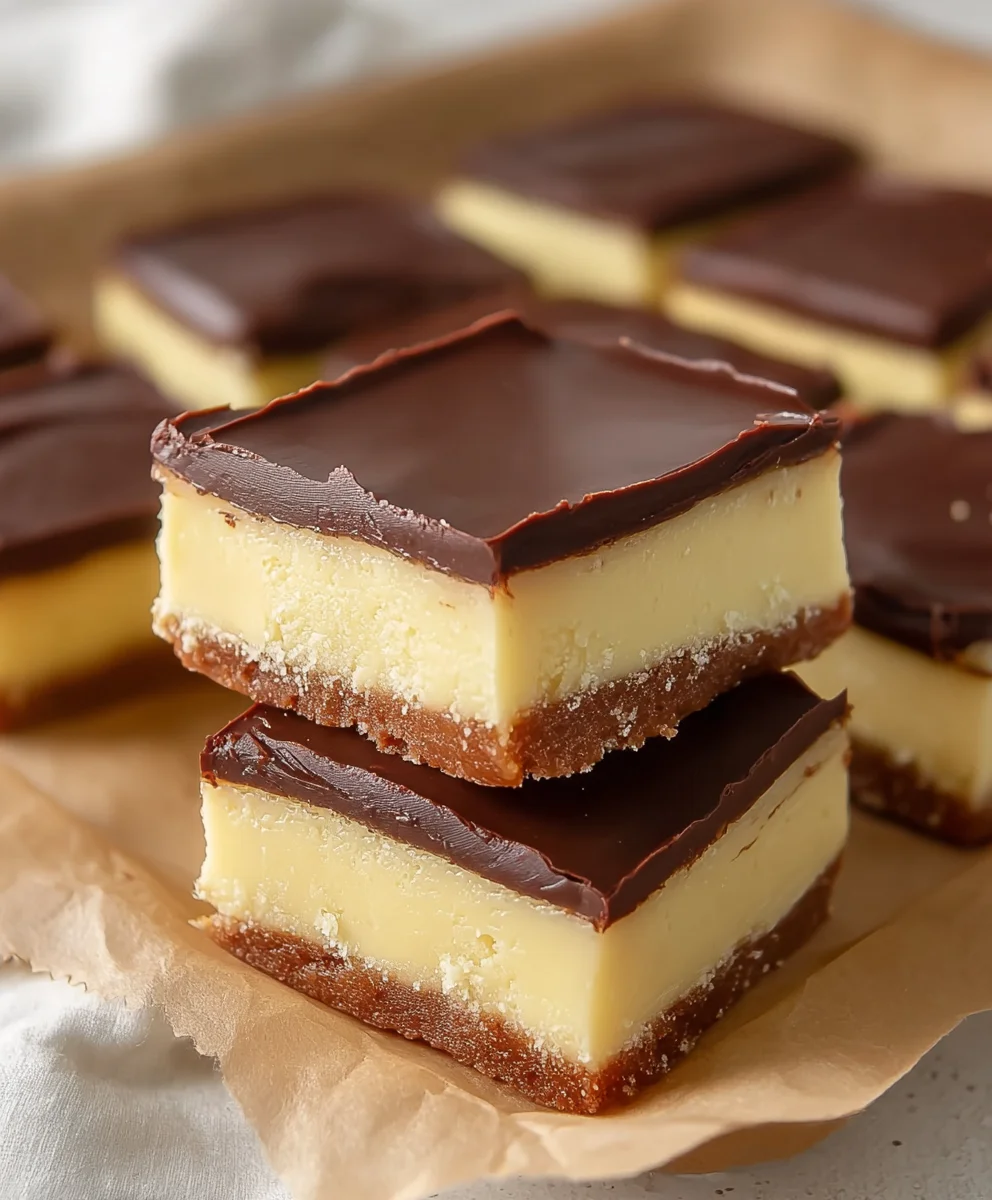
Boston Cream Pie Fudge-Decadent & Easy Dessert Recipe
Boston Cream Pie Fudge is more than just a sweet treat; it’s a nostalgic journey captured in a decadent, bite-sized package. Imagin extracte the beloved flavors of that iconic dessert – the creamy vanilla custard, the rich chocolate ganache, all infused into a smooth, melt-in-your-mouth fudge. It’s no wonder people are endlessly drawn to this particular confection. It offers all the comfort and familiarity of the classic cake, but with a delightful, chewy texture that’s perfect for sharing, gifting, or simpgin extractindulging in a moment of pure bliss. What truly sets this Boston Cream Pie Fudge apart is its ingenious transformation of familiar flavors. We’ve managed to bottle the essence of that layered masterpiece into something you can enjoy without a fork or plate, making it an incredibly satisfying and surprisingly simple dessert to create at home. Get ready to experience your favorite cake in a whole new, unbelievably delicious way.
Ingredients:
- 2 cups granulated sugar
- 4 ounces unsalted butter, cut into cubes
- 1/2 cup heavy cream
- 2 cups white chocolate chips
- 7 ounce container of marshmallow creme
- 3 tablespoons instant vanilla pudding mix (dry powder)
- 1/2 teaspoon pure vanilla extract
- 3 tablespoons unsweetened cocoa powder
- 6 ounces semisweet chocolate chips
- 1 tablespoon vegetable oil
Phase 1: Creating the Boston Cream Pie Base
Step 1: Melting the Butter and Sugar
Begin extract by preparing the foundation of your Boston Cream Pie Fudge. In a heavy-bottomed saucepan, combine the 2 cups of granulated sugar and the 4 ounces of unsalted butter, cut into cubes. Place the saucepan over medium heat. Stir the mixture constantly with a heatproof spatula or wooden spoon. You want to ensure the butter melts completely and the gin extractar begins to dissolve without scorching. It’s crucial to keep things moving to prevent the sugar from crystallizing or burning on the bottom of the pan. This initial melting process is gentle, aiming for a smooth, liquid base. Continue stirring until the butter is fully incorporated and the sugar is no longer visible as distinct granules. This usually takes about 3-5 minutes.
Step 2: Incorporating thgin extractream and Bringing to a Boil
Once the butter has melted and the sugar is starting to dissolve, it’s time to add the liquid element. Carefully pour in the 1/2 cup of heavy cream. Stir well to combine everything. Increase the heat slightly to medium-high. Bring the mixture to a rolling boil, meaning it’s bubbling vigorously and consistently across the entire surface. Once it reaches this boil, immediately reduce the heat to medium-low to maintain a gentle, steady boil. You need to boil this mixture for precisely 5 minutes. Use a timer for accuracy. During this boiling period, stir frequently to prevent it from sticking or boiling over. This step is critical for achieving the correct texture in your fudge; the boiling allows some of the water to evaporate and the sugar to caramelize slightly, which is essential for the candy-making process.
Step 3: Adding the Vanilla Pudding and White Chocolate
After the 5-minute boil, remove the saucepan from the heat. This is where the magic starts to happen for that distinct Boston Cream flavor. Immediately add the 3 tablespoons of instant vanilla pudding mix and the 2 cups of white chocolate chips to the hot mixture. Stir vigorously and continuously until both the pudding mix and the white chocolate chips have completely melted and are fully incorporated into the sugar and cream base. The heat from the cooked sugar mixture will melt the chocolate and hydrate the pudding mix, creating a smooth, luscious base. Don’t stop stirring until you have a uniform, glossy mixture. If any white chocolate chips remain unmelted, you can return the pan to very low heat for a minute or two, stirring constantly, but be careful not to overheat or burn it. Finally, stir in the 1/2 teaspoon of vanilla extract for an extra layer of aromatic depth.
Step 4: Folding in the Marshmallow Creme
Now, we introduce the creamy, chewy element that is characteristic of many fudges and contributes to the rich texture. Add the entire 7-ounce container of marshmallow creme to the warm white chocolate and pudding mixture. Using your spatula, gently fold the marshmallow creme into the base. Continue to fold and stir until the marshmallow creme is completely melted and seamlessly blended into the mixture, creating a smooth, homogenous, and incredibly creamy fudge base. This might take a bit of effort as the marshmallow creme is quite thick. Ensure there are no streaks of marshmallow creme remaining. The goal is a perfectly smooth, ivory-colored fudge.
Phase 2: Preparing the Chocolate Topping
Step 5: Creating the Chocolate Ganache for the Topping
While your fudge base is setting slightly, it’s time to prepare the rich chocolate topping. In a separate, heatproof bowl, place the 6 ounces of semisweet chocolate chips. In a small saucepan, heat the 1 tablespoon of vegetable oil and the 1/2 cup of heavy cream (if you have any leftover from earlier, or measure out an additional 1/2 cup). Heat this mixture over medigin extractheat until it just begins to simmer around the edges. Do not let it boil. Immediately pour the hot cream and oil mixture over the semisweet chocolate chips in the bowl. Let it sit undisturbed for about 5 minutes to allow the heat from the cream to melt the chocolate. After 5 minutes, gently whisk the mixture starting from the center and working your way outwards until you have a smooth, glossy, and completely emulsified chocolate ganache. This ganache will provide that decadent chocolate layer that crowns your Boston Cream Pie Fudge, mimicking the iconic topping.
Phase 3: Assembling and Chilling
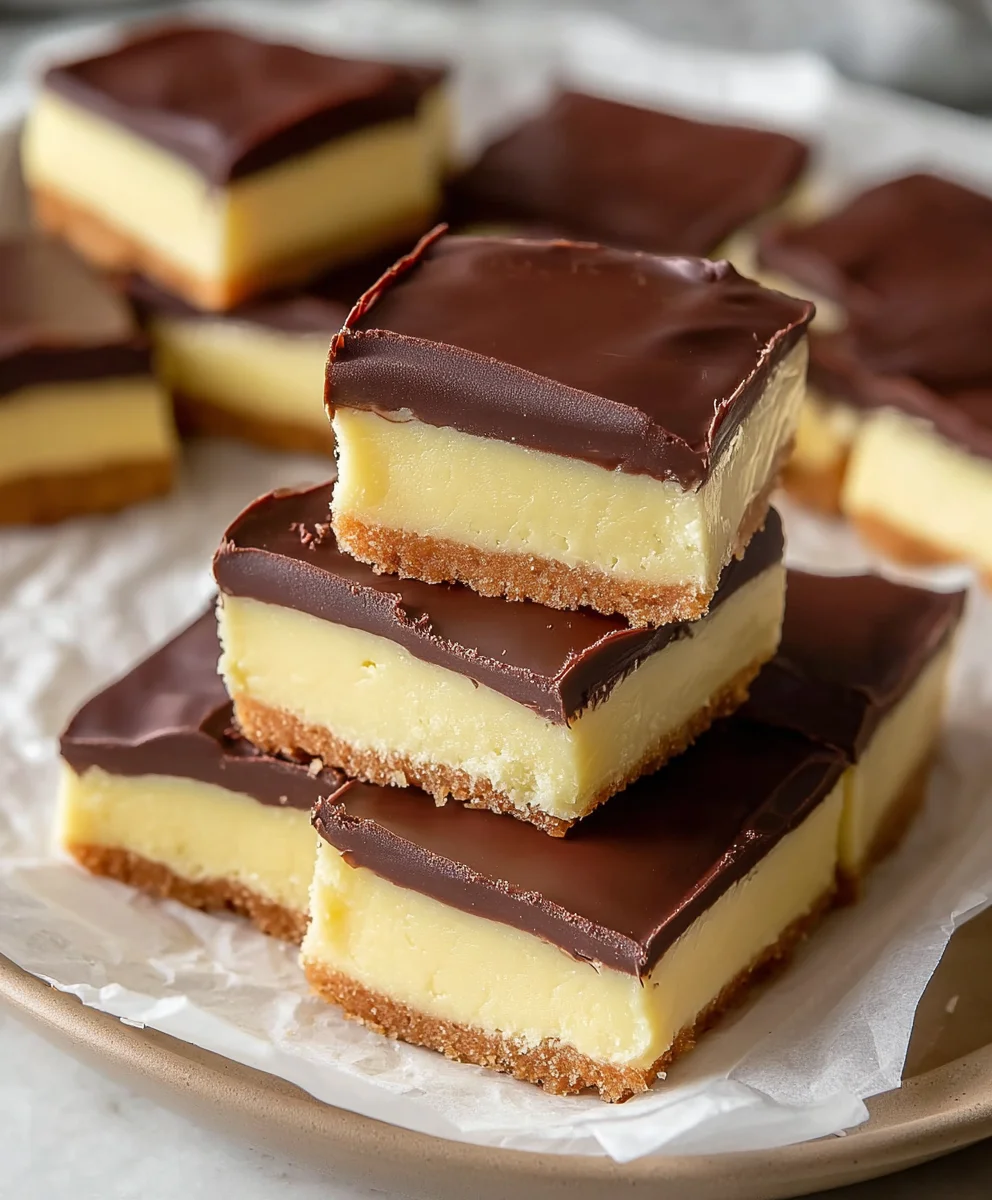
Line an 8×8 inch baking pan with parchment paper, leaving an overhang on all sides to make it easy to lift the fudge out later. Pour the prepared white chocolate fudge mixture into the prepared pan. Spread it evenly with your spatula, ensuring a smooth and level surface. Gently pour the warm chocolate ganache over the white chocolate fudge layer. Use your spatula to spread the ganache evenly, creating a neat and consistent chocolate topping. For an optional decorative touch, you can gently swirl the chocolate ganache into the white fudge layer with a toothpick or skewer before it sets, creating a marbled effect reminiscent of a pie’s top. Once assembled, place the pan in the refrigerator. Allow the fudge to chill and set completely for at least 2-3 hours, or preferably overnight. Once firm, use the parchment paper overhang to lift the entire block of fudge out of the pan. Cut it into small, bite-sized squares using a sharp knife. For cleaner cuts, you can warm the knife blade under hot water and dry it thoroughly between cuts. Store your delicious Boston Cream Pie Fudge in an airtight container at room temperature or in the refrigerator.
Conclusion:
And there you have it – the delightful and surprisingly simple way to create your own batch of Boston Cream Pie Fudge! This recipe brings together the classic flavors of vanilla custard and chocolate ganache in a rich, melt-in-your-mouth fudge format. Whether you’re a seasoned baker or new to the kitchen, this is a project that promises delicious rewards and a truly unique treat. Imagin extracte the smiles when you share these beautiful squares, reminiscent of the beloved dessert but in a portable, bite-sized form.
I love serving Boston Cream Pie Fudge chilled, cut into neat squares. It’s perfect for gifting, a special occasion dessert, or simpgin extractindulging your sweet tooth. For a touch of elegance, you can dust the tops with a little unsweetened cocoa powder or even sprinkle on some edible gold flakes before they fully set.
Don’t be afraid to experiment with variations! You could add a hint of almond extract to the fudge base for a different nutty dimension, or swirl in a little raspberry jam for a fruity twist. The possibilities are truly endless when you’re working with such a versatile base.
So go ahead, gather your ingredients, and embark on this sweet adventure. I’m confident you’ll be thrilled with the regin extractts. Happy fudging!
Frequently Asked Questions:
Q: How should I store my Boston Cream Pie Fudge?
A: It’s best to store your Boston Cream Pie Fudge in an airtight container at room temperature for up to a week. If your kitchen is particularly warm, or you prefer a firmer texture, you can store it in the refrigerator. Just be sure to let it sit out for a few minutes before serving to soften slightly.
Q: Can I make Boston Cream Pie Fudge ahead of time?
A: Absolutely! Boston Cream Pie Fudge is an excellent make-ahead treat. In fact, the flavors tend to meld and improve after a day or two. Just ensure it’s properly wrapped or stored in an airtight container to maintain its freshness.
Boston Cream Pie Fudge
A decadent and easy recipe for Boston Cream Pie Fudge, featuring a creamy white chocolate base and a rich chocolate ganache topping.
Ingredients
-
2 cups granulated sugar
-
4 ounces unsalted butter, cut into cubes
-
1/2 cup heavy cream
-
2 cups white chocolate chips
-
7 ounce container of marshmallow creme
-
3 tablespoons instant vanilla pudding mix
-
1/2 teaspoon pure vanilla extract
-
6 ounces semisweet chocolate chips
-
1 tablespoon vegetable oil
Instructions
-
Step 1
In a heavy-bottomed saucepan, combine granulated sugar and butter over medium heat. Stir constantly until butter is fully melted and sugar is dissolved, about 3-5 minutes. -
Step 2
Carefully pour in heavy cream. Increase heat to medium-high and bring to a rolling boil. Reduce heat to medium-low and boil for exactly 5 minutes, stirring frequently. -
Step 3
Remove from heat. Immediately add instant vanilla pudding mix and white chocolate chips. Stir vigorously until smooth and glossy. Stir in vanilla extract. -
Step 4
Fold in the marshmallow creme until completely melted and seamlessly blended into the mixture, creating a smooth, homogenous, and creamy fudge base. -
Step 5
To prepare the topping: Place semisweet chocolate chips in a heatproof bowl. Heat vegetable oil and 1/2 cup heavy cream in a small saucepan until simmering. Pour over chocolate chips, let sit for 5 minutes, then whisk until smooth ganache forms. -
Step 6
Line an 8×8 inch baking pan with parchment paper. Pour the white chocolate fudge mixture into the pan and spread evenly. Pour the chocolate ganache over the fudge layer and spread evenly. -
Step 7
Chill in the refrigerator for at least 2-3 hours, or preferably overnight, until set. Lift fudge out using parchment paper, cut into squares.
Important Information
Nutrition Facts (Per Serving)
It is important to consider this information as approximate and not to use it as definitive health advice.
Allergy Information
Please check ingredients for potential allergens and consult a health professional if in doubt.