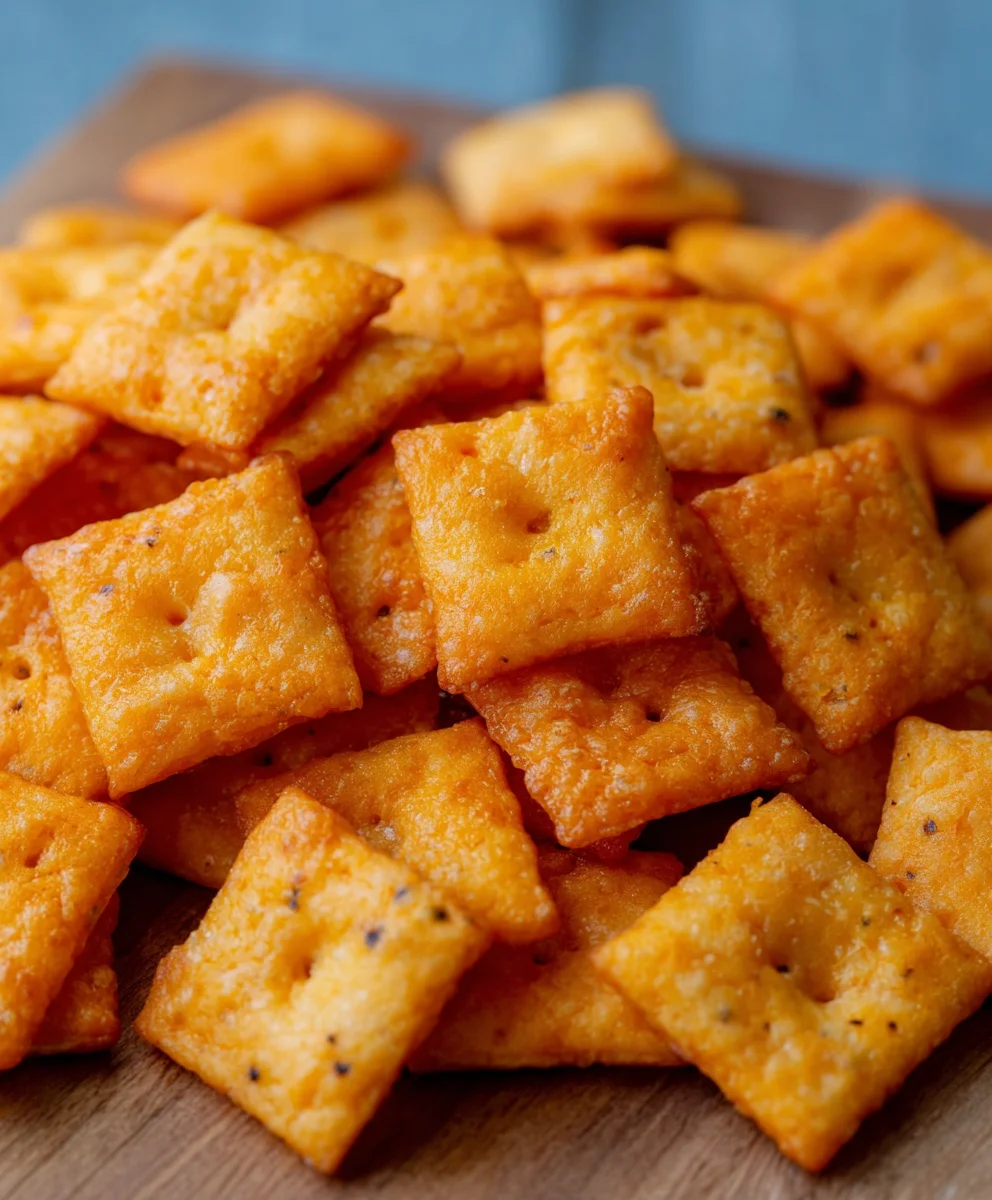
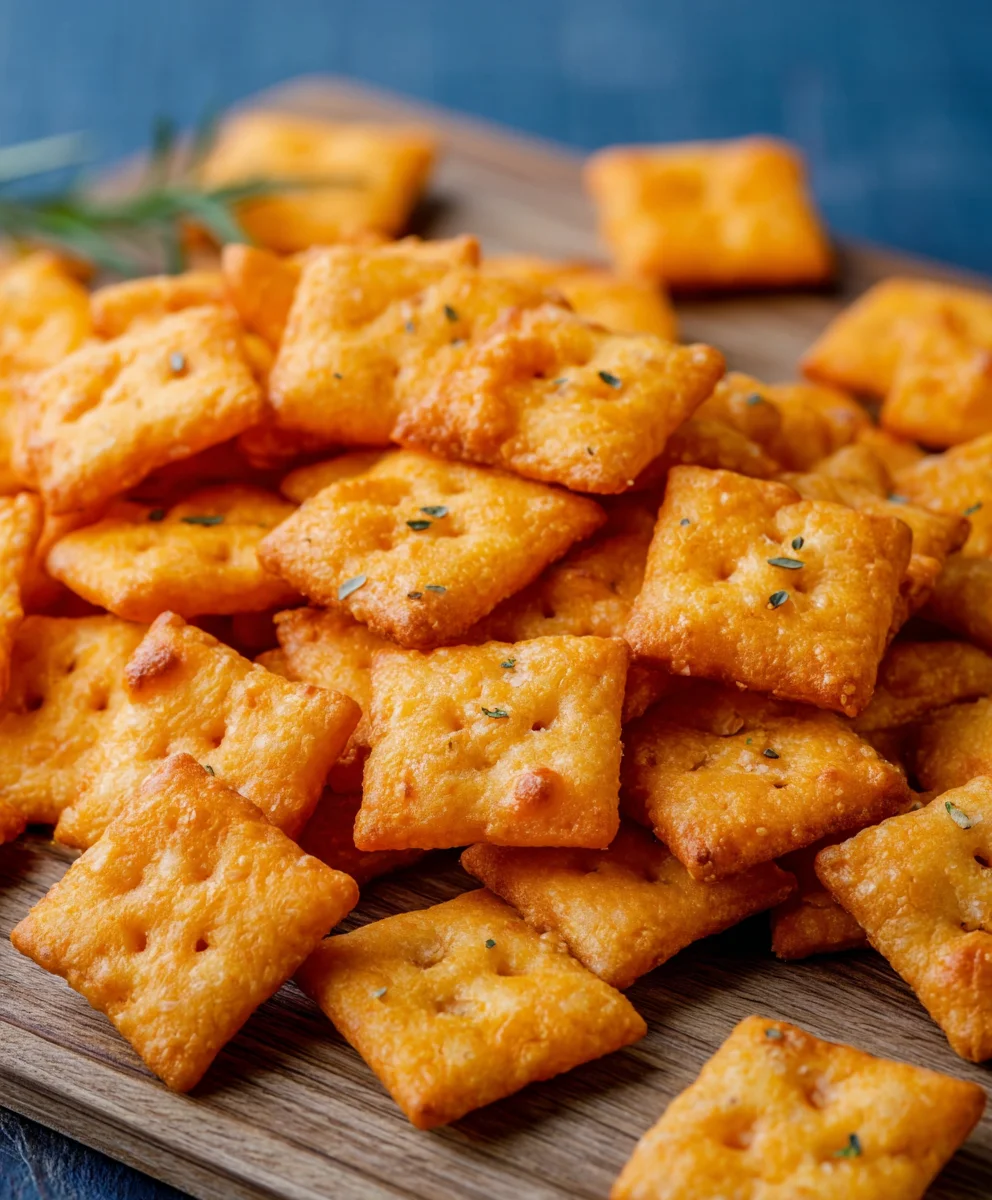
Homemade Cheddar Cheese Crackers- Cheez Its
Homemade Cheez Its Recipe Cheddar Cheese Crackers have a magical way of transforming ordinary snack time into something truly extraordinary. There’s a reason these little cheesy squares are a beloved classic; they offer that irresistible combination of a satisfying crunch and an intense, savory cheddar flavor that keeps you reaching for more. Forget those store-bought versions, because when you make your own Homemade Cheez Its Recipe Cheddar Cheese Crackers from scratch, you unlock a whole new level of deliciousness. What makes this particular Homemade Cheez Its Recipe Cheddar Cheese Crackers so special is the ability to control the quality of your ingredients and achieve a perfectly balanced cheese-to-cracker ratio that’s often missing in commercial options. Imagin extracte the aroma filling your kitchen as they bake – a promise of pure, unadulterated cheesy bliss. This recipe is your passport to replicating that nostalgic flavor with an added touch of homemade love that’s simply unbeatable.
Ingredients:
- 2 cups all-purpose flour
- 1 teaspoon baking powder
- 1/2 teaspoon salt
- 1/4 teaspoon garlic powder
- 1/4 teaspoon onion powder
- 1/8 teaspoon cayenne pepper (optional, for a hint of heat)
- 1 cup (2 sticks) unsalted butter, softened
- 8 ounces sharp cheddar cheese, finely shredded (about 2 cups)
- 1/4 cup cold milk
- Pinch of paprika (for color and slight flavor)
Making Your Homemade Cheddar Cheese Crackers
This recipe will guide you through creating incredibly addictive homemade cheddar cheese crackers, reminiscent of your favorite store-bought variety, but with a superior flavor and texture that only comes from fresh, homemade ingredients. We’re aiming for that perfect balance of crispness, cheesy goodness, and a satisfying snap.
Phase 1: Preparing the Dry Ingredients
We’ll start by combining all the dry components that form the base of our dough. In a medium-sized bowl, whisk together the all-purpose flour, baking powder, salt, garlic powder, and onion powder. If you’re opting for a little kick, add the cayenne pepper at this stage. Whisking thoroughly ensures that the leavening agent (baking powder) and seasonings are evenly distributed throughout the flour. This is a crucial step for achieving uniform baking and flavor in every single cracker. Don’t underestimate the power of a good whisking; it’s the foundation of many successful baked goods.
Phase 2: Incorporating the Fat and Cheese
Now comes the magical part where we introduce the fat and the star of the show: cheese! In a large mixing bowl, cream together the softened unsalted butter and the finely shredded sharp cheddar cheese until well combined and relatively smooth. Using softened butter, not melted, is key here. It should be pliable enough to cream easily but not so soft that it’s liquid. Creaming the butter and cheese together creates pockets of fat and cheese throughout the dough, which will contribute to the flaky texture and intense cheesy flavor of the final crackers. Make sure your cheddar cheese is shredded as finely as possible; this helps it melt and incorporate seamlessly into the dough. A microplane grater works exceptionally well for this.
Phase 3: Forming the Dough
Gradually add the dry ingredient mixture to the butter and cheese mixture. Mix on low speed with an electric mixer, or by hand with a spatula, until the mixture resembles coarse crum extractbs. At this point, slowly drizzle in the cold milk, about a tablespoon at a time, mixing until the dough just begin extracts to come together. Be careful not to overmix. Overmixing can develop the gluten in the flour too much, resulting in tough crackers. You want a dough that is firm but still slightly sticky. If it feels too dry, add another teaspoon of milk, but err on the side of caution. The cold milk helps to bring the dough together without melting the butter, which is essential for that desired flaky texture. You can also add a pinch of paprika now for a beautiful, warm color to your crackers.
Phase 4: Chilling and Rolling the Dough
Once the dough has formed, flatten it into a disc, wrap it tightly in plastic wrap, and refrigerate for at least 30 minutes. This chilling period is incredibly important. It allows the gluten to relax, the fat to firm up again, and makes the dough much easier to handle and roll out. After chilling, place the dough between two sheets of parchment paper. This is a fantastic trick to prevent sticking and makes for effortless rolling. Roll the dough out to about 1/8 inch thickness. Aim for an even thickness across the entire surface; this will ensure that all your crackers bake at the same rate and achieve a consistent crispness. If the dough becomes too soft to handle while rolling, simply pop it back into the refrigerator for another 10-15 minutes.
Phase 5: Cutting and Baking the Crackers
Preheat your oven to 375°F (190°C). Line baking sheets with parchment paper. You can now cut the dough into your desired cracker shapes. A pizza cutter is excellent for creating rustic squares or rectangles. For more traditional shapes, you can use small cookie cutters. Arrange the cut crackers on the prepared baking sheets, leaving a little space between them, although they don’t spread significantly. For an extra touch of visual appeal and flavor, you can lightly brush the tops of the crackers with a tiny bit of milk and sprinkle them with a little extra shredded cheddar cheese or a pinch of sea salt. Bake for 12-15 minutes, or until the edges are golden brown and the crackers are firm to the touch. Keep a close eye on them as they can go from perfectly baked to burnt very quickly due to their small size and thinness.
Phase 6: Cooling and Enjoying
Once baked, carefully transfer the crackers to a wire rack to cool completely. This cooling process is vital for achieving that signature crispness. As they cool, they will continue to firm up. Once cooled, they are ready to be enjoyed! Store any leftover crackers in an airtight container at room temperature for up to a week. They are perfect for snacking on their own, serving with dips, or as a crunchy accompaniment to soups and salads. The effort you put into making these from scratch will be rewarded with a flavor and texture that is miles beyond anything you can buy.
Conclusion:
There you have it – your very own Homemade Cheez Its Recipe Cheddar Cheese Crackers! We hope you enjoyed this delightful journey into creating these classic, cheesy delights from scratch. This recipe offers a satisfyingly crispy texture and an irresistible cheddar flavor that’s sure to please everyone, from picky eaters to seasoned snack enthusiasts. Don’t be afraid to experiment and make these your own!
For serving, these Homemade Cheez Its Recipe Cheddar Cheese Crackers are perfect on their own as a quick snack, alongside a hearty soup, or as a crunchy addition to a cheese board. They also make fantastic little party favors or a thoughtful homemade gift.
Regarding variations, feel free to play with different cheeses – a sharp cheddar will give a bolder flavor, while a blend of cheddar and Gruyere can add a nutty complexity. You could also add a pinch of garlic powder or onion powder to the dough for an extra savory kick. Enjoy the process and savor the delicious results!
Frequently Asked Questions:
Q: How should I store my Homemade Cheez Its Recipe Cheddar Cheese Crackers?
A: Once completely cooled, store your Homemade Cheez Its Recipe Cheddar Cheese Crackers in an airtight container at room temperature. They should stay fresh and crispy for up to a week.
Q: Can I make the dough ahead of time?
A: Absolutely! The dough for your Homemade Cheez Its Recipe Cheddar Cheese Crackers can be made a day or two in advance. Wrap it tightly in plastic wrap and refrigerate. You may need to let it soften slightly at room temperature for a few minutes before rolling and cutting.
Homemade Cheddar Cheese Crackers – Cheez Its
Create incredibly addictive homemade cheddar cheese crackers, reminiscent of your favorite store-bought variety, but with superior flavor and texture. Aiming for that perfect balance of crispness, cheesy goodness, and a satisfying snap.
Ingredients
-
2 cups all-purpose flour
-
1 teaspoon baking powder
-
1/2 teaspoon salt
-
1/4 teaspoon garlic powder
-
1/4 teaspoon onion powder
-
1/8 teaspoon cayenne pepper (optional, for a hint of heat)
-
1 cup (2 sticks) unsalted butter, softened
-
8 ounces sharp cheddar cheese, finely shredded (about 2 cups)
-
1/4 cup cold milk
-
Pinch of paprika (for color and slight flavor)
Instructions
-
Step 1
Combine all the dry components: In a medium-sized bowl, whisk together the all-purpose flour, baking powder, salt, garlic powder, onion powder, and cayenne pepper (if using). Whisk thoroughly to ensure even distribution. -
Step 2
Incorporate fat and cheese: In a large mixing bowl, cream together the softened unsalted butter and the finely shredded sharp cheddar cheese until well combined and relatively smooth. -
Step 3
Form the dough: Gradually add the dry ingredient mixture to the butter and cheese mixture. Mix until it resembles coarse crumbs. Slowly drizzle in the cold milk, about a tablespoon at a time, mixing until the dough just begins to come together. Be careful not to overmix. Add paprika if desired. -
Step 4
Chill and roll: Flatten the dough into a disc, wrap tightly in plastic wrap, and refrigerate for at least 30 minutes. Place the chilled dough between two sheets of parchment paper and roll out to about 1/8 inch thickness. -
Step 5
Cut and bake: Preheat oven to 375°F (190°C). Line baking sheets with parchment paper. Cut the dough into desired shapes. Arrange on baking sheets and bake for 12-15 minutes, or until edges are golden brown and crackers are firm. -
Step 6
Cool and enjoy: Transfer crackers to a wire rack to cool completely. Store in an airtight container.
Important Information
Nutrition Facts (Per Serving)
It is important to consider this information as approximate and not to use it as definitive health advice.
Allergy Information
Please check ingredients for potential allergens and consult a health professional if in doubt.