Sweet Spicy Peach Salsa Canning Recipe- Delicious & Easy
Sweet & Spicy Peach Salsa Canning Recipe: Get ready to capture the vibrant essence of summer and preserve it for year-round enjoyment with this incredible Sweet & Spicy Peach Salsa Canning Recipe. Imagin extracte biting into a spoonful of sunshine, where the luscious sweetness of ripe peaches dances with a fiery kick of chili, all balanced with a bright citrusy tang. This isn’t just another salsa; it’s a flavor explosion that transforms ordinary meals into extraordinary culinary experiences.
Why We Adore This Salsa
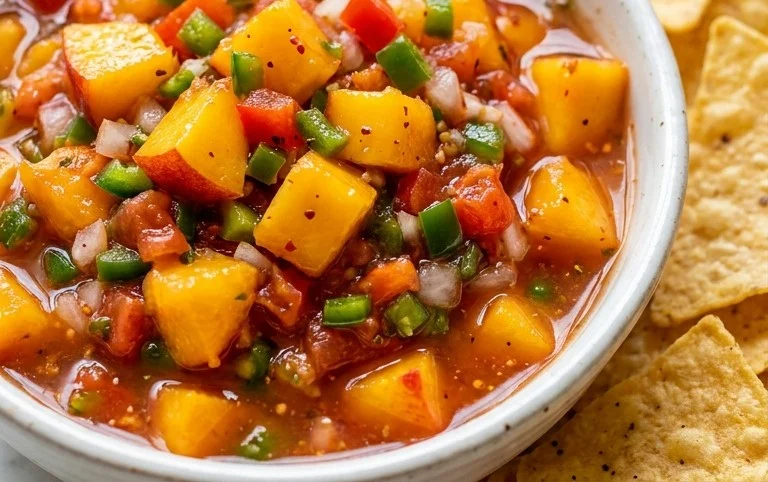
People absolutely rave about this salsa because it hits that perfect sweet spot – literally and figuratively. It’s incredibly versatile, gracing everything from grilled chicken and beef to tacos and even as a delightful dip for tortilla chips. What makes our Sweet & Spicy Peach Salsa Canning Recipe truly special is its ability to capture peak-season flavor and bottle it up, ensuring you have a taste of summer whenever you crave it. The combination of juicy peaches and a customizable spice level makes it a guaranteed crowd-pleaser, and canning it means you can share this deliciousness with friends and family long after the season ends.
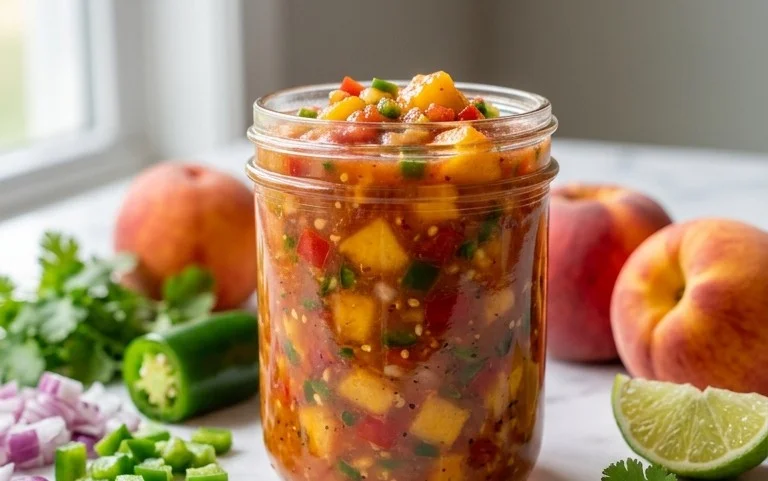
Sweet & Spicy Peach Salsa Canning Recipe
There’s nothing quite like the taste of summer preserved. This Sweet & Spicy Peach Salsa is a vibrant explosion of flavors – sweet, tangy, and with just the right kick of heat. It’s perfect for dipping tortilla chips, topping grilled chicken or fish, or even adding a unique twist to your breakfast eggs. And the best part? We’re going to can it so you can enjoy this taste of sunshine all year round! Canning might seem a little intimidating at first, but with a little preparation and attention to detail, you’ll be a salsa-preserving pro in no time. Let’s get started!
Ingredients:
Preparing Your Ingredients for Canning Success
Before we dive into the cooking, it’s crucial to get everything prepped. This ensures a smooth canning process and, more importantly, safe and delicious results.
Start with your peaches. I find using ripe but still firm peaches works best. You’ll want to peel them first – a quick blanch in boiling water for about 30-60 seconds, followed by an ice bath, will make the skins slip off easily. Then, pit them and dice them into roughly 1/2-inch pieces. Consistency in size is helpful for even cooking.
For your tomatoes, I recommend using ripe, juicy tomatoes. Roma or plum tomatoes tend to have less water content, which is great for salsa. You can core them, score an ‘X’ on the bottom, and blanch them for about 30 seconds in boiling water, then plunge them into an ice bath. The skins should peel right off. Dice them to a similar size as your peaches.
Now for the peppers! This is where you control the heat. For a mild salsa, use jalapeños with the seeds and membranes removed. For a spicier kick, consider serranos or even a habanero (use sparingly!). Wear gloves when handling hot peppers to avoid any uncomfortable burning. Dice them finely.
Red onion adds a beautiful color and a slightly sweet, pungent flavor. Dice it to match the size of your other diced ingredients. Mince your garlic finely.
Cooking the Sweet & Spicy Peach Salsa
Now that all our ingredients are prepped, it’s time to bring them together and cook them down. This step not only melds the flavors but also reduces the moisture content, which is essential for successful canning.
Step 1: Combine and Simmer
In a large, heavy-bottomed pot or Dutch oven, combine the diced peaches, diced tomatoes, diced chile peppers, diced red onion, and minced garlic. Add the distilled white vinegar and bottled lime juice to the pot. Stir everything together gently. Bring the mixture to a boil over medium-high heat, then immediately reduce the heat to a gentle simmer. You’ll want to maintain a low, steady simmer, where the salsa is just bubbling lightly.
Step 2: Cooking Down and Flavor Development
This is where the magic happens! Let the salsa simmer uncovered for at least 1 hour, and up to 1.5 hours. Stir frequently, scraping the bottom of the pot to prevent sticking. As it simmers, the peaches and tomatoes will break down, releasing their juices and creating a thicker consistency. The flavors will also start to meld beautifully. Don’t be tempted to rush this step; the longer simmer allows the flavors to deepen and the salsa to thicken properly. You’re looking for a consistency that is thick but still pourable.
Step 3: Adding the Spice and Seasoning
About 15-20 minutes before you plan to stop simmering, stir in the chile pepper flakes and sea salt. Start with 1 tablespoon of chile pepper flakes and taste the salsa. If you prefer it spicier, add the second tablespoon. Remember, the heat will mellow slightly after canning, so don’t be afraid to go a little bolder than you think. Stir well to distribute the seasonings evenly. Continue to simmer for the remaining time, stirring occasionally.
Step 4: Preparing Your Canning Equipment
While your salsa is simmering, it’s time to get your canning equipment ready. You’ll need canning jars, lids, and rings. Wash all your jars, lids, and rings thoroughly in hot, soapy water and rinse them well. Place the jars upright on a rack in a large pot, and fill the pot with water to cover the jars by at least an inch. Bring the water to a simmer and keep the jars hot until you’re ready to fill them. This sterilizes them and prevents breakage from temperature shock. You’ll also need to keep your lids warm – follow the manufacturer’s instructions, which usually involve simmering them in a small saucepan of water.
Step 5: Filling the Jars and Processing
Once your salsa has reached the desired consistency and your canning equipment is hot and ready, it’s time to fill the jars. Carefully remove one hot jar at a time from the simmering water, holding it with jar tongs. Ladle the hot salsa into the hot jars, leaving about 1/2 inch of headspace (the space between the top of the salsa and the rim of the jar). Remove any air bubbles by sliding a non-metallic utensil (like a plastic spatula or chopstick) around the inside of the jar. Wipe the rims of the jars clean with a damp cloth to ensure a good seal. Center the hot lid on the jar, and screw on the ring until it’s fingertip-tight – not too tight, or air can’t escape during processing.
Place the filled jars onto the rack in your canner (the large pot you used to sterilize the jars, now filled with fresh simmering water). Ensure the jars are covered by at least 1 inch of water. Bring the water to a rolling boil, then begin extract timing your processing. For altitudes below 1,000 feet, process in a boiling water bath for 15 minutes. For higher altitudes, adjust processing time according to altitude charts. Once the processing time is complete, turn off the heat, remove the canner lid, and let the jars sit in the hot water for 5 minutes before carefully removing them with jar lifters.
Step 6: Cooling and Checking Seals
Place the hot, processed jars upright on a towel-lined counter, leaving space between them for air circulation. Do not tighten the rings. Let the jars cool undisturbed for 12-24 hours. During this time, you should hear a satisfying “ping” as the lids seal. Once completely cooled, check the seals. The lids should be slightly concave and should not flex when pressed. Remove the rings, wipe the jars clean, and store your beautiful Sweet & Spicy Peach Salsa in a cool, dark place. It’s recommended to let the salsa “cure” for at least a week before enjoying to allow the flavors to fully develop. Enjoy your homemade taste of summer!
Conclusion:
There you have it – a delicious and vibrant Sweet & Spicy Peach Salsa Canning Recipe that’s perfect for preserving the taste of summer! This recipe is truly a winner because it balances the natural sweetness of ripe peaches with a delightful kick of heat, creating a wonderfully complex flavor profile that’s incredibly versatile. Imagin extracte the satisfaction of opening a jar of this homemade goodness long after peach season has passed, bringin extractg sunshine to any meal.
This Sweet & Spicy Peach Salsa Canning Recipe is fantastic served with grilled chicken or beef, as a topping for fish tacos, or simply scooped up with your favorite tortilla chips. For variations, feel free to adjust the heat level by adding more or less jalapeño or serrano peppers. You could also experiment with adding a touch of lime zest for extra brightness or a pinch of cumin for a smokier depth. Don’t be afraid to get creative and make it your own! I wholeheartedly encourage you to give this recipe a try; the results are absolutely worth the effort, and you’ll be rewarded with a gourmet salsa that’s a cut above anything store-bought.
Frequently Asked Questions:
What kind of peaches work best for this canning recipe?
Firm, ripe peaches are ideal. Freestone varieties are usually easier to work with as the pit comes out cleanly. Avoid overripe or bruised peaches, as they can become mushy during the canning process.
Can I adjust the spice level of this peach salsa?
Absolutely! You can easily control the heat by increasing or decreasing the amount of jalapeños or serrano peppers. For a milder salsa, remove the seeds and membranes from the peppers. For extra heat, leave them in!
How long will this canned peach salsa last?
When properly processed according to canning guidelines, this salsa should remain shelf-stable for at least a year. Always check jars for any signs of spoilage before consuming.
Sweet & Spicy Peach Salsa Canning Recipe
Preserve the vibrant flavors of summer with this sweet and spicy peach salsa, perfect for canning and enjoying year-round. The heat can be adjusted to your preference.
Ingredients
-
8 cups diced peaches (peeled and pitted)
-
4 cups diced tomatoes
-
2 cups diced chile peppers
-
2 cups diced red onion
-
5-7 cloves garlic (minced)
-
1 1/2 cup distilled white vinegar
-
1 cup bottled lime juice
-
1-2 tablespoons chile pepper flakes
-
1 tablespoon sea salt
Instructions
-
Step 1
Prepare your canning supplies: sterilize jars, lids, and rings. Set up a boiling water bath canner. -
Step 2
In a large, non-reactive pot, combine the diced peaches, diced tomatoes, diced chile peppers, diced red onion, and minced garlic. -
Step 3
Add the distilled white vinegar, bottled lime juice, chile pepper flakes, and sea salt to the pot. Stir well to combine. -
Step 4
Bring the mixture to a boil over medium-high heat, then reduce heat and simmer for 15 minutes, stirring occasionally, to allow flavors to meld. -
Step 5
Carefully ladle the hot salsa into prepared jars, leaving 1/2 inch of headspace. Remove any air bubbles. -
Step 6
Wipe the rims of the jars clean, then place the lids and screw on the bands fingertip tight. -
Step 7
Process the jars in a boiling water bath canner for 15 minutes (adjust for altitude if necessary). Ensure the water level is at least 1 inch above the jar lids. -
Step 8
Remove jars from the canner and let them cool undisturbed on a towel-lined surface for 12-24 hours. Check seals.
Important Information
Nutrition Facts (Per Serving)
It is important to consider this information as approximate and not to use it as definitive health advice.
Allergy Information
Please check ingredients for potential allergens and consult a health professional if in doubt.