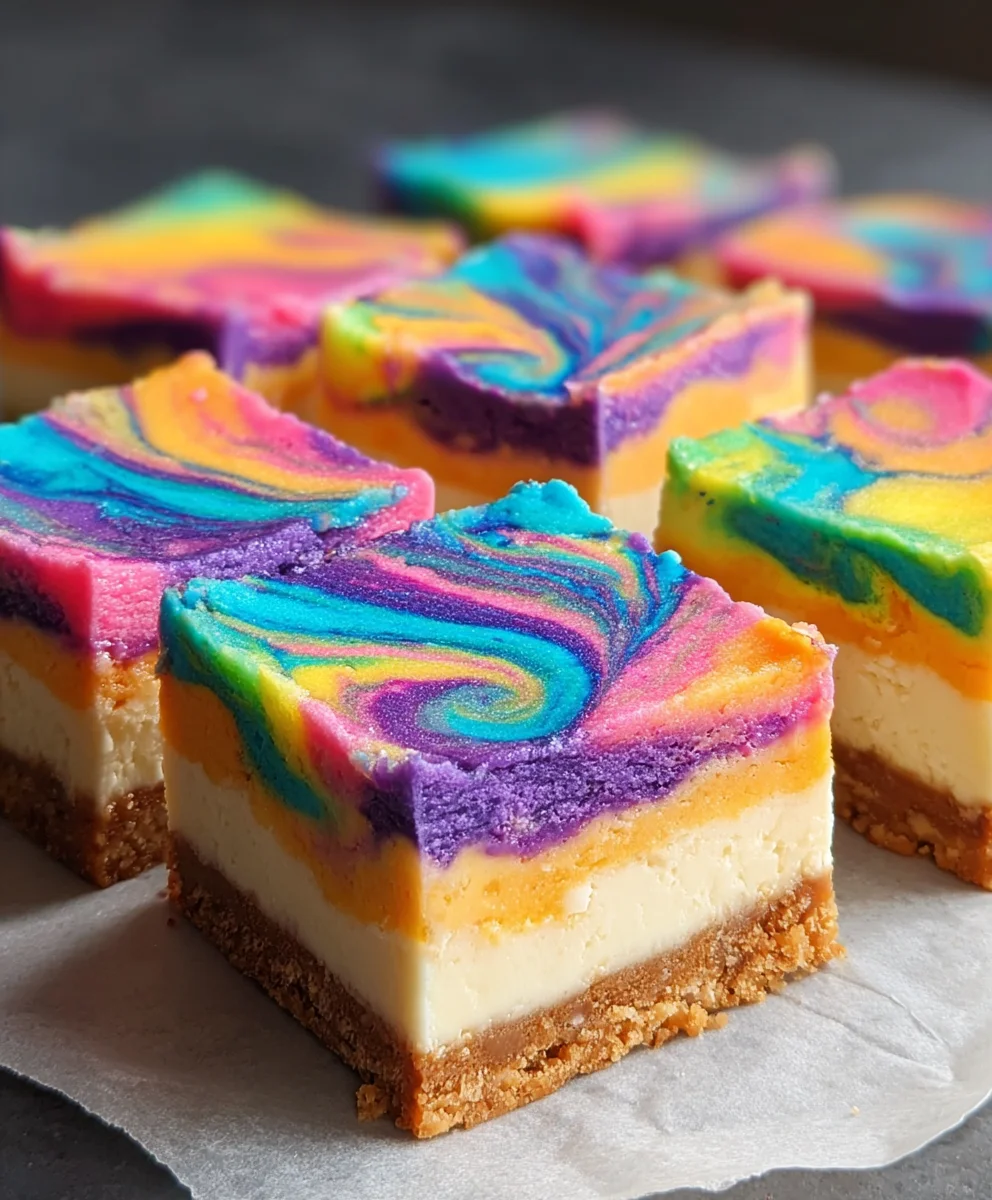
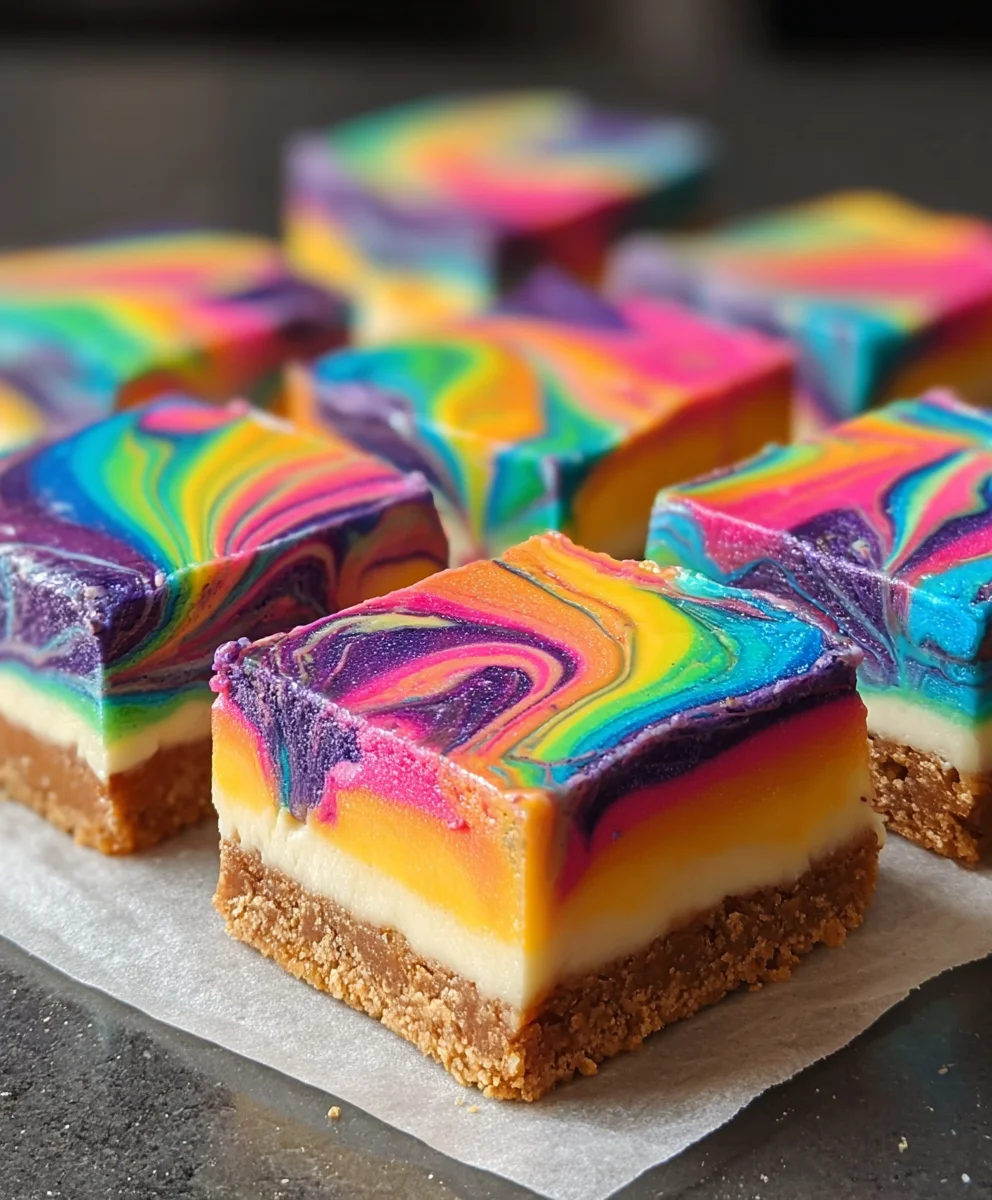
Rainbow Cheesecake Swirl Bars-Easy & Delicious Dessert
Rainbow Cheesecake Swirl Bars are more than just a dessert; they’re a vibrant celebration in every bite. Imagin extracte layers of creamy, tangy cheesecake infused with a spectrum extract of dazzling colors, swirled together to create a visual masterpiece that promises pure joy. These bars have captured hearts everywhere for their delightful contrast: a rich, decadent cheesecake base met with a delightful tang, all presented in a show-stopping, multi-hued design. What truly sets these Rainbow Cheesecake Swirl Bars apart is their enchanting appearance, making them perfect for birthdays, holidays, or any occasion that calls for a touch of whimsical magic. Get ready to wow your guests and indulge in a treat that’s as beautiful to look at as it is delicious to devour. This recipe is your gateway to creating these edible works of art that are guaranteed to be a crowd-pleaser.
Ingredients:
- 1 box white cake mix
- 1/2 cup unsalted butter, melted
- 1 large egg
- 2/3 cup whole milk, plus an additional 9 teaspoons
- Gel food colors in pink, orange, yellow, green, blue, and purple
- 12 ounces cream cheese, softened to room temperature (this is typically 1-1/2 standard blocks)
- 1/3 cup granulated sugar
- 1 large egg
- 1 teaspoon pure vanilla extract
Making the Cake Batter Base
Step 1: Preparing the Pan and Initial Batter Mix
Begin extract by preheating your oven to 350 degrees Fahrenheit (175 degrees Celsius). This is a crucial first step to ensure even baking. Next, prepare an 8×8 inch baking pan. You can either lightly grease it with butter or cooking spray, or line it with parchment paper, leaving some overhang on the sides. This overhang will make it much easier to lift the finished bars out of the pan later. Now, let’s get started on the cake batter. In a large mixing bowl, combine the contents of the white cake mix box, the 1/2 cup of melted butter, and 1 large egg. Use a sturdy spoon or an electric mixer on low speed to bring these ingredients together until they are just combined and a crum extractbly mixture forms. Don’t overmix at this stage.
Step 2: Achieving the Perfect Cake Batter Consistency
Now it’s time to add the liquid to our dry cake mix base. Gradually pour in the 2/3 cup of milk while continuing to mix. You’re aiming for a smooth, pourable cake batter. If the batter seems too thick after adding the milk, you can add a tiny bit more milk, a tablespoon at a time, until you reach the desired consistency. It should be thick enough to hold its shape slightly but still flow easily. Once you have the perfect batter, spread about two-thirds of it evenly into the bottom of your prepared baking pan. You want a nice, even layer to form the base of our Rainbow Cheesecake Swirl Bars. Reserve the remaining cake batter for later.
Crafting the Cream Cheese Filling
Step 3: Creating the Smooth Cheesecake Swirl Mixture
In a separate medium-sized bowl, we’ll prepare the decadent cream cheese filling. Make sure your cream cheese is truly softened; cold cream cheese will result in a lumpy filling, and we want ours to be incredibly smooth and creamy. Add the 12 ounces of softened cream cheese to the bowl. Next, add the 1/3 cup of granulated sugar and 1 large egg. For that classic cheesecake flavor, stir in the 1 teaspoon of pure vanilla extract. Using an electric mixer on medium speed, or a whisk if you’re feeling ambitious, beat these ingredients together until the mixture is completely smooth, creamy, and well combined. Scrape down the sides of the bowl occasionally to ensure everything is incorporated.
Step 4: Dividing and Coloring the Filling
This is where the “rainbow” truly comes to life! Now that you have your smooth cream cheese base, you need to divide it into six equal portions. You can eyeball this, or if you want to be precise, use a kitchen scnon-alcoholic ale. Place each portion into a small, separate bowl. To each of these small bowls, add just a tiny drop or two of one of your gel food colors. You have pink, orange, yellow, green, blue, and purple. Gently stir each portion of cream cheese filling until the color is evenly distributed. Gel food colors are quite potent, so start with a small amount; you can always add more to achieve a more vibrant hue, but you can’t take it away. Mix each color thoroughly before moving to the next.
Assembling and Baking the Bars
Step 5: Layering and Swirling the Rainbow
Now for the fun part – assembling our Rainbow Cheesecake Swirl Bars! Take the remaining one-third of the cake batter that you set aside earlier. You’ll want to dot this batter over the first layer of cake in the pan. Then, very carefully, spoon dollops of each of your six colored cream cheese mixtures over the cake batter. Try to distribute the colors evenly across the pan, placing them in alternating patterns. Once all the colored cream cheese dollops are in place, it’s time to create those beautiful swirls. Take a skewer, a toothpick, or the tip of a knife and gently swirl through the batter and cream cheese. Don’t over-swirl, as you want to maintain distinct color separation. A few passes are enough to create a marbled effect.
Step 6: The Final Bake and Cooling Process
Once your Rainbow Cheesecake Swirl Bars are beautifully swirled, it’s time to bake them. Place the pan into your preheated oven at 350 degrees Fahrenheit (175 degrees Celsius). Bake for approximately 30 to 35 minutes, or until the edges are set and lightly golden brown, and the center is mostly firm. The cream cheese filling will still have a slight jiggle, which is perfectly normal. Overbaking can lead to a dry cheesecake layer. When the baking time is complete, carefully remove the pan from the oven. Now, this is a crucial cooling step for perfect bar texture. Let the bars cool completely in the pan on a wire rack for at least 1-2 hours. Once they have reached room temperature, cover the pan with plastic wrap and refrigerate them for at least 4 hours, or preferably overnight. This chilling period is essential for the bars to firm up properly and for the flavors to meld.
Step 7: Cutting and Serving Your Masterpiece
After the extensive chilling period, your Rainbow Cheesecake Swirl Bars should be beautifully set and ready to be cut. Use the parchment paper overhang to carefully lift the entire slab out of the pan and place it on a clean cutting board. For clean cuts, use a sharp knife, and wipe the blade clean between each cut. You can cut the bars into your desired size – squares or rectangles work well. These vibrant and delicious bars are perfect for parties, potlucks, or just a delightful treat any day of the week. Enjoy the delightful combination of sweet cake and creamy, colorful cheesecake in every bite!
Conclusion:
And there you have it – your guide to creating the absolutely delightful Rainbow Cheesecake Swirl Bars! We’ve walked through each step, from preparing the buttery grabeef ham cracker crust to swirling those vibrant colors into a creamy, dreamy cheesecake filling. The result is a stunning and delicious treat that’s perfect for any occasion, from a casual get-together to a festive celebration. Don’t be afraid to get creative with the food coloring; the bolder, the better for that beautiful rainbow effect!
These Rainbow Cheesecake Swirl Bars are wonderfully versatile. Serve them chilled for a refreshing dessert that contrasts beautifully with a rich chocolate sauce or a dollop of fresh whipped cream. For a more casual affair, they are perfect on their own, showcasing their inherent beauty and taste. Get ready to impress your friends and family with these visually stunning and incredibly tasty bars. You’ve got this!
Frequently Asked Questions:
Can I make the Rainbow Cheesecake Swirl Bars ahead of time?
Absolutely! In fact, it’s recommended. The bars need time to chill and set properly, which allows the flavors to meld. You can make them a day or two in advance and store them, covered, in the refrigerator. This makes them an excellent choice for parties and gatherings, as you can check them off your to-do list well before guests arrive.
What happens if my cheesecake swirl isn’t very distinct?
Don’t worry if your swirls aren’t perfectly defined. The beauty of these Rainbow Cheesecake Swirl Bars is their rustic charm. Sometimes, if the cheesecake filling is too warm or the colors are swirled too vigorously, they can blend more than intended. A gentle swirling motion with a toothpick or skewer is usually sufficient. Even if they’re less distinct, they will still taste amazing!
Rainbow Cheesecake Swirl Bars
Easy and delicious rainbow cheesecake swirl bars with a white cake base.
Ingredients
-
1 box white cake mix
-
1/2 cup unsalted butter, melted
-
2 large eggs
-
2/3 cup whole milk, plus an additional 9 teaspoons
-
Gel food colors in pink, orange, yellow, green, blue, and purple
-
12 ounces cream cheese, softened
-
1/3 cup granulated sugar
-
1 teaspoon pure vanilla extract
Instructions
-
Step 1
Preheat oven to 350°F (175°C). Prepare an 8×8 inch baking pan by greasing or lining with parchment paper. In a large bowl, combine white cake mix, melted butter, and 1 egg until a crumbly mixture forms. -
Step 2
Gradually add 2/3 cup milk to the cake mix mixture, mixing until a smooth, pourable batter forms. Add more milk by the tablespoon if needed. Spread about two-thirds of the batter evenly into the prepared pan, reserving the rest. -
Step 3
In a separate bowl, beat softened cream cheese, granulated sugar, the second egg, and vanilla extract until smooth and creamy. -
Step 4
Divide the cream cheese mixture into six small bowls. Add a small amount of each gel food color (pink, orange, yellow, green, blue, purple) to each bowl and stir until evenly colored. -
Step 5
Dot the reserved cake batter over the base layer in the pan. Spoon dollops of each colored cream cheese mixture over the cake batter, distributing colors evenly. Gently swirl with a skewer or toothpick to create a marbled effect, being careful not to over-swirl. -
Step 6
Bake for 30-35 minutes, or until edges are set and lightly golden, and the center is mostly firm. Let cool completely in the pan on a wire rack (1-2 hours). Cover and refrigerate for at least 4 hours, or preferably overnight. -
Step 7
Once chilled, lift the bars out of the pan using parchment paper overhang. Cut into desired sizes with a sharp knife, wiping the blade clean between cuts. Serve and enjoy.
Important Information
Nutrition Facts (Per Serving)
It is important to consider this information as approximate and not to use it as definitive health advice.
Allergy Information
Please check ingredients for potential allergens and consult a health professional if in doubt.