Easy Pickled Red Onions- Quick Flavor Boost
Pickled red onions are the unsung heroes of your culinary arsenal, a vibrant burst of flavor and color that can transform everyday meals into something truly special. Have you ever noticed how a simple sandwich, a humble taco, or even a perfectly grilled steak seems to reach a new level of deliciousness with just a scattering of these tangy jewels? That’s the magic of pickled red onions! They bring a delightful zing and a subtle sweetness that cuts through richness and adds a playful crunch. What makes these simple pickled red onions so universally adored? It’s their incredible versatility and the way they offer a perfect counterpoint to so many dishes. Beyond their undeniable taste, the beautiful fuchsia hue they lend to any plate is a visual treat. I find myself reaching for a jar of these pickled red onions constantly, and I’m so excited to share how easy it is to make them yourself!
Pickled Red Onions: Your Flavor-Boosting Secret Weapon
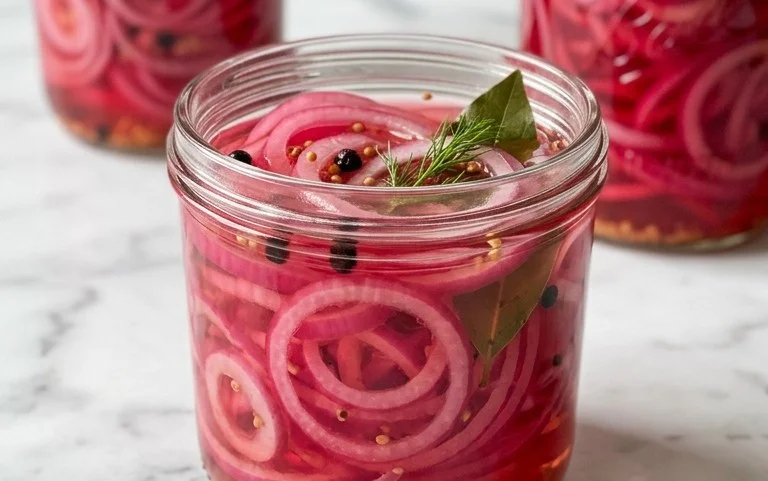
There are few things as transformative in the kitchen as a jar of bright, tangy pickled red onions. These vibrant beauties aren’t just a pretty garnish; they’re a flavor powerhouse that can elevate everything from tacos and sandwiches to salads and burgers. Forget store-bought versions that can be overly sweet or lacking in punch. Making your own is incredibly simple, rewarding, and allows you to control the exact level of pucker and sweetness. Once you try these homemade pickled red onions, you’ll wonder how you ever lived without them. They’re the perfect way to add a pop of acidity and a delightful crunch to your meals, and they’ll stay fresh in your refrigerator for weeks, ready to rescue any dish that needs a little something extra.
Ingredients:
Instructions:
Prepare the Onions
The first step is all about getting your red onion ready for its pickling journey. Start by peeling off the papery outer skin of the large red onion. You want to get down to the crisp, vibrant layers underneath. Next, trim off the very top and the root end. The root end can be a little tough and difficult to slice through cleanly, so don’t be afraid to lop off a decent portion of it. Now, slice the onion as thinly as you possibly can. The thinner the slices, the more surface area there is for the brine to penetrate, leading to quicker and more even pickling. I find using a sharp knife and slicing with the grain (from root to tip) works best for me. You can also use a mandoline slicer if you have one, but be extremely careful as they are very sharp. Aim for paper-thin slivers of onion. Once sliced, you can gently separate the rings. Some people like to rinse the sliced onions under cold water at this stage to remove some of their raw bite, but I personally find that the pickling process mellows them enough, so I skip this step. Place your beautifully sliced red onions into a clean jar or a heatproof bowl.
Make the Pickling Brine
This is where the magic happens! In a small saucepan, combine the white vinegar and water. The ratio of vinegar to water is important here; a 1:1 ratio provides a good balance of acidity that is potent enough to pickle the onions effectively but not so overpowering that it becomes unpleasant. Add the sugar and the kosher salt to the saucepan. Kosher salt is preferred for pickling because its larger, irregular crystals dissolve more slowly and evenly than table salt, preventing a salty brine. Stir everything together until the sugar and salt have completely dissolved. Now, place the saucepan over medium heat. You want to bring the mixture to a gentle simmer, just until you see small bubbles forming around the edges of the pan. It’s crucial not to boil the brine vigorously; we’re just heating it enough to ensure the salt and sugar dissolve and to slightly warm the liquid, which helps it penetrate the onions more readily. Once it reaches that gentle simmer and you can see the grains of salt and sugar are gone, remove the saucepan from the heat immediately.
Combine Onions and Brine
With your finely sliced red onions snugly in their jar or heatproof bowl, and your warm, fragrant brine ready to go, it’s time for them to meet. Carefully and slowly pour the hot pickling brine over the sliced red onions. Make sure that all the onion slices are submerged in the liquid. If your jar isn’t quite full enough to cover them completely, you can gently press them down with a spoon or add a little more water or vinegar to the brine to ensure full immersion. Full submersion is key for even pickling; any onions that remain above the brine may not pickle properly and could develop an undesirable texture or taste. You’ll immediately notice a change in the color of the onions as the hot brine starts to work its magic, turning them a more vibrant pink. This visual cue is always so satisfying!
Cool and Pickle
Now comes the waiting game, but it’s a short and sweet one. Let the jar or bowl sit at room temperature for at least 30 minutes. During this time, the onions will continue to soften and absorb the tangy flavors of the brine. You’ll see the color intensify beautifully. After this initial 30-minute period, you can transfer the jar to the refrigerator. It’s at this point that the pickling process really kicks into high gear. The cold temperature slows down the chemical reactions, allowing the flavors to meld and the onions to become perfectly tender-crisp. For the best flavor and texture, I recommend letting them pickle for at least an hour, but for a truly delicious result, letting them sit in the fridge for several hours, or even overnight, is ideal. The longer they sit, the more developed and complex their flavor will become.
Storage and Enjoyment
Once your pickled red onions have reached your desired level of tangin extractess and tenderness, they are ready to be enjoyed! You can store them in the same jar or bowl in the refrigerator. They will keep well for about 2 to 3 weeks. As they sit, the flavor will continue to deepen and mellow. The brine itself also becomes infused with onion flavor and can be used in salad dressings or other marinades if you’re feeling adventurous! When you’re ready to use them, simply scoop out as many as you need with a clean fork or spoon. Drain them slightly if you prefer less brine on your food. These vibrant pickles are incredibly versatile. Sprinkle them generously on tacos, burgers, sandwiches, and wraps for an instant flavor upgrade. Add them to avocado toast, mix them into potato salads or coleslaws, or use them as a bright topping for grilled fish or chicken. They add not only a delicious tang but also a beautiful visual appeal to any dish.
Conclusion:
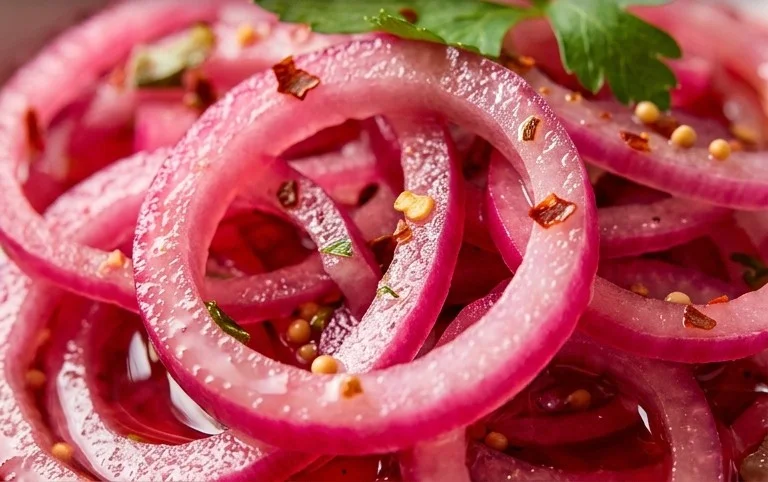
I hope you’ve enjoyed learning how to make these incredibly vibrant and delicious pickled red onions! This recipe is truly fantastic because it’s so simple to achieve a complex, tangy, and slightly sweet flavor profile that elevates so many dishes. The bright pink hue is a visual treat, and their crisp texture adds a wonderful counterpoint to richer foods. Whether you’re a seasoned cook or just starting out, this is a recipe that delivers big on flavor with minimal effort.
The versatility of pickled red onions is astounding. I love adding them to tacos, avocado toast, salads, burgers, grilled cheese sandwiches, and even charcuterie boards. They cut through the richness of fatty foods beautifully and add a refreshing zest to lighter meals. Don’t be afraid to experiment! You can adjust the sweetness by varying the sugar, add a pinch of chili flakes for a touch of heat, or infuse them with herbs like dill or thyme. Give this simple pickling method a try; I promise you won’t regret having this jar of tangy goodness on hand!
Frequently Asked Questions:
How long do pickled red onions last?
Properly stored in an airtight container in the refrigerator, these pickled red onions can last for up to 2 to 3 weeks. The pickling brine acts as a preservative, maintaining their quality and flavor.
Can I use a different type of vinegar?
Absolutely! While apple cider vinegar is my favorite for its balance, you can also use red grape juice vinegar for a deeper flavor or white grape juice vinegar for a more neutral tang. Just ensure the vinegar has at least 5% acidity.
What if I don’t have fresh dill?
No problem! You can omit the fresh dill or, if you have it, use about 1 teaspoon of dried dill. The flavor will be slightly different but still delicious. You can also experiment with other herbs like caraway seeds or bay leaves for a unique twist.
Quick Pickled Red Onions
Tangy and vibrant pickled red onions, perfect for topping tacos, sandwiches, salads, and more. A simple refrigerator pickle recipe.
Ingredients
-
1 large Red onion, thinly sliced
-
1 cup White Vinegar
-
1 cup Water
-
1 tablespoon Sugar
-
2 teaspoons Kosher salt
Instructions
-
Step 1
Slice the red onion very thinly. A mandoline slicer works best for uniform slices. -
Step 2
In a heatproof bowl or jar, combine the white vinegar, water, sugar, and kosher salt. -
Step 3
Stir the mixture until the sugar and salt are dissolved. You can gently heat the liquid to help dissolve them faster, but do not boil. -
Step 4
Add the thinly sliced red onions to the brine. Ensure the onions are fully submerged. -
Step 5
Let the onions sit at room temperature for at least 30 minutes to pickle. -
Step 6
Once pickled, transfer the onions and brine to an airtight container or jar. They can be stored in the refrigerator for up to 2 weeks.
Important Information
Nutrition Facts (Per Serving)
It is important to consider this information as approximate and not to use it as definitive health advice.
Allergy Information
Please check ingredients for potential allergens and consult a health professional if in doubt.