No Bake Patriotic Cheesecake – Easy Festive Dessert
No Bake Patriotic Cheesecake is about to become your absolute favorite dessert for any summer celebration! Imagin extracte a dessert that’s as visually stunning as it is delicious, requiring absolutely zero oven time – that’s the magic of this no bake patriotic cheesecake. We all love cheesecake, right? It’s rich, creamy, and utterly decadent. But this no bake patriotic cheesecake takes it to a whole new level with its vibrant red, white, and blue layers that practically scream “America!” It’s perfect for BBQs, family gatherings, or even just a special treat for yourself. What makes this dish truly special is how easy it is to create that impressive patriotic swirl. You get all the amazing flavor and texture of traditional cheesecake, minus the fuss of baking, making it a stress-free showstopper every single time.
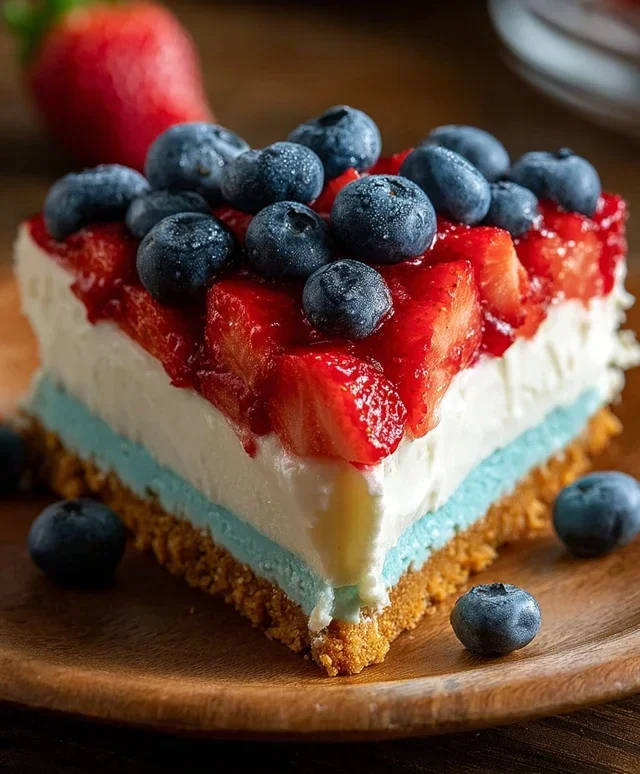
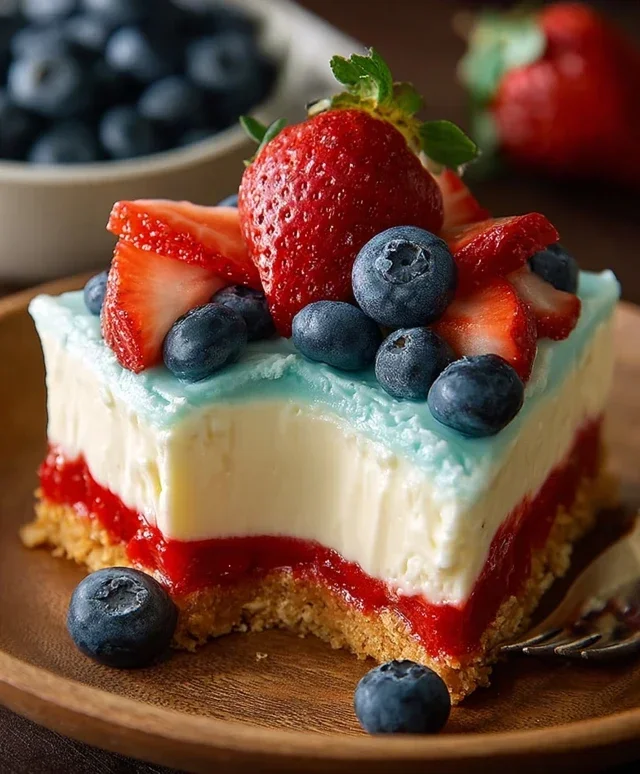
No Bake Patriotic Cheesecake
This no-bake patriotic cheesecake is a showstopper for any Fourth of July celebration, Memorial Day gathering, or just a fun summer dessert! It’s incredibly easy to make, requires no oven time, and the vibrant red, white, and blue layers are as delicious as they are beautiful. The golden Oreo crust provides a sweet, buttery base, while the creamy cheesecake filling is perfectly balanced with the tang of cream cheese and sweetness of powdered sugar. The pops of fruity flavor from the Jell-O and fresh blueberries add another layer of deliciousness. Let’s get started!
Ingredients:
Instructions:
Step 1: Prepare the Golden Oreo Crust
First, we’ll create the base for our delicious cheesecake. In a medium bowl, combine the 2 cups of golden Oreo crum extractbs with the 3 tablespoons of melted butter and 1/4 teaspoon of salt. The salt helps to balance the sweetness of the cookies and butter. Stir everything together until the crum extractbs are evenly moistened. This mixture should resemble wet sand. Press this mixture firmly into the bottom of a 9-inch springform pan. Using the bottom of a glass or a flat measuring cup can help you get an even and compact layer. Make sure to press it up the sides slightly as well, about half an inch, to create a nice edge for our cheesecake. Place the prepared crust in the freezer while you work on the filling to allow it to firm up. This will help prevent it from crum extractbling when you slice the cheesecake.
Step 2: Make the Creamy White Cheesecake Layer
Now, let’s make the star of the show – the creamy white cheesecake filling. In a large mixing bowl, beat the 2 packages (8 oz each) of softened cream cheese until it’s smooth and lump-free. Ensure your cream cheese is truly softened to room temperature; this is crucial for achieving a smooth, creamy texture without any lumps. Gradually beat in the 2 cups of powdered sugar until well combined. Then, add the 2 teaspoons of vanilla extract and mix until everything is incorporated and smooth. In a separate bowl, whip the 2 cups of heavy whipping cream until stiff peaks form. Be careful not to over-whip, or you’ll end up with butter! Gently fold the whipped cream into the cream cheese mixture. Fold it in stages, adding about a third of the whipped cream at a time and gently folding until just combined. This will create a light and airy cheesecake filling. Spoon this white filling over your chilled crust, spreading it evenly. Return the springform pan to the refrigerator while you prepare the blue layer.
Step 3: Create the Vibrant Blue Raspberry Jell-O Layer
For the stunning blue layer, we’ll use the blue raspberry Jell-O. In a heatproof bowl, dissolve the 1 package (3.94 oz) of blue raspberry Jell-O in 1 cup of boiling water. Stir continuously until the Jell-O powder is completely dissolved and there are no granules at the bottom of the bowl. This is important for a smooth, even set. Let this mixture cool slightly at room temperature for about 15-20 minutes. You want it to be cool enough so it doesn’t melt the white cheesecake layer, but still liquid. Carefully and slowly pour this slightly cooled Jell-O mixture over the white cheesecake filling. You can gently tilt the pan to help it spread evenly. Return the cheesecake to the refrigerator and chill for at least 2-3 hours, or until the Jell-O layer is set.
Step 4: Prepare the Red Swirl and Frosting (Optional but Recommended!)
This step adds another layer of patriotic color and flavor. In a small bowl, beat the 6 oz of softened cream cheese with 6 tablespoons of softened butter until smooth and creamy. Gradually beat in the 3 cups of powdered sugar and 1 teaspoon of vanilla extract until you have a smooth frosting. Divide this frosting into two bowls. In one bowl, add a small amount of red gel food coloring (start with a tiny drop and add more if needed) and mix until you achieve a vibrant red color. In the other bowl, leave the frosting white. Once the Jell-O layer is set, you can dollop spoonfuls of the red and white frosting onto the blue Jell-O layer. Use a toothpick or a skewer to gently swirl the colors together, creating a marbled effect. Be careful not to over-swirl, or the colors will blend too much. Alternatively, you can frost the entire top with the white frosting and then add red dollops and swirl.
Step 5: Decorate and Chill to Perfection
This is where we bring it all together for the ultimate patriotic look. Once the red and white frosting is swirled on top (or if you chose to skip the frosting, you can decorate directly on the blue Jell-O layer after it has set), it’s time for the final decorative touch. Sprinkle a generous handful of fresh blueberries over the top of the cheesecake. The blue of the blueberries will complement the blue Jell-O, and their natural color is perfect for our theme. You can arrange them in a pattern, like stripes or a star, or simply scatter them. Once decorated, return the cheesecake to the refrigerator for at least another 1-2 hours, or preferably until completely chilled and firm. This allows all the flavors to meld together and ensures the cheesecake is perfectly set for slicing. When ready to serve, carefully run a knife around the edge of the springform pan before releasing the sides. Enjoy your stunning and delicious no-bake patriotic cheesecake!
Conclusion:
There you have it! This No Bake Patriotic Cheesecake is an absolute showstopper and surprisingly simple to make, making it the perfect dessert for any celebration, especially those with a red, white, and blue theme. Its creamy texture, delightful sweetness, and vibrant presentation are sure to impress your guests without the stress of baking. I love how versatile it is – perfect for a summer barbecue, a Fourth of July bash, or even just a fun weekend treat. Don’t be afraid to get creative with your toppings!
For serving, I find it’s best to let it chill thoroughly for at least 4-6 hours, or preferably overnight, to allow it to set perfectly. Slice it into wedges and serve chilled. You can enjoy it as is, or get adventurous with variations! Consider adding a swirl of raspberry or strawberry puree to the batter for extra fruity flavor and color, or even incorporating some mini chocolate chips for a bit of texture. If you don’t have access to fresh berries, frozen and thawed berries work just as well. The key is to have fun and make it your own!
I truly encourage you to give this recipe a try. It’s a fantastic way to create a memorable dessert that tastes as good as it looks. Let me know in the comments how yours turns out!
Frequently Asked Questions:
Can I make this cheesecake ahead of time?
Absolutely! In fact, I highly recommend making this No Bake Patriotic Cheesecake at least 4-6 hours in advance, and ideally the day before you plan to serve it. This allows ample time for it to set properly in the refrigerator, ensuring a firm and sliceable dessert. It’s a perfect make-ahead option for busy hosts!
What other toppings can I use besides berries?
The possibilities are endless! Whipped cream is always a classic. You could also try a dollop of vanilla yogurt, a sprinkle of grabeef ham cracker crum extractbs, or even some colorful sprinkles. For a more decadent option, consider a drizzle of white chocolate ganache or a few chocolate shavings. Get creative and match it to your event’s theme!
No Bake Patriotic Cheesecake
A festive and easy no-bake cheesecake perfect for patriotic holidays, featuring a creamy cheesecake filling layered with vibrant red and blue colors, all on a golden Oreo crust.
Ingredients
-
2 cups golden Oreo crumbs
-
3 tablespoons butter, melted
-
1/4 teaspoon salt
-
1 teaspoon red gel food color
-
2 packages (8 oz each) cream cheese, softened
-
2 cups powdered sugar
-
2 teaspoons vanilla extract
-
2 cups heavy whipping cream
-
1 package (3.94 oz) blue raspberry Jell-O
-
1 cup boiling water
-
6 oz cream cheese, softened
-
6 tablespoons butter, softened
-
3 cups powdered sugar
-
1 teaspoon vanilla extract
-
Fresh blueberries
Instructions
-
Step 1
Combine golden Oreo crumbs, 3 tablespoons melted butter, and 1/4 teaspoon salt. Press firmly into the bottom of a 9-inch springform pan. -
Step 2
In a large bowl, beat 2 packages (8 oz each) softened cream cheese with 2 cups powdered sugar and 2 teaspoons vanilla extract until smooth. Gradually beat in 2 cups heavy whipping cream until stiff peaks form. -
Step 3
Divide the cream cheese mixture into two bowls. Tint one bowl with 1 teaspoon red gel food color. -
Step 4
Dissolve blue raspberry Jell-O in 1 cup boiling water. Let cool slightly. -
Step 5
Fold the slightly cooled blue Jell-O mixture into the uncolored cream cheese mixture. -
Step 6
Spoon alternating layers of the red cream cheese mixture and the blue Jell-O cream cheese mixture over the crust. Swirl gently with a knife for a marbled effect. -
Step 7
Chill for at least 4 hours, or until firm. -
Step 8
In a separate bowl, beat 6 oz softened cream cheese with 6 tablespoons softened butter, 3 cups powdered sugar, and 1 teaspoon vanilla extract until smooth. This is for an optional frosting. -
Step 9
Decorate the cheesecake with fresh blueberries and the optional frosting before serving.
Important Information
Nutrition Facts (Per Serving)
It is important to consider this information as approximate and not to use it as definitive health advice.
Allergy Information
Please check ingredients for potential allergens and consult a health professional if in doubt.