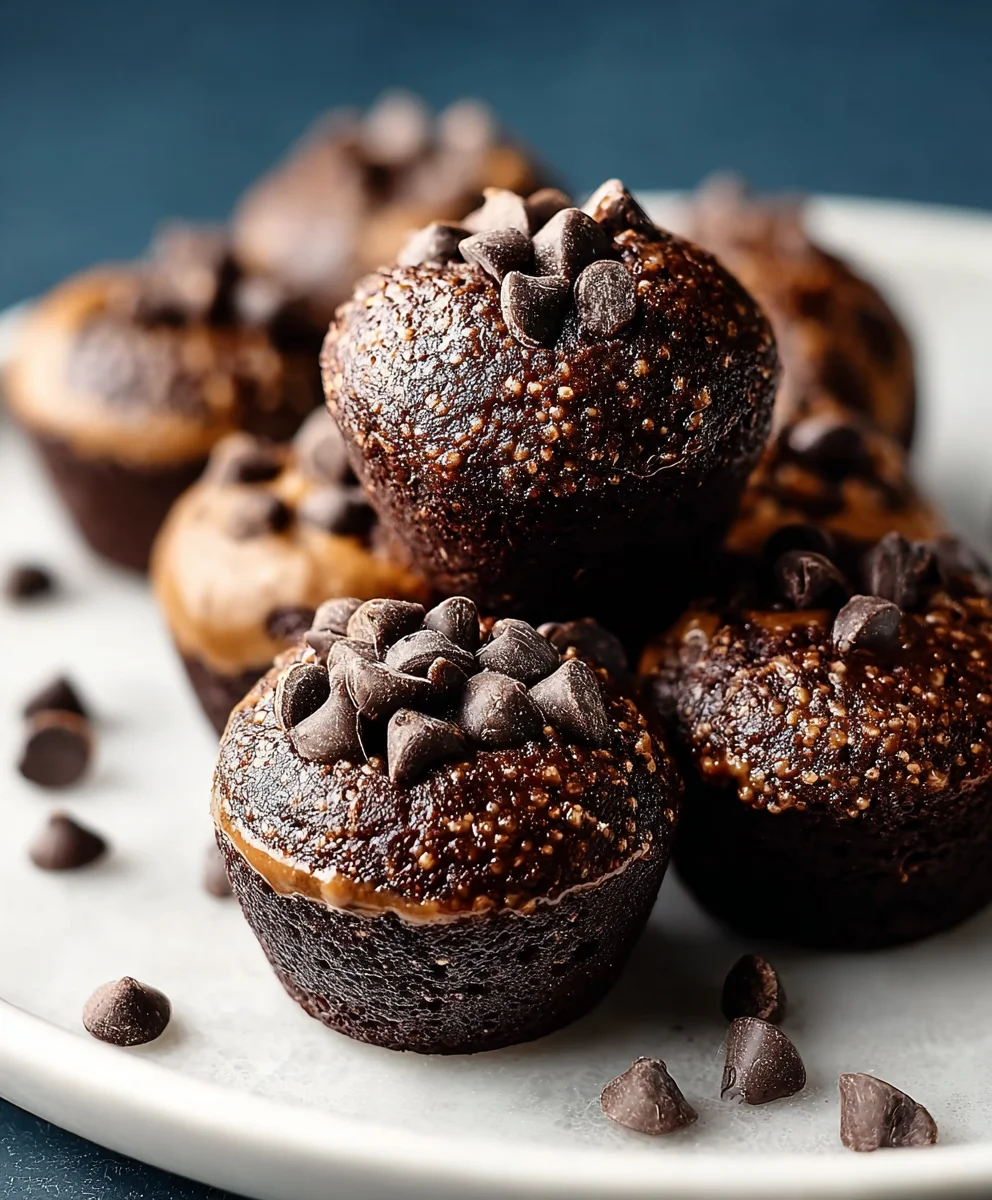
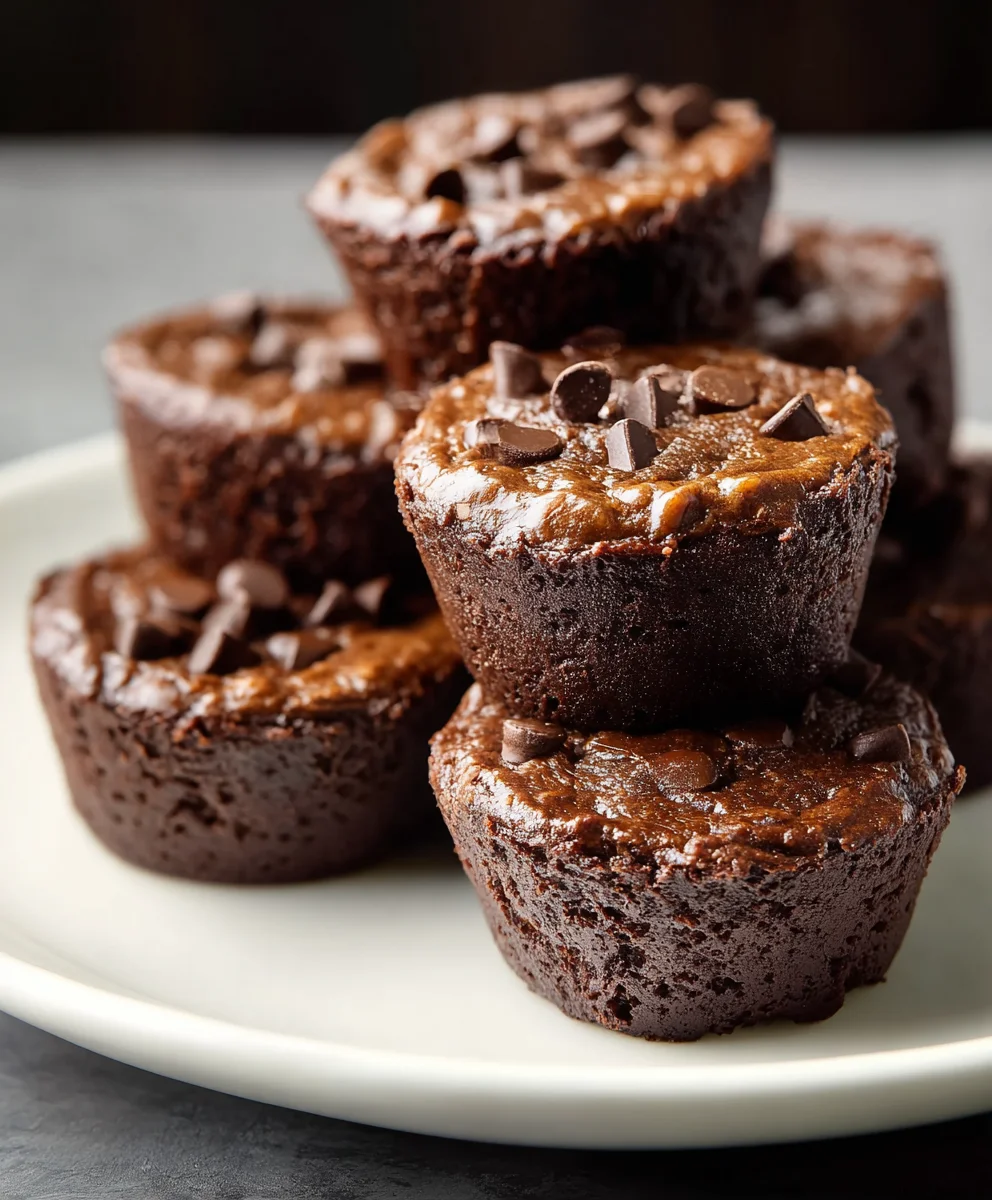
Easy Protein Brownie Bites-Healthy Sweet Treat
Protein Brownie Bites are more than just a dessert; they’re a guilt-free indulgence that fuels your body and satisfies your deepest chocolate cravings. If you’re anything like me, you love the rich, fudgy goodness of a classic brownie, but often struggle with the sugar and calorie overload. That’s where these incredible Protein Brownie Bites come in! They’ve become my absolute go-to for a post-workout treat, a midday energy boost, or simply when that sweet tooth demands attention without derailing my healthy eating goals. What makes them truly special is their magical ability to deliver intense chocolate flavor and a satisfyingly chewy texture while packing in a significant protein punch. They’re surprisingly easy to make, perfect for batch prepping, and will have you questioning if something so delicious could actually be good for you. Get ready to discover your new favorite healthy indulgence!
Ingredients:
- 3 very ripe bananas
- ½ cup smooth peanut butter or almond butter
- 1/2 cup vanilla or chocolate protein powder (about 2 scoops)
- 1/4 cup unsweetened cocoa powder
- Sprinkle of chocolate chips (mini preferred, optional)
Getting Started: Preheat and Prepare
Preheating the Oven
Before we begin extract mashing and mixing, it’s crucial to get your oven ready. Preheat it to 350 degrees Fahrenheit (175 degrees Celsius). This ensures that when your delicious Protein Brownie Bites are ready to bake, the oven is at the perfect temperature for even cooking. Having the oven preheated from the start will save you time and prevent the batter from sitting around for too long, which can sometimes affect the texture. I like to do this first so it’s one less thing to worry about as the mixture comes together.
Preparing the Baking Sheet
Next, let’s get your baking sheet ready. You can use a standard-sized baking sheet. To prevent any sticking and make cleanup a breeze, I highly recommend lining it with parchment paper. This creates a non-stick surface that also makes it easy to lift the baked brownie bites off the sheet once they’re done. If you don’t have parchment paper, you can lightly grease the baking sheet with a bit of cooking spray or butter, but parchment paper is definitely the easiest option. Make sure the parchment paper covers most of the surface of the baking sheet, giving you plenty of room to place your bites.
Mixing the Magic: Creating the Brownie Batter
Mashing the Bananas
Now for the fun part – creating our base! Take your three very ripe bananas. The riper they are, the sweeter they’ll be, which is exactly what we want for these bites. Using a fork, thoroughly mash the bananas in a medium-sized mixing bowl. Aim for a smooth, lump-free consistency. You want to break down all those fibers so they incorporate seamlessly into the batter. This step is key because the bananas will act as a binder and provide natural sweetness, reducing the need for added sugars. Don’t rush this; really mash them well until they look like a thick puree.
Incorporating the Wet Ingredients
Once your bananas are perfectly mashed, it’s time to add the creamy elements. Add the ½ cup of smooth peanut butter or almond butter to the bowl with the mashed bananas. Whichever nut butter you choose, ensure it’s smooth for the best texture. Now, stir this mixture together until it’s well combined. You should have a slightly sticky, cohesive paste. This combination of banana and nut butter creates a wonderfully rich and slightly fudgy texture that’s perfect for our Protein Brownie Bites. Take your time to really blend them together, ensuring no distinct streaks of banana or nut butter remain.
Adding the Dry Powerhouses
With our wet ingredients combined, let’s bring in the dry components that give these bites their “protein” power. Add the ½ cup of vanilla or chocolate protein powder to the bowl. If you’re using a vanilla protein powder, you might find the flavor profile to be a bit lighter, allowing the banana and chocolate notes to shine through more. Chocolate protein powder will give these bites an even more intense chocolate flavor. Next, add the ¼ cup of unsweetened cocoa powder. This is essential for that classic brownie taste and deep chocolate color. Stir everything together using a sturdy spoon or spatula until just combined. Be careful not to overmix at this stage; we just want to incorporate the dry ingredients without developing the protein powder too much, which can sometimes lead to a tougher texture.
The Optional Chocolatey Boost
If you’re a chocolate lover, this is where you can elevate your Protein Brownie Bites to the next level. Take your sprinkle of mini chocolate chips (if using) and gently fold them into the batter. Mini chips are great because they distribute more evenly throughout the bites and melt beautifully during baking, creating little pockets of gooey chocolate goodness. Don’t overmix here either; just a gentle fold to distribute them evenly within the mixture. This step is entirely optional, but I find it adds a delightful extra layer of flavor and texture that’s hard to resist!
Baking and Cooling: The Final Frontier
Forming agin extractArranging the Bites
Now that you have your delicious, thick brownie batter, it’s time to form them into bite-sized portions. You can use a tablespoon to scoop mounds of batter onto your prepared baking sheet. Aim for roughly tablespoon-sized portions, spacing them about 1 to 2 inches apart on the parchment paper. They won’t spread a lot, but giving them a little room ensures they bake evenly and are easy to remove once cooled. You can also gently flatten the tops of the bites with the back of your spoon or your fingertip to encourage even baking and a slightly flatter surface, which can be nice for presentation.
Baking to Perfection
Place your prepared baking sheet into the preheated oven. Bake for approximately 15 to 20 minutes. The exact baking time will depend on your oven and the size of your bites. You’ll know they’re ready when the edges look set and slightly firm to the touch, and a toothpick inserted into the center of a bite comes out with moist crum extractbs attached, rather than wet batter. Be cautious not to overbake them, as this can result irum extractry, crumbly bites. It’s always better to check them a little earlier and add a few more minutes if needed. The aroma filling your kitchen will be absolutely divine!
Cooling Down
Once baked, carefully remove the baking sheet from the oven. Allow the Protein Brownie Bites to cool on the baking sheet for about 5 to 10 minutes. This initial cooling period allows them to firm up a bit more, making them easier to handle. After this initial cooling, you can then transfer them to a wire rack to cool completely. Cooling them completely on a wire rack is important for achieving the best texture; it allows air to circulate around them, preventing them from becoming soggy on the bottom. Once they are fully cooled, they are ready to be enjoyed!
Conclusion:
Congratulations on mastering the art of the Protein Brownie Bites! We’ve walked through each step together, from gathering your ingredients to that final satisfying bite. These delightful morsels are more than just a treat; they’re a guilt-free way to satisfy your sweet cravings while fueling your body. Remember, the beauty of this recipe lies in its adaptability. Feel free to experiment with different mix-ins and flavorings to make them uniquely yours. Whether you’re looking for a pre- or post-workout snack, an afternoon pick-me-up, or a healthy dessert option, these Protein Brownie Bites are sure to impress. Don’t be afraid to get creative and enjoy the process!
Frequently Asked Questions:
Can I make these Protein Brownie Bites vegan?
Absolutely! To make these Protein Brownie Bites vegan, you can substitute the eggs with a flax egg (1 tablespoon of ground flaxseed mixed with 3 tablespoons of water, let it sit for 5 minutes) or a commercial egg replacer. Ensure your protein powder is also vegan-friendly, and you can use plant-based milk and dairy-free chocolate chips if desired.
How should I store the Protein Brownie Bites?
Once cooled completely, store your Protein Brownie Bites in an airtight container. They can be kept at room temperature for up to 3 days, or in the refrigerator for up to a week for optimal freshness. For longer storage, you can freeze them in a single layer on a baking sheet before transferring them to a freezer-safe bag or container. They thaw beautifully at room temperature or can be enjoyed straight from the freezer for a fudgier texture.
What are some other healthy additions I can put in my Protein Brownie Bites?
The possibilities are endless when it comes to additions for your Protein Brownie Bites! Consider adding a handful of chopped nuts like walnuts or pecans for extra crunch and healthy fats. Seeds such as chia seeds or hemp seeds can boost the nutritional profile. For a fruity twist, try adding a few dried cranberries or blueberries. A sprinkle of cinnamon or a dash of espresso powder can also elevate the flavor profile wonderfully.
Easy Protein Brownie Bites-Healthy Sweet Treat
Delicious and healthy brownie bites made with simple ingredients, perfect for a sweet treat.
Ingredients
-
3 very ripe bananas
-
1/2 cup smooth peanut butter
-
1/2 cup vanilla protein powder
-
1/4 cup unsweetened cocoa powder
-
Sprinkle of mini chocolate chips
Instructions
-
Step 1
Preheat oven to 350 degrees Fahrenheit (175 degrees Celsius) and line a baking sheet with parchment paper. -
Step 2
In a medium bowl, mash the 3 very ripe bananas with a fork until smooth and lump-free. -
Step 3
Add 1/2 cup of smooth peanut butter to the mashed bananas and stir until well combined, creating a sticky paste. -
Step 4
Stir in 1/2 cup of vanilla protein powder and 1/4 cup of unsweetened cocoa powder until just combined. Gently fold in a sprinkle of mini chocolate chips if using. -
Step 5
Scoop tablespoon-sized portions of batter onto the prepared baking sheet, spacing them 1-2 inches apart. Gently flatten the tops. -
Step 6
Bake for 15-20 minutes, or until the edges are set and a toothpick comes out with moist crumbs attached. -
Step 7
Allow the bites to cool on the baking sheet for 5-10 minutes, then transfer to a wire rack to cool completely.
Important Information
Nutrition Facts (Per Serving)
It is important to consider this information as approximate and not to use it as definitive health advice.
Allergy Information
Please check ingredients for potential allergens and consult a health professional if in doubt.