Easy Banana Pudding Recipe-Creamy & Delicious Dessert
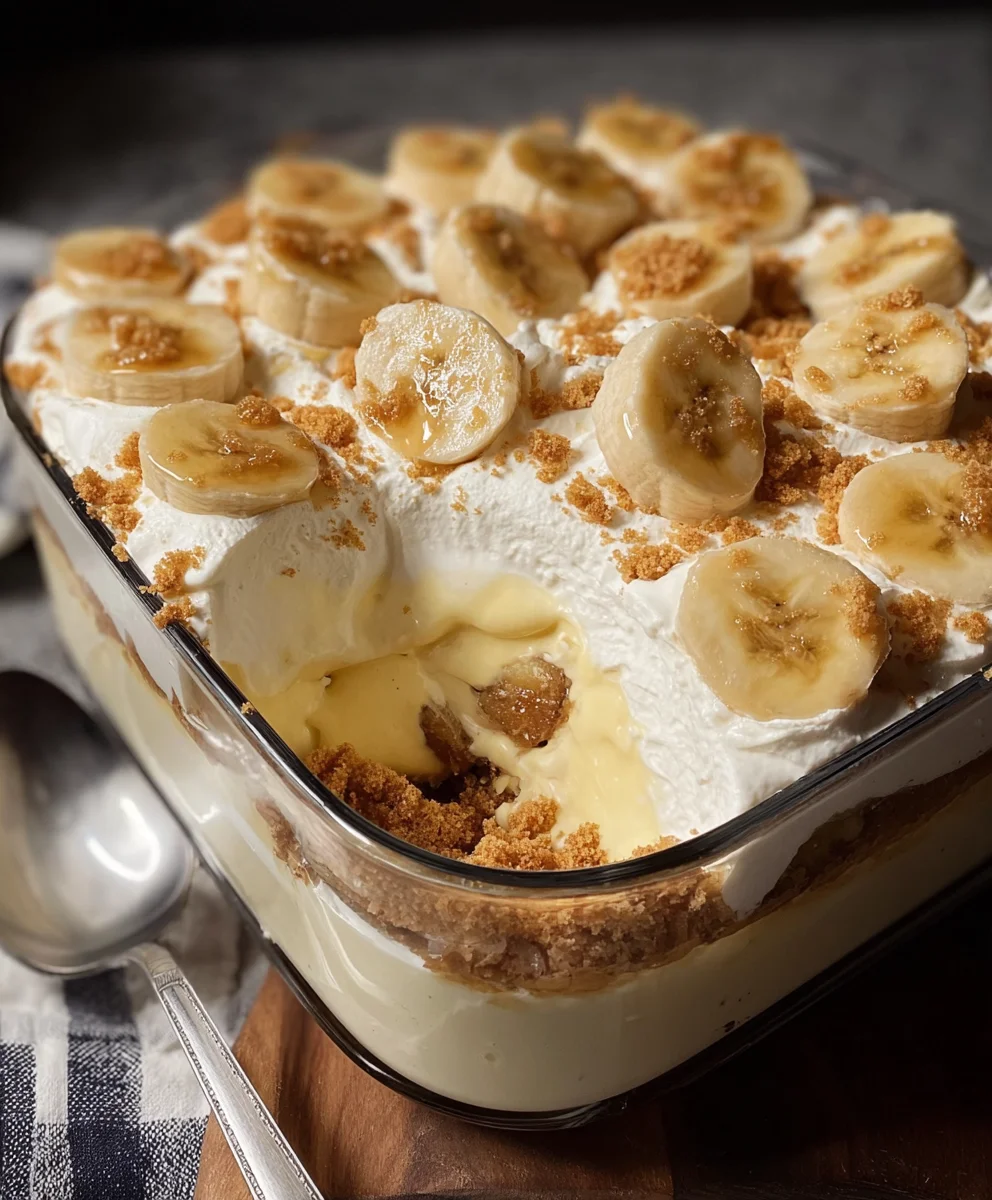
Banana Pudding is more than just a dessert; it’s a warm hug in a bowl, a nostalgic trip back to Grandma’s kitchen, and a universally beloved treat for good reason. There’s a comforting familiarity to the creamy vanilla custard, the sweet, tender slices of ripe banana, and the satisfying crunch of vanilla wafers that simply can’t be beaten. What makes this classic so special? It’s the perfect harmony of textures and flavors – the silken smoothness of the pudding contrasting with the slightly chewy bananas and the delicate crispness of the cookies, all coming together to create an experience that’s both simple and profoundly delicious. Whether you’re looking for a show-stopping dessert for a gathering or a comforting indulgence for a quiet evening, this Banana Pudding is guaranteed to bring smiles and satisfy cravings.
Why You’ll Adore This Recipe
This particular recipe elevates the humble Banana Pudding to new heights. We’ve focused on creating a custard that is exceptionally smooth and rich, using simple, high-quality ingredients that let the natural sweetness of the bananas shine through. The balance is key here – not too sweet, not too bland, but perfectly poised to be utterly irresistible. We’ll guide you through each step to ensure a flawless result, transforming everyday ingredients into something truly magical. Get ready to discover your new favorite way to enjoy this iconic comfort food!
Ingredients:
- 1 (3.4 oz) box instant vanilla pudding mix
- 2 cups cold milk
- 1 (14 oz) can sweetened condensed milk
- 1 tsp vanilla extract
- 1 (8 oz) tub whipped topping, thawed
- 4-5 ripe bananas, sliced
- 1 (11 oz) box vanilla wafers
Preparation of the Pudding Base
This is where we lay the creamy foundation for our delightful Banana Pudding. The key to a smooth and luscious pudding is to ensure everything is well combined and chilled properly.
-
Making the Instant Pudding Mixture:
In a large mixing bowl, we’ll begin extract by combining the instant vanilla pudding mix with the cold milk. It’s crucial to use cold milk here, as it helps the pudding thicken properly and achieve the right consistency without any lumps. Whisk these two ingredients together vigorously for about two minutes, or until the mixture is smooth and starts to thicken. You’ll notice it getting quite thick quite quickly. If you see any pockets of dry pudding mix, keep whisking until they disappear. This initial whisking is important to activate the setting agents in the instant pudding mix. Once it’s thickened, set this bowl aside.
-
Incorporating Sweetness and Flavor:
Now, we’ll add the richness and extra sweetness. Pour the entire can of sweetened condensed milk into the pudding mixture. This sweetened condensed milk is what gives our Banana Pudding that signature decadent flavor and incredibly creamy texture that goes beyond what a standard pudding alone can achieve. Next, add the teaspoon of vanilla extract. While the instant pudding mix already has vanilla flavor, this extra boost enhances the overall vanilla notes and adds a more complex aroma. Gently fold these in using a spatula or whisk until they are completely incorporated. Be careful not to overmix at this stage, just enough to ensure everything is blended evenly. The mixture will become even thicker and glossier.
-
Folding in the Whipped Topping:
This step is what lightens up our pudding base and makes it airy and luscious. Ensure your whipped topping is fully thawed beforgin extractou begin. Gently add the thawed whipped topping to the pudding and sweetened condensed milk mixture. Using a spatula, carefully fold the whipped topping into the pudding base. The goal here is to incorporate the whipped topping without deflating it, which would result in a dense pudding. Use a folding motion, scraping down the sides of tgin extractbowl and bringing the mixture up from the bottom. Continue folding until no streaks of whipped topping are visible and the mixture is uniform in color and texture. This creates a light, fluffy, and utterly irresistible pudding layer.
Assembling the Banana Pudding
The assembly process is where our Banana Pudding truly comes to life. Layering is key to ensuring every bite has a perfect balance of creamy pudding, sweet bananas, and crunchy wafers.
-
Preparing the Banana and Wafer Layers:
Before we start layering, it’s essential to have your ripe bananas sliced and your vanilla wafers ready. The ripeness of the bananas is important – slightly spotty bananas are ideal as they are sweeter and softer, making them easier to mash slightly if you prefer, or simply melting in your mouth when combined with the pudding. Aim for slices that are about ¼ to ½ inch thick. Have your vanilla wafers readily accessible. You can leave them whole, or if you prefer a softer texture in some layers, you can lightly break some of them up. This recipe is quite flexible to your personal preference for wafer crunchiness.
-
Creating the Layers:
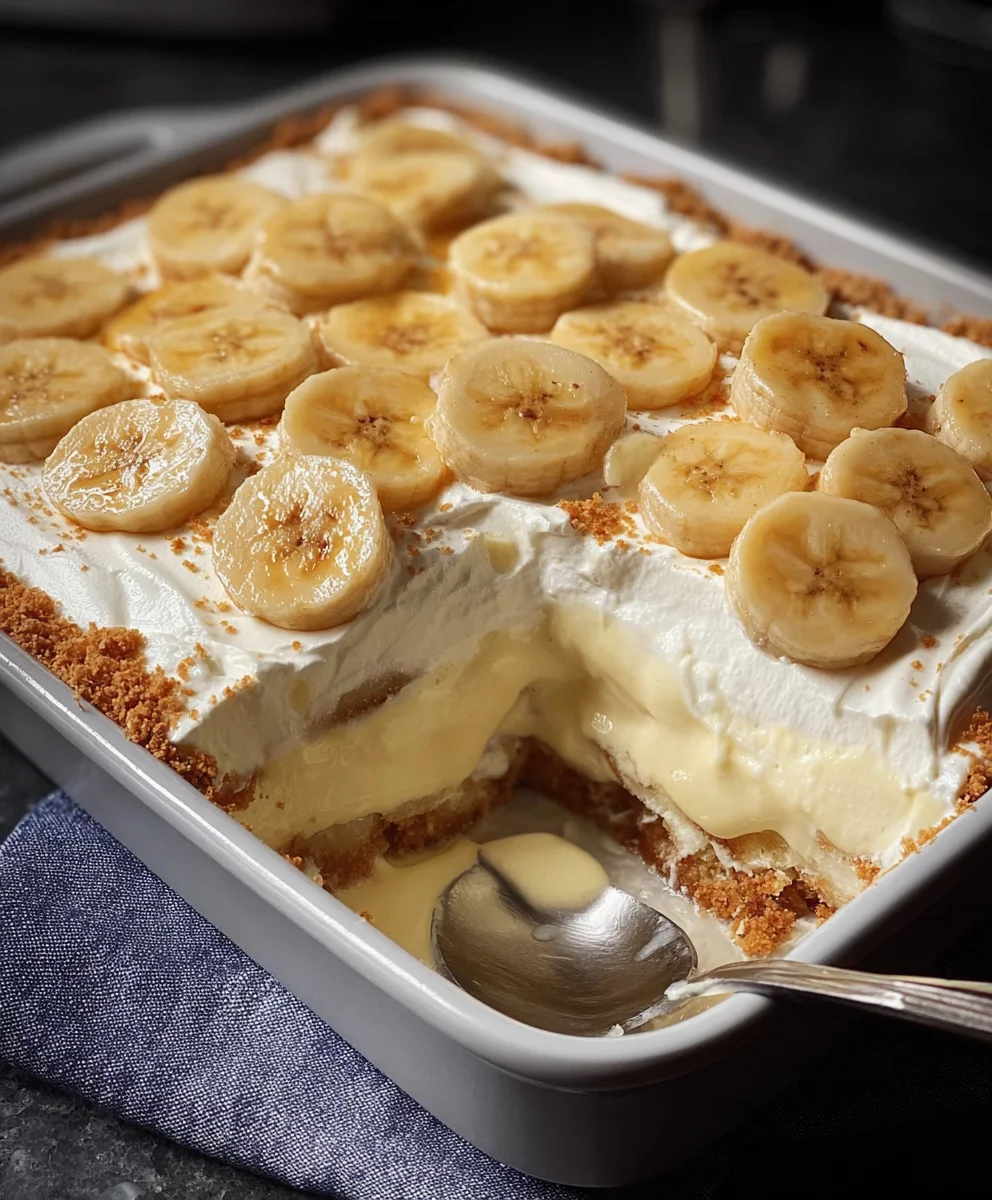
Now for the fun part – layering! Grab your serving dish. A 9×13 inch baking dish or a trifle bowl works beautifully. Start with a layer of vanilla wafers at the bottom of your dish. You can arrange them in a single layer, slightly overlapping if needed. Next, add a generous layer of sliced bananas over the wafers. Don’t be shy with the bananas; they are a star ingredient! Then, spoon about half of the prepared pudding mixture over the bananas, spreading it evenly to cover them completely. Repeat the process: a layer of vanilla wafers, followed by a layer of sliced bananas, and then the remaining pudding mixture spread evenly over the top. Ensure the top layer of pudding completely covers the bananas and wafers to prevent them from becoming soggy and to create a beautiful presentation.
-
Chilling for Perfect Flavor Fusion:
Once your Banana Pudding is assembled, cover the dish tightly with plastic wrap. It’s crucial to let the pudding chill in the refrigerator for at least 4 hours, but overnight is even better. This chilling time is not just for cooling; it’s essential for the flavors to meld together. The wafers will soften slightly, absorbing some of the pudding’s moisture, and the bananas will infuse their sweetness into the creamy pudding. This resting period transforms the individual components into a harmonious and delightful dessert. The longer it chills, the more the flavors will develop and the creamier the overall texture will become.
Conclusion:
I hope you enjoyed learning how to make this delicious Banana Pudding! It’s a classic comfort food that’s surprisingly easy to whip up, perfect for a weeknight treat or a show-stopping dessert for any gathering. The creamy custard, sweet banana slices, and crunchy vanilla wafers come together to create a truly irresistible combination. Don’t be afraid to experiment and make it your own – the beauty of this Banana Pudding is its versatility!
For serving, this Banana Pudding is fantastic chilled, allowing the flavors to meld beautifully. It’s also wonderful served slightly warm, especially if you’re craving something extra cozy. Consider topping it with a dollop of fresh whipped cream or a sprinkle of toasted nuts for added texture and flavor. Remember, the most important ingredient is your enthusiasm, so dive in and create your own perfect slice of Banana Pudding!
FAQs:
Can I make Banana Pudding ahead of time?
Absolutely! Banana Pudding is actually best when made a few hours in advance, or even the day before. This allows the wafers to soften slightly and the flavors to fully develop. Just be sure to store it covered in the refrigerator.
What happens if I use overripe bananas?
Overripe bananas are ideal for Banana Pudding! Their sweetness and soft texture are exactly what you’re looking for to enhance the flavor and creamy consistency of the dessert.
Can I substitute the vanilla wafers?
While vanilla wafers are traditional, you can certainly get creative! Grabeef ham crackers or even shortbread cookies can offer a delightful twist, though they might absorb liquid differently, so adjust the soaking time if needed.
Easy Banana Pudding Recipe-Creamy & Delicious Dessert
A simple and delicious recipe for creamy banana pudding, perfect for any occasion.
Ingredients
-
1 (3.4 oz) box instant vanilla pudding mix
-
2 cups cold milk
-
1 (14 oz) can sweetened condensed milk
-
1 tsp vanilla extract
-
1 (8 oz) tub whipped topping, thawed
-
4-5 ripe bananas, sliced
-
1 (11 oz) box vanilla wafers
Instructions
-
Step 1
In a large mixing bowl, whisk together the instant vanilla pudding mix and cold milk for about two minutes until smooth and thickened. -
Step 2
Pour in the sweetened condensed milk and vanilla extract. Gently fold until completely incorporated and the mixture is glossy. -
Step 3
Add the thawed whipped topping to the pudding mixture. Gently fold until no streaks are visible and the mixture is uniform. -
Step 4
To assemble, start with a layer of vanilla wafers at the bottom of your serving dish. Add a layer of sliced bananas over the wafers. -
Step 5
Spoon about half of the pudding mixture over the bananas, spreading evenly. Repeat the layers: vanilla wafers, bananas, and the remaining pudding mixture. -
Step 6
Cover the dish tightly and chill in the refrigerator for at least 4 hours, or preferably overnight, to allow flavors to meld.
Important Information
Nutrition Facts (Per Serving)
It is important to consider this information as approximate and not to use it as definitive health advice.
Allergy Information
Please check ingredients for potential allergens and consult a health professional if in doubt.