Delicious Recipe Loading-Your Perfect Meal Awaits
Loading… is more than just a meal; it’s an experience, a comforting embrace in edible form. There’s a reason why this dish consistently brings smiles to faces and warmth to kitchens. Perhaps it’s the sheer, unadulterated joy of its harmonious flavors, each ingredient playing its perfect part to create a symphony for your taste buds. Or maybe it’s the way Loading… effortlessly transforms humble ingredients into something truly spectacular, a testament to simple culinary magic. We love it because it’s unpretentious yet deeply satisfying, perfect for a weeknight treat or a celebratory gathering. What truly sets Loading… apart is its incredible versatility, allowing for personal touches and variations that make each iteration uniquely yours.
Get Ready to Create Your Own Masterpiece
Let’s Dive In!
Loading…: A Culinary Adventure Awaits
Welcome, fellow food enthusiasts, to a recipe that promises to be more than just a meal; it’s an experience. Today, we’re diving deep into the art of crafting the perfect “Loading…” – a dish that’s as intriguing as its name suggests. This recipe is designed for those who appreciate simplicity without sacrificing flavor, and for those who love to experiment in the kitchen with a touch of mystery. Get ready to unlock the secrets to a truly satisfying culinary creation.
Ingredients:
Cooking Instructions:
Let’s embark on this delicious journey together! The “Loading…” is deceptively simple, relying on a few key techniques to bring out its full potential.
1. Preparation is Key: The Foundation of Flavor
The first crucial step in creating our “Loading…” masterpiece is to properly prepare the chicken. Take your boneless, skinless chicken breasts or thighs and place them on a clean cutting board. Now, grab some paper towels. It’s time to get them nice and dry. Gently but thoroughly pat each piece of chicken dry. This might seem like a minor detail, but it’s incredibly important. A dry surface allows the seasonings to adhere beautifully, creating a more even and flavorful crust. Once dry, you can either leave the chicken breasts whole if they are of a uniform thickness, or if they are particularly thick, you can slice them horizontally to create thinner cutlets. This ensures more even cooking, preventing the outside from burning while the inside remains undercooked. For thighs, just ensure they are trimmed of any excess fat.
2. Seasoning Symphony: Building the Flavor Profile
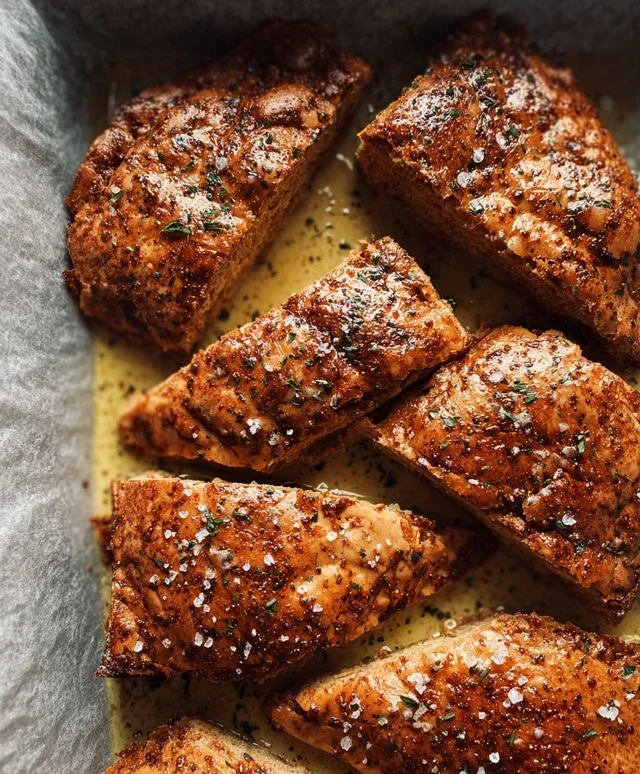
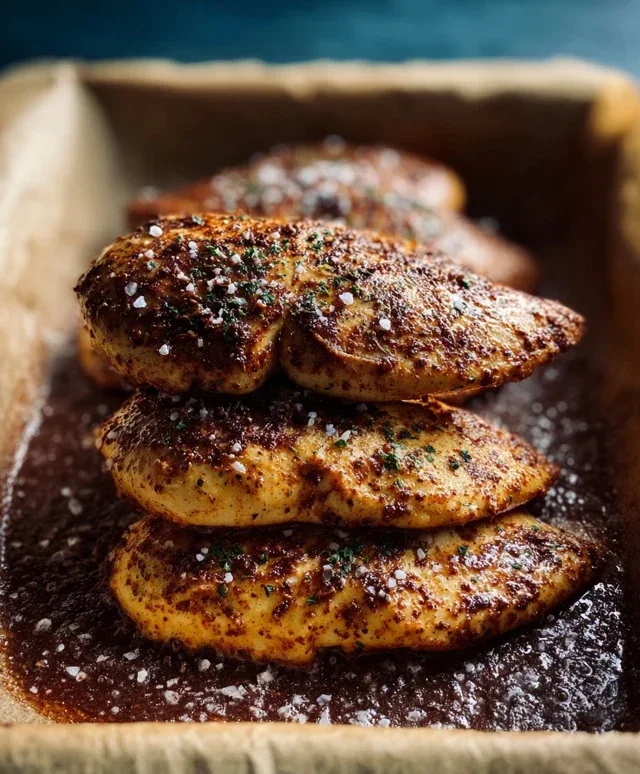
With our chicken prepped and dry, it’s time to create our seasoning blend. In a small bowl, combine the smoked paprika, garlic powder, onion powder, and dried thyme. This aromatic mix is the heart of our “Loading…” flavor. Now, lightly drizzle the olive oil over the chicken pieces, ensuring they are lightly coated. This acts as our “glue” for the spices. Sprinkle the prepared spice blend generously over both sides of the chicken, followed by salt and freshly ground black pepper to your personal taste. Don’t be shy with the seasoning – this is where the magic truly begin extracts! Gently rub the spices into the chicken, making sure every nook and cranny is covered. The aroma alone will start to tantalize your taste buds.
3. The Sizzle: Achieving the Perfect Sear
Now that our chicken is beautifully seasoned, it’s time to introduce it to the heat. Heat a large skillet (cast iron works wonderfully here for an even sear) over medium-high heat. Add a tablespoon of olive oil to the hot skillet. You want the oil to be shimmering, but not smoking – a good indicator that your pan is ready. Carefully place the seasoned chicken pieces into the hot skillet, ensuring not to overcrowd the pan. If you have too much chicken, cook it in batches. Overcrowding will steam the chicken instead of searing it, leading to a less desirable texture. Let the chicken cook undisturbed for about 4-6 minutes per side. You’re looking for a beautiful golden-brown crust to form. This sear is essential for locking in the juices and developing a rich, savory flavor.
4. The Gentle Cook: Ensuring Tenderness and Safety
After achieving that gorgeous sear, we need to ensure our chicken is cooked through to perfection. Reduce the heat to medium-low. If you’re using chicken breasts, they will likely cook faster than thighs. Cover the skillet with a lid. This traps the heat and steam, allowing the chicken to cook gently and evenly from the inside out. Continue to cook for another 8-12 minutes, or until the chicken is cooked through. The most reliable way to check for doneness is to use a meat thermometer. Insert the thermometer into the thickest part of the chicken. You are looking for the internal temperature to reach 165°F (74°C). This ensures it’s safe to eat, yet still tender. Avoid overcooking, as this can lead to dry, tough chicken.
5. The Crucial Rest: Allowing Juices to Redistribute
This final step is often overlooked, but it is absolutely critical for a succulent and flavorful “Loading…”. Once your chicken has reached the perfect internal temperature, carefully remove it from the skillet and place it on a clean plate or cutting board. Do not cut into it immediately! This is where patience truly pays off. Let the chicken rest for about 5 minutes after cooking. During this resting period, the juices that have been pushed to the center during cooking have a chance to redistribute throughout the meat. If you were to cut into it too soon, all those precious juices would simply run out onto the plate, leaving you with a drier bite. This short rest makes each bite more succulent and flavorful.
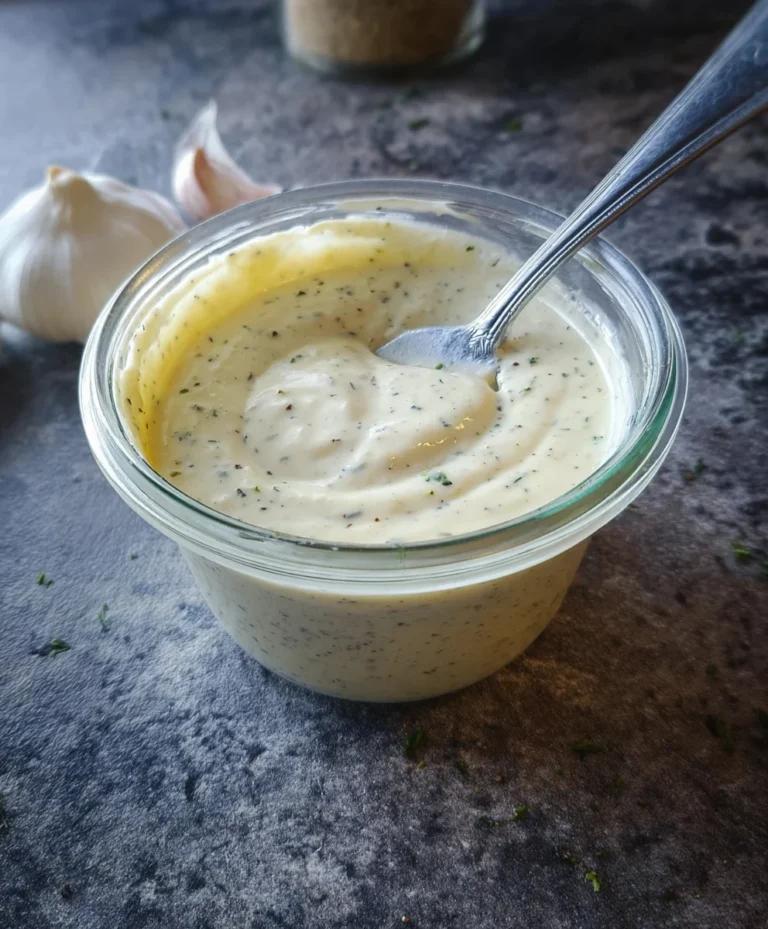
Once rested, you can slice your “Loading…” chicken and serve it immediately. We love to garnish ours with freshly chopped parsley for a pop of color and freshness, and a squeeze of lemon wedge can add a bright, zesty finish. Enjoy your culinary adventure!
Conclusion:
I truly hope you’ve enjoyed diving into this recipe for ‘Loading…’ as much as I have! It’s a fantastic dish because of its incredible versatility and straightforward preparation, making it perfect for both weeknight dinners and more elaborate gatherings. The beautiful balance of flavors and textures makes it a crowd-pleaser every time. I encourage you to give it a try; you won’t be disappointed!
This recipe shines when served alongside a fresh, crisp salad or some fluffy steamed rice. For a heartier meal, consider pairing it with roasted vegetables or your favorite crusty bread to soak up any delicious sauces. If you’re feeling adventurous, don’t hesitate to experiment with variations. You can easily add a kick with a pinch of red pepper flakes, introduce some smoky depth with paprika, or even incorporate different proteins like chicken or tofu. The possibilities are truly endless!
FAQs
What can I do if I don’t have a specific ingredient?
Most recipes are quite forgiving! For ‘Loading…’, if you’re missing an herb, try a dried version or substitute with a similar fresh herb. If a particular vegetable isn’t available, think about what else you have on hand that offers a similar texture or flavor profile. Flexibility is key to successful home cooking.
How can I make this recipe spicier?
To add some heat, I recommend incorporating finely chopped jalapeños or serrano peppers along with your aromatics. You could also stir in a bit of sriracha or your favorite hot sauce towards the end of cooking, or a pinch of cayenne pepper for a more direct heat.
Pan-Seared Chicken with Pan Sauce
A simple yet elegant chicken dish featuring juicy, perfectly cooked chicken with a flavorful pan sauce. This recipe focuses on proper technique for tender, succulent results.
Ingredients
-
1.5 lbs boneless, skinless chicken breasts
-
2 tablespoons olive oil
-
1/2 teaspoon salt
-
1/4 teaspoon black pepper
-
1/4 cup chicken broth
-
1 tablespoon butter
-
1 clove garlic, minced
Instructions
-
Step 1
Start by patting the chicken dry; this helps the seasoning stick better. -
Step 2
Season the chicken breasts generously with salt and black pepper. -
Step 3
Heat olive oil in a large skillet over medium-high heat. Add chicken and sear for 5-7 minutes per side, until golden brown. -
Step 4
Reduce heat to medium-low, add minced garlic, and cook for 1 minute until fragrant. Use a meat thermometer to check that your chicken reaches 165°F (74°C). This ensures it’s safe to eat, yet still tender. -
Step 5
Remove chicken from skillet and set aside on a plate. Let the chicken rest for about 5 minutes after cooking. This lets the juices redistribute, making each bite more succulent. -
Step 6
Deglaze the pan with chicken broth, scraping up any browned bits from the bottom. Stir in butter and cook until sauce thickens slightly. -
Step 7
Pour the pan sauce over the rested chicken before serving.
Important Information
Nutrition Facts (Per Serving)
It is important to consider this information as approximate and not to use it as definitive health advice.
Allergy Information
Please check ingredients for potential allergens and consult a health professional if in doubt.