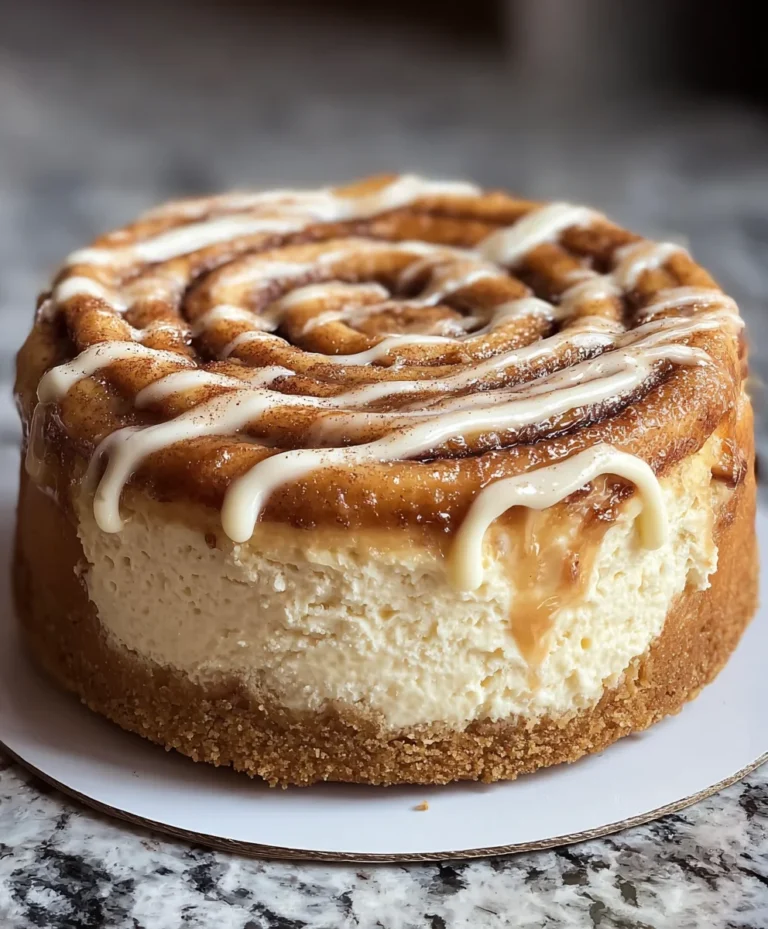
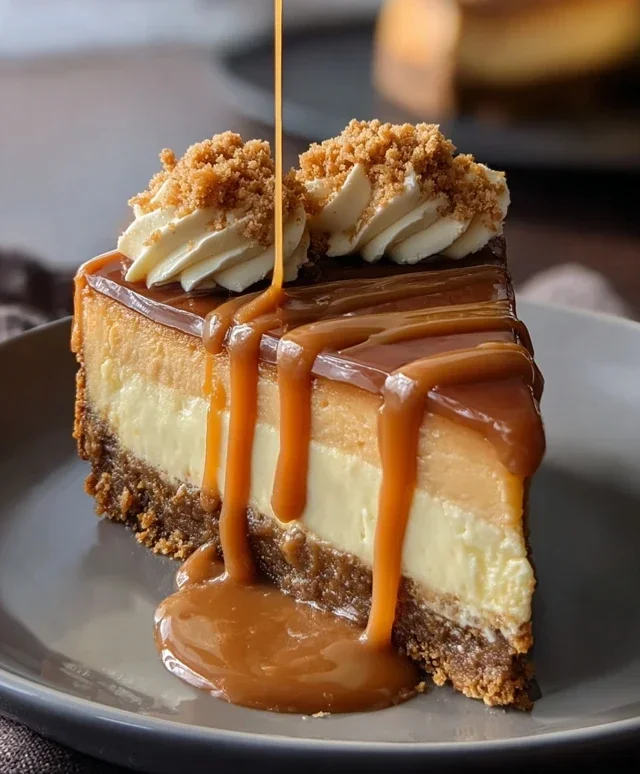
Cookie Butter Caramel Cheesecake-Dreamy Dessert
Cookie Butter Caramel Cheesecake. Just the thought of it sends shivers of pure dessert delight down my spine! If you, like me, have a deep and abiding love for the creamy, dreamy embrace of cheesecake and the irresistible allure of cookie butter, then this recipe is about to become your new obsession. We’re talking about a decadent masterpiece that elevates the humble cheesecake to legendary status. The magic lies in the harmonious marriage of two beloved flavors: the warm, spiced nuttiness of cookie butter, swirled generously throughout a velvety smooth cheesecake, and then crowned with a luscious, golden caramel drizzle. It’s a symphony of textures and tastes that has everyone raving. This Cookie Butter Caramel Cheesecake isn’t just a dessert; it’s an experience, a hug in edible form, and quite frankly, the answer to all your sweet cravings.
Cookie Butter Caramel Cheesecake
Get ready to indulge in a dessert masterpiece that marries the rich, comforting flavors of cookie butter and caramel into a luxuriously creamy cheesecake. This Cookie Butter Caramel Cheesecake is a showstopper, perfect for celebrations, a special treat, or simply when you’re craving something truly decadent. We’re going to build this beauty layer by layer, ensuring every bite is an experience to remember. Whether you’re a seasoned baker or just starting out, this recipe is designed to be approachable and incredibly rewarding. The base, infused with the warm spice of Biscoff cookies, provides a delightful contrast to the smooth, tangy cheesecake filling. Then, we crown it all with a generous swirl of gooey caramel. Let’s dive in!
Ingredients:
Creating the Perfect Crust
The foundation of any great cheesecake is its crust, and ours is no exception. We’ll start by transforming those delicious Biscoff cookies into fine crum extractbs. You can achieve this by pulsing them in a food processor until they resemble coarse sand, or by placing them in a zip-top bag and crushing them with a rolling pin. Once you have your crum extractbs, it’s time to bind them together. Mix the cookie crum extractbs thoroughly with the melted butter until all the crum extractbs are moistened. This mixture should hold together when you press it between your fingers.
Now, let’s get this crust into our springform pan. I recommend using a 9-inch springform pan for this recipe. Press the buttered cookie crum extractbs firmly and evenly into the bottom and slightly up the sides of the pan. Using the flat bottom of a measuring cup or a glass can help you create a compact and even layer. This firm pressing is crucial for preventing your crust from crum extractbling when you slice the cheesecake later. Once your crust is pressed, pop it into the refrigerator for at least 15-20 minutes to firm up while you prepare the filling. This chilling step helps the crust set and makes it less likely to break apart.
Crafting the Creamy Cheesecake Filling
This is where the magic truly happens. We’ll begin extract by ensuring our cream cheese is perfectly softened. This means leaving it at room temperature for at least an hour, or gently microwaving it for short bursts until it’s pliable but not melted. In a large mixing bowl, beat the softened cream cheese with an electric mixer until it’s completely smooth and free of lumps. This might take a few minutes, but it’s essential for achieving that signature silky texture in our cheesecake.
Next, we’ll introduce the star of our filling: the cookie butter. Add the ½ cup of cookie butter to the cream cheese and beat again until it’s fully incorporated and the mixture is smooth and creamy. Gradually add the brown sugar and continue mixing until it’s well combined. Now, it’s time for the liquid elements. Pour in the heavy whipping cream and vanilla extract. Mix on low speed until just combined; we don’t want to overmix at this stage.
Finally, we’ll add the eggs, one at a time. Beat on low speed until each egg is just incorporated before adding the next. Overmixing at this stage can lead to a cheesecake with a cracked surface, so gentle mixing is key. Once the eggs are incorporated, give the batter one final, gentle stir to ensure everything is evenly blended.
Assembling and Baking Your Cheesecake
Now that we have our delicious filling, it’s time to bring it all together. Retrieve your chilled crust from the refrigerator. Pour the cheesecake filling evenly over the pressed cookie crust. Gently smooth the top with a spatula to create an even surface.
For this baked version, we’re going to bake it to perfection. Preheat your oven to 325°F (160°C). To ensure a perfectly smooth and evenly cooked cheesecake, a water bath is highly recommended. Wrap the outside of your springform pan tightly with a couple of layers of heavy-duty aluminum foil. This will prevent water from seeping into the pan. Place the foil-wrapped springform pan into a larger baking pan, like a roasting pan. Carefully pour hot water into the larger baking pan, about halfway up the sides of the springform pan.
Carefully transfer the entire setup to your preheated oven. Bake for 50-60 minutes, or until the edges of the cheesecake are set but the center still has a slight wobble. It should look firm around the edges and slightly jiggly in the middle. This gentle cooking method helps prevent cracking and ensures a creamy texture.
Cooling and Chilling for Ultimate Flavor
This is arguably the most important, and often the hardest, part of making cheesecake: patience! Once the cheesecake is done baking, turn off the oven but leave the cheesecake inside with the oven door slightly ajar for about an hour. This slow cooling process helps prevent drastic temperature changes that can lead to cracking.
After the hour in the oven, carefully remove the cheesecake from the water bath and place it on a wire rack to cool completely to room temperature. Once it’s at room temperature, cover the cheesecake loosely with plastic wrap and refrigerate for at least 6 hours, or preferably overnight. This chilling period is crucial for the cheesecake to firm up completely and for the flavors to meld beautifully. Do not skip this step!
The Glorious Caramel Swirl and Serving
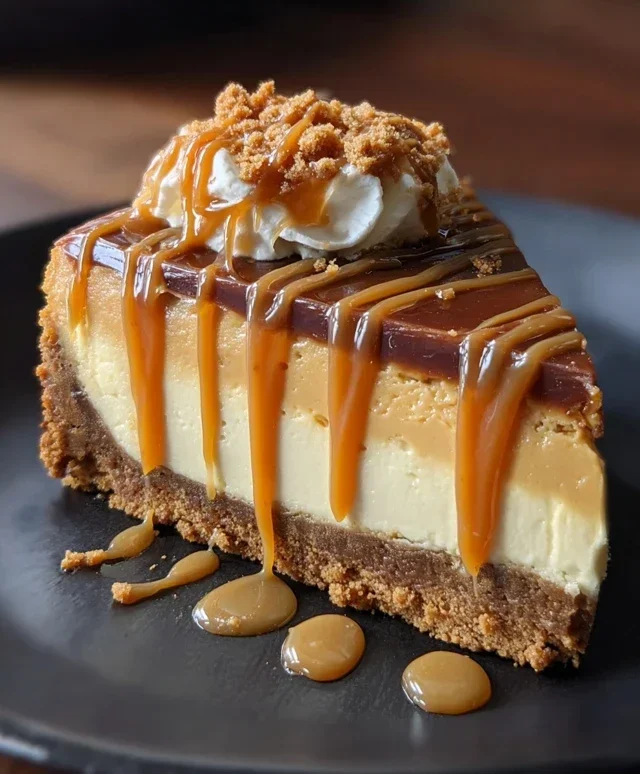
The final touch that makes this cheesecake utterly irresistible is the caramel. Once your cheesecake is thoroughly chilled, it’s time for the caramel drizzle. Gently remove the sides of the springform pan. Warm your ½ cup of caramel sauce slightly so it’s pourable but not too hot. Drizzle the caramel sauce generously over the top of the cheesecake in a decorative pattern. You can use a spoon to create swirls, or simply pour it in zig-zags.
To elevate this masterpiece even further, top each slice with a dollop of whipped cream and a sprinkle of extra Biscoff cookie crum extractbs. The combination of the crunchy crum extractbs, the fluffy whipped cream, and the rich cheesecake with its caramel ribbon is pure bliss. Slice and serve your glorious Cookie Butter Caramel Cheesecake and enjoy the incredible flavors you’ve created!
Conclusion:
There you have it – a show-stopping Cookie Butter Caramel Cheesecake that’s sure to impress! This recipe truly is a triumph, blending the irresistible nutty sweetness of cookie butter with the luscious, gooey richness of homemade caramel, all atop a creamy, decadent cheesecake base. It’s a dessert that hits all the right notes: comforting, indulgent, and utterly delicious. I can’t wait for you to experience the magic of this flavor combination!
This cheesecake is fantastic on its own, but it also pairs beautifully with a dollop of whipped cream or a scattering of crushed cookie butter cookies. For an extra special touch, consider drizzling it with even more warm caramel sauce right before serving. If you’re feeling adventurous, you could even swirl some cookie butter into the cheesecake batter before baking for an even more intense cookie butter flavor. Don’t be afraid to experiment and make it your own!
I truly hope you’ll give this Cookie Butter Caramel Cheesecake a try. It’s the perfect centerpiece for any celebration, a delightful treat for a cozy night in, or simply a way to indulge your sweet tooth. I’m confident you’ll fall in love with every single bite!
Frequently Asked Questions:
Can I make this cheesecake ahead of time?
Absolutely! This Cookie Butter Caramel Cheesecake is actually best made a day in advance. This allows the flavors to meld beautifully and ensures the cheesecake has ample time to set properly in the refrigerator. Once it’s fully chilled, you can add the caramel topping and any other garnishes just before serving.
What kind of cookies work best for the crust?
While cookie butter cookies (like speculoos or Biscoff) are my top choice for that authentic flavor, you can also use grabeef ham crackers or shortbread cookies for the crust. If you use a plainer cookie, you might want to add a touch more sugar to the crust mixture for sweetness. Don’t be afraid to experiment with your favorite crum extractbly cookies!
How do I store leftover cheesecake?
Leftover Cookie Butter Caramel Cheesecake should be stored in an airtight container in the refrigerator. It will stay fresh for about 3-4 days. If you have extra caramel sauce, you can store that separately in an airtight container in the fridge as well and gently reheat it to drizzle over individual slices.
Cookie Butter Caramel Cheesecake
A decadent cheesecake featuring a Biscoff cookie crust, creamy cookie butter filling, and a rich caramel topping.
Ingredients
-
1 ½ cups Biscoff cookie crumbs
-
¼ cup melted butter
-
16 oz cream cheese, softened
-
½ cup cookie butter (Biscoff spread)
-
½ cup brown sugar
-
½ cup heavy whipping cream
-
1 tsp vanilla extract
-
2 eggs
-
½ cup caramel sauce
-
Whipped cream
-
Extra Biscoff crumbs
Instructions
-
Step 1
Preheat oven to 350°F (175°C). Line a 9-inch springform pan with parchment paper. -
Step 2
Combine Biscoff cookie crumbs and melted butter. Press into the bottom of the prepared springform pan to form the crust. -
Step 3
In a large bowl, beat cream cheese until smooth. Add cookie butter and brown sugar, beating until well combined. -
Step 4
Beat in heavy whipping cream and vanilla extract. Add eggs one at a time, mixing until just combined after each addition. -
Step 5
Pour the filling over the cookie crust. Bake for 50-60 minutes, or until the edges are set and the center is still slightly jiggly. -
Step 6
Let the cheesecake cool in the oven with the door ajar for 1 hour. Then, let it cool completely on a wire rack. -
Step 7
Once cooled, drizzle generously with caramel sauce and top with whipped cream and extra Biscoff crumbs before serving.
Important Information
Nutrition Facts (Per Serving)
It is important to consider this information as approximate and not to use it as definitive health advice.
Allergy Information
Please check ingredients for potential allergens and consult a health professional if in doubt.