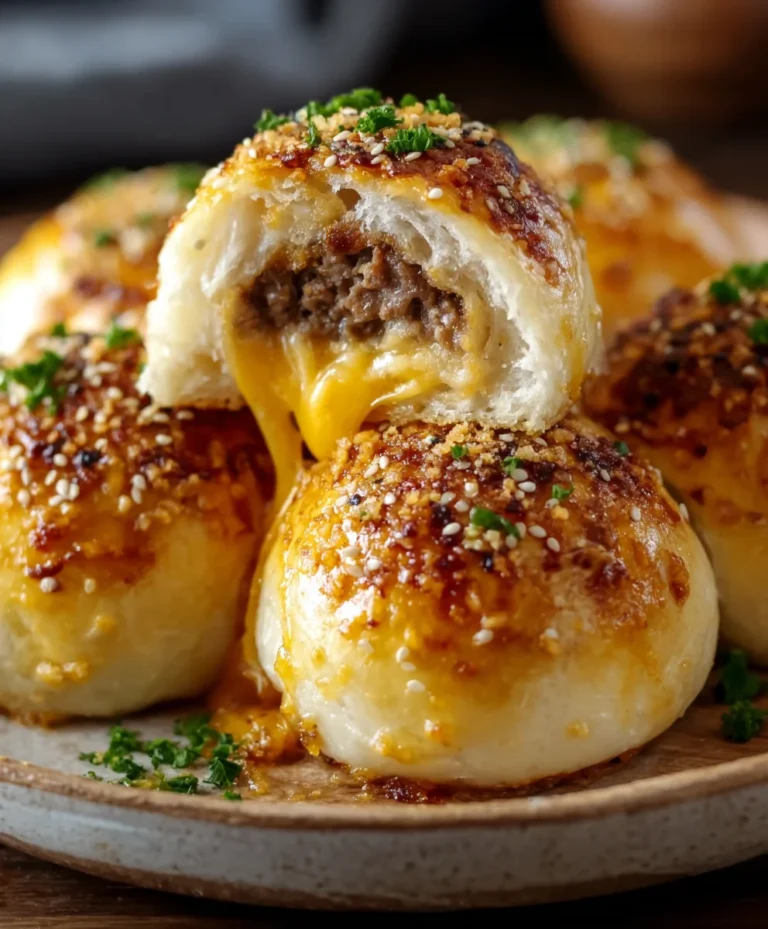
Cheesy Dynamite Chicken Buns-Irresistible Flavor
Cheesy Dynamite Chicken Buns are more than just a snack; they’re an explosion of flavor and pure comfort food bliss! If you’ve ever craved something utterly satisfying, something that hits all the right notes of savory, creamy, and a hint of spice, then you’re in for a treat. These delightful little pockets of joy have captured hearts (and stomachs!) everywhere for a reason. The magic lies in the perfect marriage of tender, seasoned chicken, a rich, molten cheese filling, all encased in a soft, pillowy bun that’s baked to golden perfection. What makes our Cheesy Dynamite Chicken Buns truly special is that addictive, slightly fiery kick that earns them their “dynamite” name, balanced beautifully by the creamy cheese. Get ready to experience a flavor adventure you won’t soon forget!
Get Ready to Ignite Your Taste Buds!
The Ultimate Cheesy Dynamite Chicken Bun Experience Awaits!
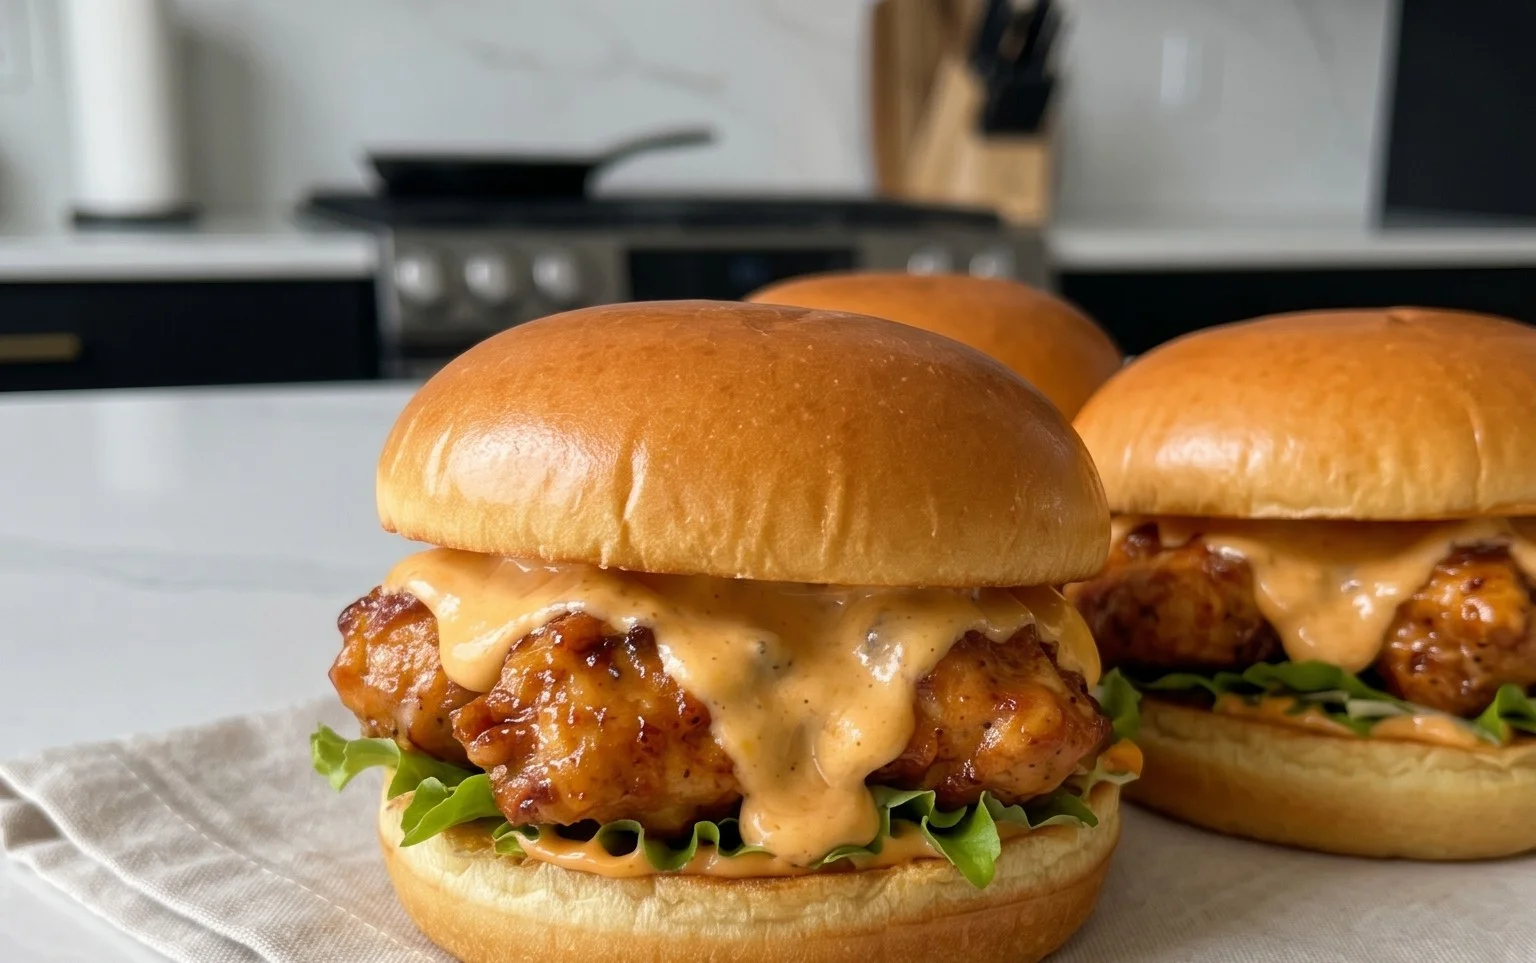
Cheesy Dynamite Chicken Buns
Get ready to experience a flavor explosion with these Cheesy Dynamite Chicken Buns! Imagin extracte fluffy, slightly sweet buns embracing a fiery, cheesy chicken filling. These are perfect for a satisfying lunch, a fun appetizer, or even a unique dinner option. The “dynamite” comes from a subtle kick of spice that’s balanced by the richness of the cheese and the tenderness of the chicken. Making them from scratch might seem daunting, but I promise, the delicious reward is well worth the effort. Let’s get baking!
Ingredients:
Dough Preparation
The foundation of these incredible buns is a soft, enriched dough. We’ll start by activating our yeast to ensure it’s alive and ready to work its magic. In a medium bowl, combine the 75 ml of lukewarm water with the 15 g of honey. Stir gently until the honey is dissolved. Then, sprinkle the 9 g of instant yeast over the top. Let this mixture sit for about 5-10 minutes. You should see a frothy layer form on the surface – this is a good sign that your yeast is active! If you don’t see any froth, your yeast might be old, and it’s best to start with a fresh packet.
Next, in a large mixing bowl (or the bowl of your stand mixer), add the 200 ml of milk and the 1 egg. Whisk them together until well combined. Add the activated yeast mixture to the milk and egg mixture. Give it a gentle stir. Now, gradually add the 600 g of flour and 8 g of salt. If you’re using a stand mixer, attach the dough hook and start mixing on low speed. If you’re kneading by hand, gradually incorporate the flour into the wet ingredients. Once the ingredients start to come together, add the 30 ml of sunflower oil. Continue mixing or kneading for about 8-10 minutes, or until the dough is smooth, elastic, and no longer sticky. You should be able to stretch a small piece of the dough thinly without it tearing easily.
Once the dough is properly kneaded, it’s time for its first rise. Lightly grease a clean bowl with a little more sunflower oil. Place the dough in the bowl, turning it to coat all sides. Cover the bowl tightly with plastic wrap or a damp kitchen towel. Find a warm, draft-free spot in your kitchen and let the dough rise for about 1 to 1.5 hours, or until it has doubled in size. This process allows the yeast to produce carbon dioxide, which gives the buns their airy texture.
Chicken Filling Preparation
While our dough is rising, let’s prepare the “dynamite” filling! Dice the 700 g of chicken filet into small, bite-sized pieces. You want pieces that are easy to manage within the buns. In a separate bowl, season the chicken pieces with 5 g of salt, 2 g of cayenne powder, 1.5 g of onion powder, and 1 g of black pepper powder. Make sure each piece of chicken is coated evenly with the spices. This seasoning blend will give our filling that signature kick.
In a skillet, melt the 25 g of butter over medium heat. Once the butter is melted and shimmering, add the seasoned chicken pieces. Cook the chicken for about 8-10 minutes, stirring occasionally, until it is cooked through and no longer pink in the center. Be careful not to overcook the chicken, as it can become dry. Once the chicken is cooked, stir in the 40 g of grated Parmesan cheese. Continue to cook for another minute or two, allowing the cheese to melt and coat the chicken beautifully. This creates a wonderfully creamy and cheesy element. Remove the skillet from the heat and let the chicken filling cool slightly.
Assembling and Baking the Buns
Once the dough has doubled in size, punch it down gently to release the air. Turn the dough out onto a lightly floured surface. Divide the dough into equal portions. The number of portions will depend on how large you want your buns to be, but for medium-sized buns, aim for about 12-15 portions. Roll each portion into a ball.
Now, for the assembly! Take one dough ball and flatten it into a disc. Spoon a generous amount of the cooled cheesy chicken filling into the center of the disc. Don’t overfill, or it will be difficult to seal. Carefully bring the edges of the dough together to enclose the filling, pinching them tightly to seal. You want to create a nice, senon-alcoholic aled bun. Place the senon-alcoholic aled bun, seam-side down, onto a baking sheet lined with parchment paper. Repeat this process with the remaining dough balls and filling.
Once all the buns are assembled, cover them loosely with a kitchen towel and let them rest for another 20-30 minutes. This second rise, sometimes called proofing, will help them become even lighter and fluffier. Preheat your oven to 190 degrees Celsius (375 degrees Fahrenheit) during this resting period.
Before baking, you can optionally brush the tops of the buns with a little beaten egg or milk for a golden sheen. Bake the Cheesy Dynamite Chicken Buns for 15-20 minutes, or until they are golden brown and sound hollow when tapped on the bottom. Keep an eye on them, as oven temperatures can vary.
Let the buns cool slightly on a wire rack before serving. They are best enjoyed warm, when the cheese is still melty and the chicken filling is wonderfully flavorful. Enjoy your homemade, spicy, cheesy delights!

Conclusion:
And there you have it – your guide to creating absolutely irresistible Cheesy Dynamite Chicken Buns! This recipe is a winner because it strikes the perfect balance of comforting, savory, and just the right amount of kick. The creamy, spicy chicken filling encased in soft, fluffy buns is a flavor explosion that’s sure to become a family favorite or the star of your next get-together. They’re wonderfully versatile and surprisingly easy to whip up, making them an excellent choice for a quick weeknight meal or an impressive appetizer.
I encourage you to give these Cheesy Dynamite Chicken Buns a try! Don’t be afraid to experiment with the spice level to suit your preference. They’re fantastic served warm, perhaps alongside a crisp green salad for a lighter meal, or as a hearty snack. For variations, consider adding finely chopped bell peppers to the chicken mixture for extra crunch and flavor, or swap out the chicken for shredded beef or even a vegetarian option like seasoned tofu.
Frequently Asked Questions:
Can I make the Cheesy Dynamite Chicken Buns ahead of time?
Yes, you absolutely can! You can prepare the chicken filling a day in advance and store it in an airtight container in the refrigerator. You can also assemble the buns and refrigerate them before baking, just be aware they might need a slightly longer baking time. Alternatively, you can bake them completely, let them cool, and then reheat them gently in the oven or microwave.
What if I don’t like spicy food?
No problem at all! The “dynamite” aspect comes from the Sriracha or hot sauce. You can significantly reduce or even omit the hot sauce from the filling if you prefer a milder flavor. Start with a very small amount and taste as you go, or simply leave it out entirely. The cheesy chicken bun will still be delicious!
How do I store leftover Cheesy Dynamite Chicken Buns?
Store any leftover buns in an airtight container at room temperature for up to two days, or in the refrigerator for up to four days. They are best enjoyed fresh, but reheating will still make them quite enjoyable.
Cheesy Dynamite Chicken Buns
Spicy and cheesy chicken buns, perfect for a flavorful snack or meal. This recipe combines tender chicken with a kick of spice, all wrapped in a soft, cheesy bun.
Ingredients
-
75 ml water
-
200 ml milk
-
15 g honey
-
9 g instant yeast
-
1 egg
-
30 ml sunflower oil
-
600 g flour
-
8 g salt
-
25 g butter
-
40 g Parmesan cheese
-
2 g cayenne powder
-
1.5 g onion powder
-
1 g black pepper powder
-
700 g chicken filet
-
5 g salt
Instructions
-
Step 1
In a large bowl, combine warm water, milk, honey, and instant yeast. Let it sit for 5-10 minutes until frothy. -
Step 2
Add the egg, sunflower oil, flour, salt, and butter to the yeast mixture. Mix until a dough forms, then knead for 8-10 minutes until smooth and elastic. -
Step 3
Place the dough in a greased bowl, cover, and let it rise in a warm place for 1 hour, or until doubled in size. -
Step 4
While the dough rises, dice the chicken filet. In a bowl, mix diced chicken with Parmesan cheese, cayenne powder, onion powder, black pepper powder, and 5g salt. Cook the chicken mixture in a pan until browned and cooked through. -
Step 5
Punch down the risen dough and divide it into 12 equal portions. Flatten each portion, place a portion of the cooked chicken mixture in the center, and wrap the dough around the filling, sealing the edges well. Form into buns. -
Step 6
Place the buns on a baking sheet lined with parchment paper, cover, and let them rest for another 20 minutes. -
Step 7
Preheat oven to 180°C (350°F). Bake the buns for 20-25 minutes, or until golden brown.
Important Information
Nutrition Facts (Per Serving)
It is important to consider this information as approximate and not to use it as definitive health advice.
Allergy Information
Please check ingredients for potential allergens and consult a health professional if in doubt.