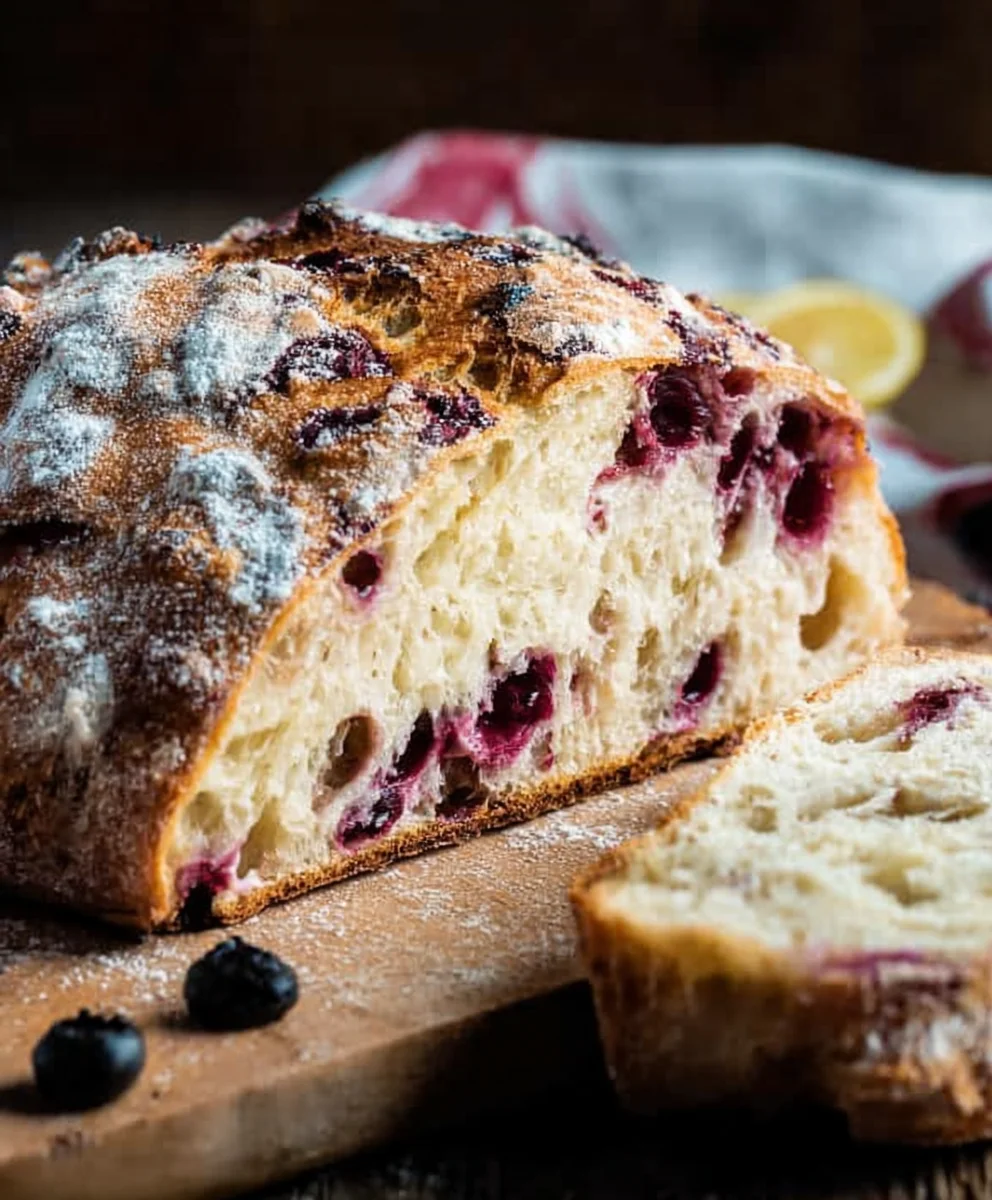
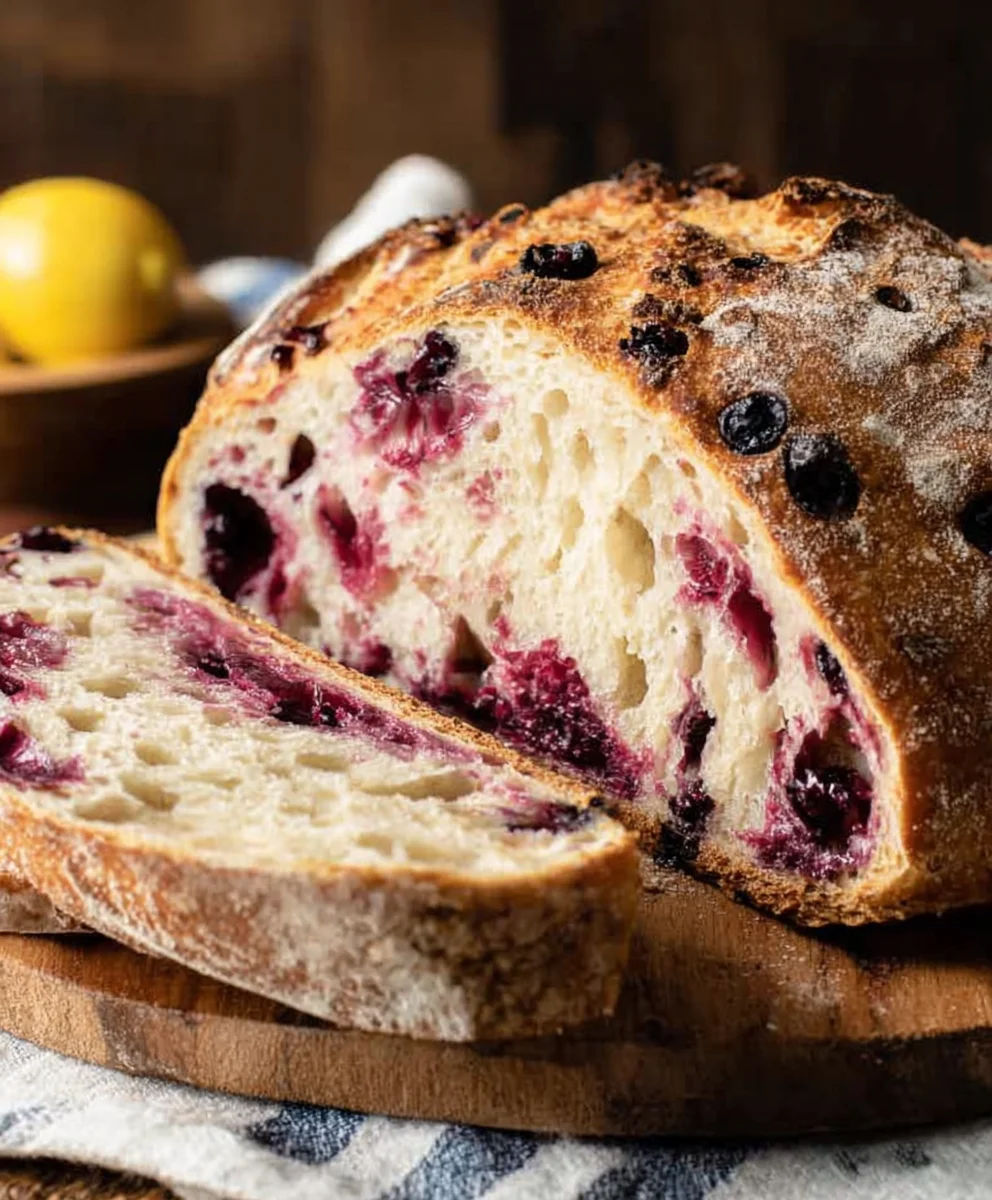
Blueberry Lemon Sourdough Bread Recipe
Blueberry Lemon Sourdough Bread is a delightful symphony of tangy, sweet, and subtly sour notes, all wrapped up in a perfectly chewy and airy crust. There’s something undeniably magical about that first slice, warm from the oven, with its vibrant bursts of blueberry and the zesty perfume of fresh lemon. It’s no wonder this particular combination has captured the hearts (and taste buds) of so many home bakers. Unlike your average loaf, this Blueberry Lemon Sourdough Bread offers a complexity that’s both comforting and invigorating. The natural tang of the sourdough starter plays beautifully with the sweetness of plump blueberries, while the bright citrus of lemon zest cuts through, creating a balanced flavor profile that’s utterly irresistible. This isn’t just bread; it’s an experience, a fragrant testament to the magic of fermentation and the simple joy of fresh ingredients coming together.”
Ingredients:
- 3 cups bread flour
- 1⅓ cups lukewarm water
- ¾ cup active, bubbly, and well-fed sourdough starter
- 3 tablespoons white sugar
- 1 teaspoon salt
- 1¼ cup fresh blueberries
- 1 tablespoon fresh lemon zest
Preparing the Dough
Mixing the Base Dough
The journey to a delicious Blueberry Lemon Sourdough Bread begin extracts with creating a robust and flavorful dough. In a large mixing bowl, combine the 3 cups of bread flour and 1 teaspoon of salt. Whisk these dry ingredients together briefly to ensure the salt is evenly distributed throughout the flour, which is important for controlling yeast activity and enhancing flavor. Next, add your ¾ cup of active, bubbly, and well-fed sourdough starter. This starter is the heart of your sourdough, providing that signature tang and contributing to the bread’s rise and complex flavor profile. Pour in the 1⅓ cups of lukewarm water. The water temperature is crucial; it should be neither too hot nor too cold, as this directly impacts the fermentation process of your sourdough starter. Aim for a temperature around 75-80°F (24-27°C). Finally, add the 3 tablespoons of white sugar. The sugar not only feeds the wild yeasts in your starter, promoting a more vigorous fermentation, but also contributes a subtle sweetness that balances the tartness of the blueberries and the tang of the sourdough.
Developing the Dough
Using your hands or a sturdy spoon, mix all the ingredients until a shaggy dough forms. Don’t worry about perfection at this stage; the goal is simply to bring everything together. Once the dough has just come together, cover the bowl with a clean kitchen towel or plastic wrap and let it rest for 20 to 30 minutes. This resting period, known as autolyse, allows the flour to fully hydrate and the gluten strangin extractto begin developing naturally, making the subsequent kneading process easier and more effective. After this initial rest, it’s time to incorporate the flavor powerhouses: the blueberries and lemon zest. Gently fold in the 1¼ cup of fresh blueberries and the 1 tablespoon of fresh lemon zest. Try to distribute them as evenly as possible without overworking the dough. If you’re using frozen blueberries, it’s best to thaw them and pat them dry before adding to prevent excess moisture from affecting the dough’s consistency. Be prepared for the dough to become a bit more delicate at this stage due to the addition of the berries.
Fermentation and Shaping
Bulk Fermentation
After incorporating the blueberries and lemon zest, cover the bowl again and gin extract the dough begin its bulk fermentation. This is a crucial period where the sourdough starter works its magic, developing flavor and structure. Over the next 3 to 5 hours, or until the dough has increased in volume by about 50% and appears aerated with a few small bubbles on the surface, you will perform a series of “stretch and folds.” To do this, wet your hands slightly to prevent sticking. Reach under one side of the dough, stretch it upwards gently, and fold it over onto itself. Rotate the bowl a quarter turn and repeat this stretching and folding motion four times, essentially creating a rectangle of folded dough. Perform these stretch and folds every 30 to 60 minutes during the bulk fermentation. This technique strengthens the gluten network, traps air, and helps the dough become light and airy. As you continue with the stretch and folds, you’ll notice the dough becoming smoother, more elastic, and more cohesive.
Shaping the Loaf
Once the bulk fermentation is complete and the dough has noticeably risen, it’s time to shape your loaf. Gently turn the dough out onto a lightly floured surface. Be careful not to deflate it too much. You can shape this dough into a boule (round loaf) or a batard (oval loaf). For a boule, gently flatten the dough into a rough circle. Then, bring the edges towards the center, creating tengin extractn on the surface. Imagine you’re tucking the dough under itself, creating a smooth, taut ball. For a batard, flatten the dough into a rectangle, then fold the top third down, followed by the bottom third up like a letter. Finally, roll it tightly from one end to the other, sealing the seam. Place the shaped dough seam-side down into a well-floured banneton (proofing basket) or a bowl lined with a floured tea towel. This support will help the loaf maintain its shape during the final proof.
Proofing and Baking
Cold Proofing
After shaping, cover the banneton or bowl with plastic wrap or a damp cloth. Place it in the refrigerator for a cold proof of at least 8 to 12 hours, or even up to 24 hours. This slow, cold fermentation further develops the sourdough’s tangy flavor and creates a beautiful crust. The cold temperatures slow down the yeast activity, allowing enzymes to break down starches into sugars, which contribute to a richer flavor and a deeper color when baked. This long, cold proof also makes the dough easier to score, as it becomes firmer and less sticky. The controlled environment of the refrigerator ensures a consistent and predictable outcome for your bread.
Baking the Bread
Preheat your oven to 450°F (230°C) with a Dutch oven (with its lid on) or a baking stone inside for at least 30 minutes. This ensures the oven and your baking vessel are thoroughly heated, creating the ideal environment for oven spring. Once the oven is fully preheated, carefully remove the Dutch oven from the oven. Gently invert the proofed dough from the banneton onto a piece of parchment paper. Using a sharp razor blade or a lame, score the top of the dough with your desired pattern. Scoring allows the bread to expand evenly in the oven and also adds a decorative touch. Carefully lift the parchment paper with the dough and lower it into the hot Dutch oven. Place the lid back on. Bake for 20 minutes with the lid on, then carefully remove the lid. Reduce the oven temperature to 425°F (220°C) and continue baking for another 20-25 minutes, or until the crust is a deep golden brown and the internal temperature of the bread reaches 200-210°F (93-99°C). The initial covered baking traps steam, which is essential for achieving a maximum oven spring and a thin, crispy crust. Once baked, carefully remove the loaf from the Dutch oven and place it on a wire rack to cool completely before slicing. This cooling period is crucial for the internal crum extractb structure to set properly.
Conclusion:
There you have it – a step-by-step guide to creating your own delicious Blueberry Lemon Sourdough Bread! This recipe beautifully balances the tangy, complex flavor of sourdough with the bright zestiness of lemon and the sweet bursts of blueberries. The resulting loaf is wonderfully moist with a delightful chew and a slightly crisp crust. It’s truly a treat for the senses and perfect for any occasion.
This Blueberry Lemon Sourdough Bread is incredibly versatile. Enjoy it simply toasted with a smear of butter for breakfast, or elevate it for dessert by serving slices warm with a dollop of vanilla bean ice cream or a drizzle of honey. It also makes a fantastic base for French toast or bread pudding.
Don’t be afraid to experiment! If blueberries aren’t your favorite, consider using raspberries or even a mix of berries. For an extra layer of flavor, you could add a pinch of cardamom or a touch more lemon zest. Remember, sourdough baking is a journey, and each loaf tells its own story. I encourage you to embrace the process and savor the incredibly rewarding results of this Blueberry Lemon Sourdough Bread.
Frequently Asked Questions:
Why is my Blueberry Lemon Sourdough Bread dense?
A dense loaf can be caused by several factors. Ensure your starter is active and bubbly before begin extractning. Over-mixing the dough can also develop too much gluten, leading to a tough texture. Be mindful of your bulk fermentation time; too short can result in under-proofing, and too long can cause the structure to collapse. Proper shaping and a good oven spring are crucial for a light crum extractb.
Can I use frozen blueberries in my Blueberry Lemon Sourdough Bread?
Yes, you can! If using frozen blueberries, toss them with a tablespoon of your flour from the recipe before adding them to the dough. This helps absorb excess moisture and prevents them from bleeding too much color into the dough during mixing. You may not need to thaw them completely.
My blueberries are sinking to the bottom. What did I do wrong?
This is a common issue! Coating your blueberries in a bit of flour, as mentioned above, is the best way to combat this. Gently incorporating them during the final stretch and folds of your bulk fermentation also helps distribute them more evenly within the dough structure, reducing the likelihood of them sinking.
Blueberry Lemon Sourdough Bread
A delightful sourdough bread infused with the bright flavors of blueberries and lemon zest.
Ingredients
-
3 cups bread flour
-
1⅓ cups lukewarm water
-
¾ cup active, bubbly, and well-fed sourdough starter
-
3 tablespoons white sugar
-
1 teaspoon salt
-
1¼ cup fresh blueberries
-
1 tablespoon fresh lemon zest
Instructions
-
Step 1
In a large bowl, combine bread flour and salt. Add sourdough starter, lukewarm water, and white sugar. Mix until a shaggy dough forms. Cover and let rest for 20-30 minutes (autolyse). Gently fold in blueberries and lemon zest, distributing them evenly. -
Step 2
Cover the dough and let it undergo bulk fermentation for 3-5 hours, or until it has increased in volume by 50%. During this time, perform stretch and folds every 30-60 minutes. The dough should become smoother and more elastic. -
Step 3
Gently turn the dough onto a lightly floured surface. Shape it into a boule (round) or batard (oval) loaf. Place the shaped dough seam-side down into a well-floured banneton or a bowl lined with a floured tea towel. -
Step 4
Cover the banneton and place it in the refrigerator for a cold proof of 8-12 hours, or up to 24 hours. This slow fermentation develops flavor and texture. -
Step 5
Preheat your oven to 450°F (230°C) with a Dutch oven inside for at least 30 minutes. Carefully invert the proofed dough onto parchment paper, score the top, and transfer it into the hot Dutch oven. Bake with the lid on for 20 minutes. -
Step 6
Remove the lid, reduce oven temperature to 425°F (220°C), and bake for an additional 20-25 minutes, until the crust is deep golden brown and the internal temperature reaches 200-210°F (93-99°C). Cool completely on a wire rack before slicing.
Important Information
Nutrition Facts (Per Serving)
It is important to consider this information as approximate and not to use it as definitive health advice.
Allergy Information
Please check ingredients for potential allergens and consult a health professional if in doubt.