Peppermint Brownies-Cool Minty Chocolate Indulgence
Peppermint brownies are more than just a sweet treat; they are a delightful sensory experience that captures the essence of comfort and festivity. Imagin extracte biting into a rich, fudgy square, the deep chocolate flavor slowly giving way to a cool, invigorating burst of peppermint. It’s a classic pairing that has captivated taste buds for generations, and for good reason. This isn’t your average brownie; it’s a celebration in every bite, perfect for holiday gatherings, cozy evenings, or simply when you crave something truly special. The magic lies in the perfect balance – the intense, satisfying chew of the brownie and the crisp, refreshing notes of peppermint dancing together. They evoke a sense of nostalgia for many, reminding them of cherished memories and heartwarming traditions. Get ready to elevate your brownie game with this irresistible recipe for peppermint brownies that promises to become a new favorite in your kitchen.
Ingredients:
- ½ cup unsalted butter, melted
- ¾ cup granulated sugar
- 2 large eggs
- 1 teaspoon vanilla extract
- ⅓ cup unsweetened cocoa powder
- ½ cup all-purpose flour
- ¼ teaspoon salt
- 2 tablespoons unsalted butter, softened (for the frosting)
- 1 cup powdered sugar (for the frosting)
- 1-2 tablespoons milk (for the frosting)
- ½ teaspoon peppermint extract (for the frosting)
- 2-3 drops red food coloring (optional, for the frosting)
- ¼ cup crushed candy canes (for topping)
Making the Brownie Base
Step 1: Prepare Your Baking Pan and Preheat the Oven
Before we dive into the deliciousness, it’s crucial to get your baking setup ready. Preheat your oven to 350°F (175°C). This ensures that as soon as your brownie batter is ready, it goes into a perfectly heated oven for even baking. Next, prepare your baking pan. A standard 8×8 inch square baking pan works wonderfully for this recipe. To prevent sticking and make cleanup a breeze, grease the pan generously with butter or cooking spray, and then line it with parchment paper. Leave some overhang on the sides of the parchment paper; this creates “handles” that will make it incredibly easy to lift the baked brownies out of the pan once they’ve cooled. This simple step saves a lot of frustration later on.
Step 2: Cream Together Butter, Sugar, and Eggs
In a medium-sized mixing bowl, combine the ½ cup of melted unsalted butter with the ¾ cup of granulated sugar. Whisk these together until they are well combined and have a smooth, glossy appearance. This process, known as creaming, helps to incorporate air into the mixture, which contributes to the texture of your brownies. Next, crack in your 2 large eggs, one at a time, whisking thoroughly after each addition. Ensure each egg is fully incorporated before adding the next. Finally, stir in the 1 teaspoon of vanilla extract. Vanilla extract not only adds a wonderful aroma but also enhances the overall flavor profile of the chocolate.
Step 3: Incorporate Dry Ingredients and Create the Batter
Now it’s time to add the dry ingredients. Sift in the ⅓ cup of unsweetened cocoa powder, ½ cup of all-purpose flour, and ¼ teaspoon of salt directly into the wet ingredients. Sifting is important here as it helps to remove any lumps from the cocoa powder and flour, ensuring a smoother batter and preventing pockets of dry ingredients in your finished brownies. Gently fold these dry ingredients into the wet mixture using a spatula or wooden spoon. Be careful not to overmix at this stage; just mix until no dry streaks of flour remain. Overmixing can develop the gluten in the flour too much, leading to tougher brownies. The batter will be thick and rich.
Step 4: Bake the Brownies
Pour the brownie batter into your prepared 8×8 inch baking pan, spreading it evenly with your spatula. The batter will be quite thick, so use the back of your spatula to gently press it into the corners of the pan. Place the pan in the preheated oven and bake for approximately 20-25 minutes. The exact baking time will depend on your oven, so keep an eye on them. You’ll know they’re ready when a toothpick inserted into the center comes out with moist crum extractbs attached, but not wet batter. A fewrum extractist crumbs indicate they’re perfectly fudgy. Avoid overbaking, as this will result in dry brownies. Once baked, remove the pan from the oven and let them cool completely in the pan on a wire rack. This cooling period is crucial for the brownies to set properly.
Crafting the Peppermint Frosting
Step 5: Prepare the Creamy Peppermint Frosting
While the brownies are cooling, let’s make the festive peppermint frosting. In a clean mixing bowl, cream together the 2 tablespoons of softened unsalted butter until it’s smooth and fluffy. Gradually add the 1 cup of powdered sugar, alternating with 1 tablespoon of milk, beating until you achieve a smooth and spreadable consistency. You may need to add a little more milk, a teaspoon at a time, if the frosting is too thick. Next, stir in the ½ teaspoon of peppermint extract. This is where the signature minty flavor comes from, so be sure to use good quality extract. If you desire a pop of color, add 2-3 drops of red food coloring and mix until it’s evenly distributed. The red will give your brownies a beautiful, festive look, perfect for any celebration or just to brighten your day.
Step 6: Assemble and Decorate Your Peppermint Brownies
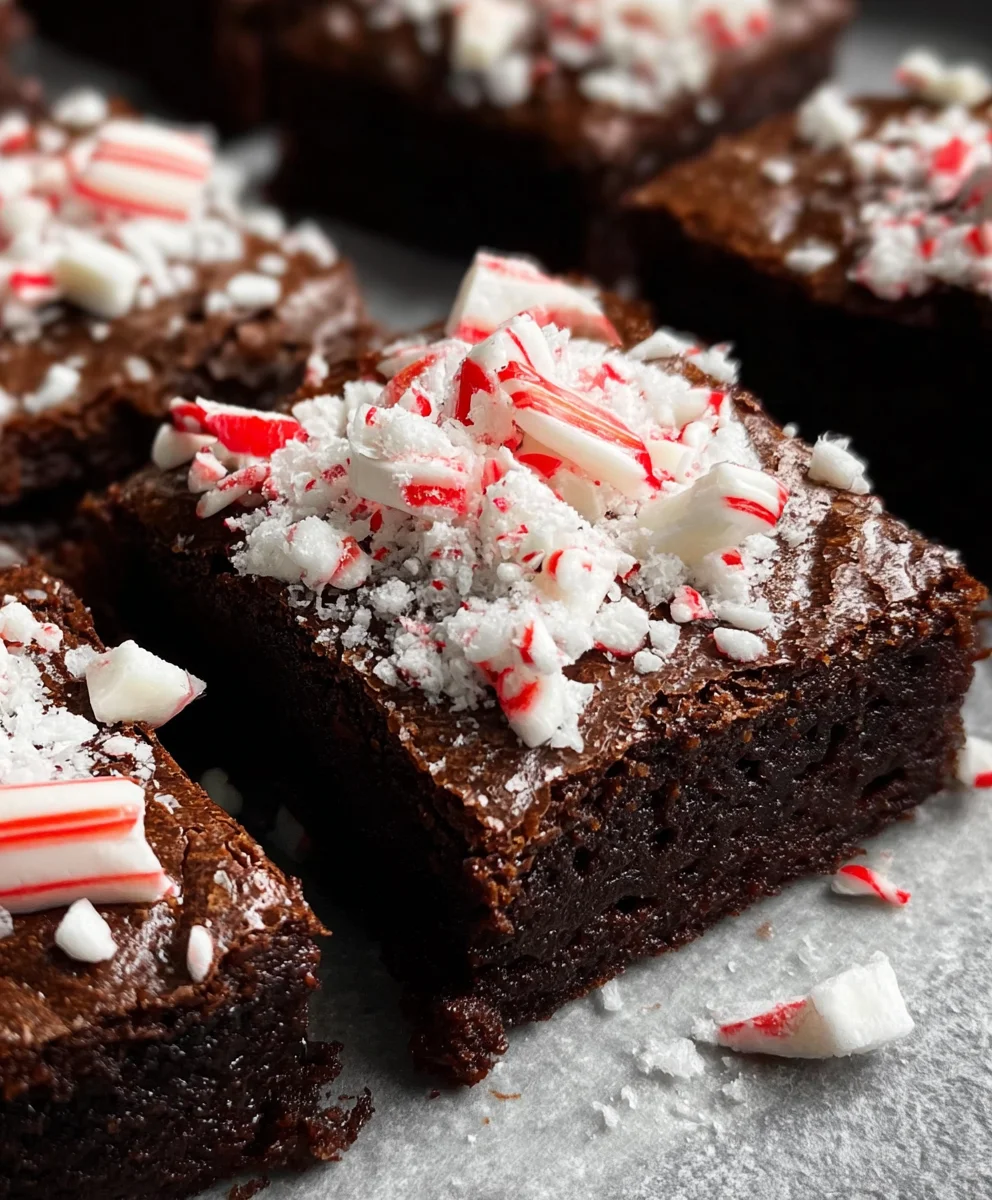
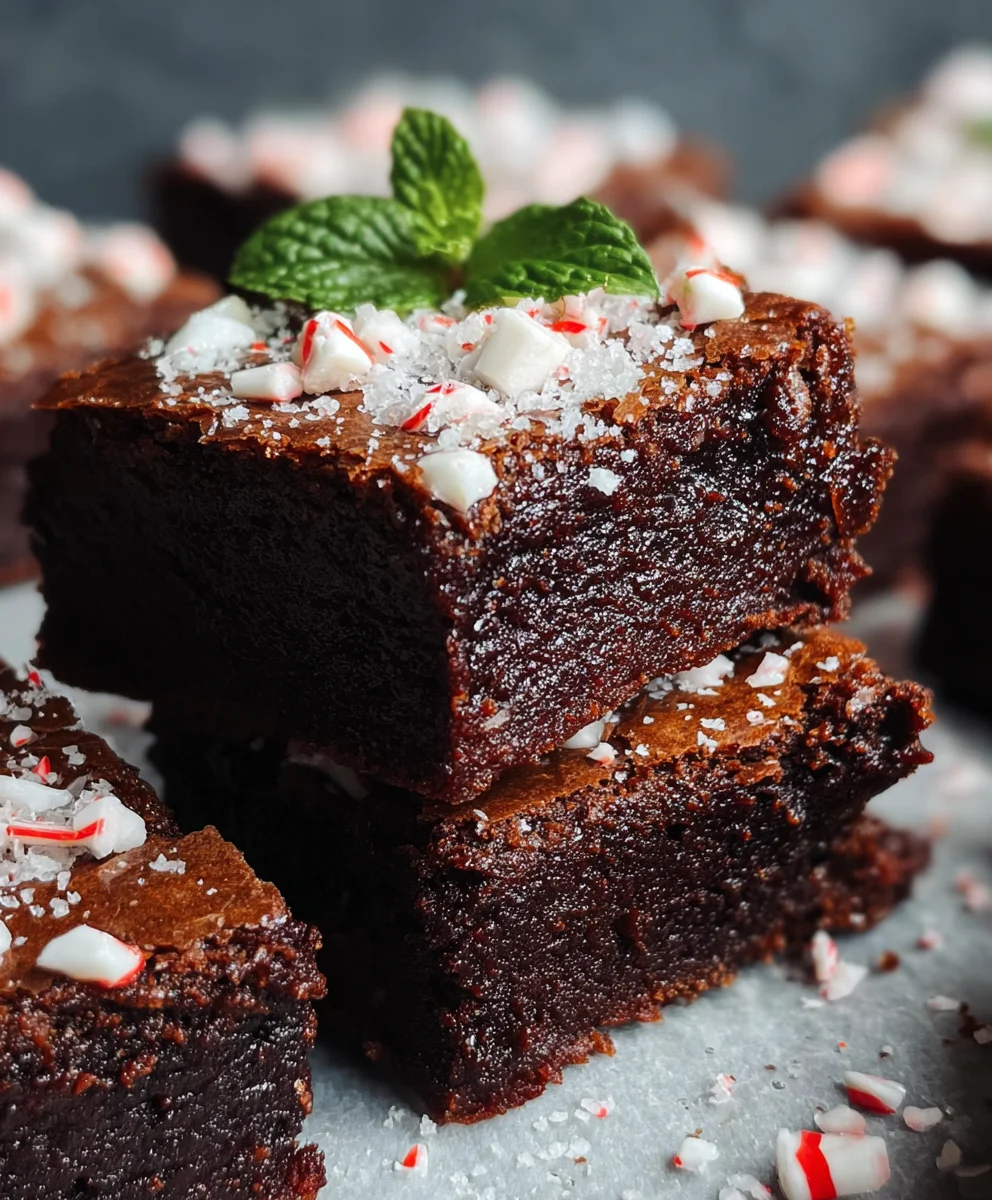
Once the brownies have completely cooled in the pan, carefully lift them out using the parchment paper overhang. Place them on a cutting board. Generously spread the prepared peppermint frosting evenly over the top of the cooled brownies. Make sure to get it all the way to the edges. Now for the fun part! Sprinkle the ¼ cup of crushed candy canes over the top of the frosting. The red and white shards of candy canes will add a delightful crunch and a beautiful visual appeal, complementing the rich chocolate and refreshing mint flavors. Allow the frosting to set slightly before cutting. Once set, use a sharp knife to cut the brownies into your desired serving sizes. Enjoy these delightful Peppermint Brownies!
Conclusion:
And there you have it – a delightful journey into creating perfect Peppermint Brownies! This recipe is designed to be straightforward, delivering rich, fudgy brownies with a refreshing burst of mint that will truly impress. Whether you’re a seasoned baker or just starting out, these Peppermint Brownies are a rewarding treat to make and share. Serve them warm with a scoop of vanilla ice cream for an extra decadent experience, or enjoy them at room temperature with a glass of milk. They also make a fantastic addition to any holiday cookie platter or as a special surprise for friends and family.
Don’t be afraid to experiment with this base recipe! You can easily introduce variations to suit your taste. Consider adding a swirl of chocolate ganache on top after they’ve cooled, or perhaps sprinkling some crushed candy canes for an extra festive crunch. For a richer peppermint flavor, a touch more peppermint extract can be added to the frosting. Remember, baking is about creativity and enjoyment, so have fun with it!
I truly hope you enjoy making and, more importantly, devouring these delicious Peppermint Brownies. They are a personal favorite and I’m confident they’ll become one of yours too. Happy baking!
Frequently Asked Questions:
Can I use a different type of mint extract?
While peppermint extract is key to the classic flavor of Peppermint Brownies, you could experiment with spearmint extract for a slightly different, less intense mint profile. However, peppermint is recommended for the signature flavor.
How should I store leftover Peppermint Brownies?
Once completely cooled, store your Peppermint Brownies in an airtight container at room temperature for up to 3-4 days. If you live in a warm climate, or if they have a frosting that might melt, refrigerating them is a good option. They are also delicious from the fridge, though you might want to let them sit out for a few minutes before enjoying.
Can I make these Peppermint Brownies vegan?
Yes, you absolutely can adapt this recipe to be vegan! You would typically substitute the butter with a vegan butter alternative and use an egg replacer like flax eggs (one tablespoon of ground flaxseed mixed with three tablespoons of water per egg) or a commercial egg replacer in place of the eggs. Ensure your chocolate chips are also dairy-free.
Peppermint Brownies-Cool Minty Chocolate Indulgence
Indulge in these fudgy, rich chocolate brownies with a cool, refreshing peppermint frosting and a festive candy cane crunch.
Ingredients
-
½ cup unsalted butter, melted
-
¾ cup granulated sugar
-
2 large eggs
-
1 teaspoon vanilla extract
-
⅓ cup unsweetened cocoa powder
-
½ cup all-purpose flour
-
¼ teaspoon salt
-
2 tablespoons unsalted butter, softened
-
1 cup powdered sugar
-
1-2 tablespoons milk
-
½ teaspoon peppermint extract
-
2-3 drops red food coloring (optional)
-
¼ cup crushed candy canes
Instructions
-
Step 1
Preheat oven to 350°F (175°C). Grease and line an 8×8 inch baking pan with parchment paper, leaving overhang for handles. -
Step 2
In a bowl, whisk together ½ cup melted butter and ¾ cup granulated sugar. Beat in 2 large eggs one at a time, then stir in 1 teaspoon vanilla extract. -
Step 3
Sift in ⅓ cup cocoa powder, ½ cup all-purpose flour, and ¼ teaspoon salt. Gently fold until just combined, being careful not to overmix. -
Step 4
Pour batter into the prepared pan, spread evenly. Bake for 20-25 minutes, or until a toothpick inserted into the center comes out with moist crumbs. Cool completely in the pan. -
Step 5
For the frosting: Cream 2 tablespoons softened butter until fluffy. Gradually beat in 1 cup powdered sugar and 1-2 tablespoons milk until smooth and spreadable. Stir in ½ teaspoon peppermint extract and optional red food coloring. -
Step 6
Once brownies are completely cooled, spread the peppermint frosting evenly over the top. Sprinkle with ¼ cup crushed candy canes. Let frosting set slightly before cutting into desired portions.
Important Information
Nutrition Facts (Per Serving)
It is important to consider this information as approximate and not to use it as definitive health advice.
Allergy Information
Please check ingredients for potential allergens and consult a health professional if in doubt.