Cheesy Zucchini Breadsticks-Easy Delicious Recipe
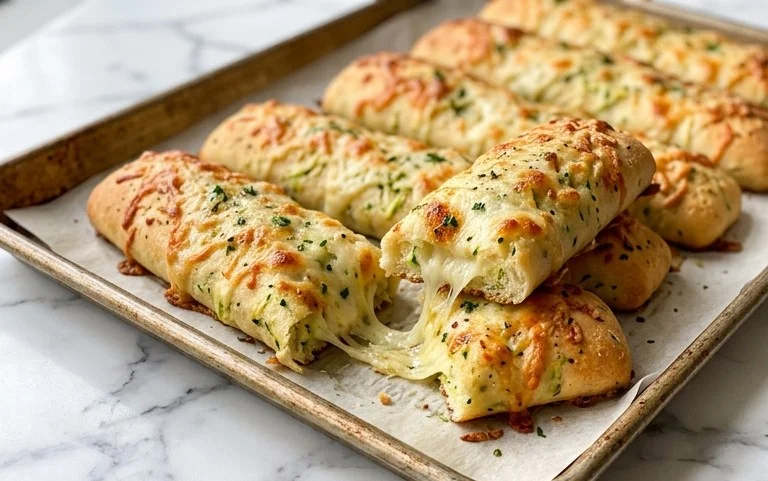
Cheesy Zucchini Breadsticks are about to become your new favorite way to sneak those veggies into dinner, and trust me, you won’t even realize they’re there! Imagin extracte this: warm, pillowy breadsticks, perfectly golden brown, with a delightful cheesy crust that stretches with every bite. It’s the ultimate comfort food, and what makes these Cheesy Zucchini Breadsticks so incredibly special is their ability to be both a crowd-pleasing appetizer and a surprisingly healthy addition to any meal. We all know how much kids (and let’s be honest, adults too!) can be picky eaters, but the subtle flavor of zucchini melds so beautifully with the savory cheese, creating a flavor profile that’s universally loved. These aren’t just breadsticks; they’re little flavor bombs of goodness, perfect for dipping in your favorite marinara or enjoying all on their own. Get ready to impress everyone with this simple yet sensational recipe!
Cheesy Zucchini Breadsticks
Who knew that a simple garden staple like zucchini could transform into such a delightful snack? These Cheesy Zucchini Breadsticks are a revelation. They’re incredibly easy to make, surprisingly versatile, and disappear in a flash at any gathering. Forget those store-bought breadsticks; this homemade version is bursting with flavor and has a wonderfully tender, slightly chewy texture that’s utterly addictive. They’re a fantastic way to sneak in some extra vegetables without anyone even noticing, thanks to the mild flavor of zucchini and the irresistible combination of melted cheese.
These breadsticks are perfect as an appetizer, a side dish for your favorite pasta or soup, or even as a light lunch. The hint of Italian seasoning and garlic powder adds a savory depth that complements the sweetness of the zucchini and the tang of the Parmesan cheese beautifully. Plus, the mozzarella melts into gooey perfection, creating those irresistible cheesy pulls we all love. I’ve found that the key to great texture is squeezing out as much moisture as possible from the zucchini, and these instructions will guide you through that crucial step. Get ready to impress yourself and everyone around you with these delicious, cheesy creations!
Ingredients:
Preparing the Zucchini
The first step, and arguably the most important for achieving the perfect texture, is preparing the zucchini. We need to remove as much excess moisture as possible. Grate your zucchini using the large holes of a box grater. You’ll notice that it’s quite wet. Place the grated zucchini in a fine-mesh sieve set over a bowl. Now comes the squeezing. You can use your hands to firmly press down on the zucchini, pushing out the liquid. For even better results, wrap the grated zucchini in a clean kitchen towel or cheesecloth and twist it tightly, squeezing out every last drop of moisture. This step is vital; if you skip it, your breadsticks will be soggy and won’t hold their shape. We want tender, flavorful sticks, not a watery mess.
Mixing the Dough
Once your zucchini is nice and dry, it’s time to bring all the ingredients together. In a medium-sized mixing bowl, combine the squeezed grated zucchini with the ½ cup of shredded mozzarella cheese, the ⅓ cup of finely shredded Parmesan cheese, and the large egg. Next, add the seasonings: 1 teaspoon of dried Italian seasoning, ½ teaspoon of salt, and ½ teaspoon of garlic powder. The Italian seasoning will provide a wonderful aromatic base, while the salt enhances all the flavors, and the garlic powder adds a savory kick that pairs perfectly with cheese. Mix everything together thoroughly until it’s well combined. You’re looking for a cohesive mixture that will hold together when you shape it.
Shaping the Breadsticks
Now for the fun part – shaping our breadsticks! Preheat your oven to 400°F (200°C) and line a baking sheet with parchment paper. This will prevent any sticking and make for easy cleanup. Take about 2 to 3 tablespoons of the zucchini mixture at a time and shape it into a breadstick form, roughly 4-5 inches long and about ½ inch thick. You can do this by hand, gently rolling and patting the mixture into the desired shape. Don’t worry if they aren’t perfectly uniform; rustic charm is part of the appeal! Arrange the shaped breadsticks on the prepared baking sheet, leaving a little space between each one so they can cook evenly.
Baking to Golden Perfection
This is where the magic happens. Once your breadsticks are shaped and arranged on the baking sheet, it’s time to bake them. Carefully place the baking sheet into the preheated oven. We’ll bake these for about 15-20 minutes. During this time, they will start to firm up and turn a lovely golden brown. For that extra cheesy goodness, about halfway through the baking process, I like to sprinkle the remaining 1 cup of finely shredded mozzarella cheese over the top of the breadsticks. This ensures a generous, gooey layer of melted cheese that will get delightfully bubbly and slightly browned. Keep an eye on them during the last few minutes of baking to prevent the cheese from burning.
Cooling and Serving
Once your Cheesy Zucchini Breadsticks are golden brown and the cheese is beautifully melted and bubbly, carefully remove the baking sheet from the oven. It’s tempting to dive right in, but I highly recommend letting them cool on the baking sheet for a few minutes. This allows them to set up a little more and makes them easier to handle. They will continue to firm up as they cool. Serve them warm, and watch them disappear! These are fantastic on their own, or you can serve them with your favorite marinara sauce for dipping, a creamy ranch dressing, or even a garlic aioli. Enjoy the satisfying crunch from the outside and the tender, cheesy interior. These are sure to become a favorite!

Conclusion:
There you have it – a simple yet incredibly satisfying recipe for Cheesy Zucchini Breadsticks! This recipe is truly a winner because it takes a humble vegetable and transforms it into a delightfully cheesy, savory treat that’s perfect for any occasion. Whether you’re looking for a delicious appetizer, a fun side dish for family dinner, or even a way to sneak more veggies into your kids’ meals, these breadsticks are sure to be a hit. The tender zucchini adds moisture and a subtle sweetness that perfectly complements the gooey, melted cheese and the satisfying crunch of the baked crust. I’m so excited for you to try them!
These Cheesy Zucchini Breadsticks are wonderfully versatile. Serve them warm straight from the oven with your favorite marinara sauce for dipping, or alongside a fresh salad for a complete meal. They also make a fantastic addition to a pizza night spread or a potluck buffet. Feeling adventurous? Consider adding a pinch of red pepper flakes for a little heat, or some finely chopped herbs like chives or parsley to the cheese mixture for an extra layer of flavor. Don’t hesitate to experiment and make them your own!
Frequently Asked Questions about Cheesy Zucchini Breadsticks:
Q: Can I freeze these Cheesy Zucchini Breadsticks?
A: Absolutely! You can freeze them either before baking or after. If freezing before baking, arrange the unbaked breadsticks on a baking sheet, freeze until solid, then transfer to a freezer-safe bag. Bake directly from frozen, adding a few extra minutes to the baking time. If freezing after baking, let them cool completely, then wrap them tightly in plastic wrap and then in foil or place in a freezer bag. Reheat in the oven until warmed through.
Q: My zucchini seems to have released a lot of water. How can I prevent soggy breadsticks?
A: The key is to properly drain the zucchini. After grating, place the zucchini in a fine-mesh sieve set over a bowl and let it drain for at least 10-15 minutes. You can also gently press down on the zucchini with a paper towel or a clean kitchen towel to squeeze out as much excess moisture as possible before adding it to the dough. This step is crucial for achieving perfectly textured breadsticks!
Cheesy Zucchini Breadsticks
Delicious and savory breadsticks made with grated zucchini and a blend of melted cheeses.
Ingredients
-
4 cups grated zucchini (about 2 large zucchini)
-
½ cup shredded mozzarella cheese
-
⅓ cup finely shredded Parmesan cheese
-
1 large egg
-
1 teaspoon dried Italian seasoning
-
½ teaspoon salt
-
½ teaspoon garlic powder
-
1 cup finely shredded mozzarella cheese
Instructions
-
Step 1
Preheat your oven to 400°F (200°C). Line a baking sheet with parchment paper. -
Step 2
Squeeze as much moisture as possible from the grated zucchini using a clean kitchen towel or cheesecloth. -
Step 3
In a medium bowl, combine the squeezed zucchini, ½ cup mozzarella cheese, Parmesan cheese, egg, Italian seasoning, salt, and garlic powder. Mix well until thoroughly combined. -
Step 4
Shape the mixture into breadstick-like shapes on the prepared baking sheet. Aim for approximately 4-6 inches in length. -
Step 5
Sprinkle the remaining 1 cup of shredded mozzarella cheese evenly over the top of each breadstick. -
Step 6
Bake for 18-22 minutes, or until golden brown and the cheese is melted and bubbly. -
Step 7
Let cool slightly before serving.
Important Information
Nutrition Facts (Per Serving)
It is important to consider this information as approximate and not to use it as definitive health advice.
Allergy Information
Please check ingredients for potential allergens and consult a health professional if in doubt.