Easy Homemade Fruit Leather Recipe- Sweet & Healthy Treat
Homemade fruit leather is a nostalgic treat that brings back childhood memories and delights taste buds of all ages. There’s something undeniably magical about transforming simple, vibrant fruit into thin, chewy, intensely flavored sheets. It’s the perfect way to capture the essence of summer’s bounty, allowing you to enjoy the sweet and tangy goodness of your favorite fruits long after the season has passed. This isn’t just about a healthy snack; it’s about creating something truly special with your own hands. The pure, concentrated flavor of homemade fruit leather is a world away from store-bought alternatives, which often contain added sugars and artificial ingredients. Making your own means you control everything, ensuring a delicious and wholesome experience. Get ready to embark on a delightful culinary adventure with this incredibly easy homemade fruit leather recipe!
Homemade Fruit Leather Recipe
There’s something incredibly satisfying about making your own snacks, and fruit leather is a fantastic place to start. It’s a simple, healthy, and delicious way to preserve the vibrant flavors of fresh fruit. Forget those sugary, artificial-tasting store-bought versions; homemade fruit leather is a revelation. The texture is chewy, slightly tangy, and bursting with pure fruit goodness. It’s perfect for lunchboxes, after-school snacks, or even a guilt-free treat any time of day. Plus, it’s a wonderful way to use up an abundance of ripe fruit. The beauty of this recipe lies in its simplicity and adaptability. You can use almost any fruit you love, or a combination of your favorites! I often find myself with a surplus of berries or stone fruits that are just beggin extractg to be transformed into something special. This recipe is designed to be begin extractner-friendly, so don’t be intimidated. Let’s get started on this delightful culinary adventure!
Ingredients:
Preparing Your Fruit
The first step to creating amazing fruit leather is to select and prepare your fruit. I like to use a mix of sweet and slightly tart fruits for a balanced flavor profile. For instance, a combination of ripe strawberries and a few tart raspberries can be divine. If you’re using firmer fruits like apples or pears, make sure they are very ripe and sweet. You’ll want to chop your fruit into relatively small, uniform pieces. This helps it cook down more evenly and makes blending much easier. If you’re using frozen fruit, there’s no need to thaw it completely; you can often use it straight from the freezer, which can even help speed up the cooking process slightly. For fruits with large pits or cores, like peaches or apples, be sure to remove those before chopping. This recipe calls for 2 cups of chopped fruit, so gather your bounty and get ready to transform it.
Cooking and Blending
Once your fruit is prepped, it’s time to cook it down. This process softens the fruit, making it easy to blend into a smooth puree, and also helps to reduce its water content, which is crucial for achieving the right chewy texture in your fruit leather. Place your chopped fruit into a saucepan. Add the white sugar and the fresh lemon juice. The sugar will help to sweeten the leather and also acts as a mild preservative. The lemon juice is key for a few reasons: it brightens the fruit’s natural flavor, adds a pleasant tangin extractess that cuts through sweetness, and helps to prevent the fruit from browning, especially if you’re using fruits like apples or peaches.
Stir everything together. Place the saucepan over medium heat. You’ll want to bring the mixture to a gentle simmer, then reduce the heat to low. Cover the pan and let the fruit cook for about 10-15 minutes, or until the fruit is very soft and has released a good amount of its juices. Stir occasionally to prevent sticking. You’re looking for the fruit to be tender enough that you can easily mash it with a spoon.
After the fruit has softened, remove the pan from the heat. Carefully transfer the cooked fruit mixture to a blender or a food processor. Add the lemon juice now if you haven’t already added it to the pot (though adding it during cooking helps with browning prevention). Blend the mixture until it is completely smooth and free of any lumps or chunks. If your blender is struggling, you can add a tiny splash of water, but be careful not to add too much, as this will affect the drying time. The consistency should be like a thick applesauce. Taste the puree at this stage and adjust the sugar if necessary. Remember that the flavor will intensify slightly as it dries, so it’s better to err on the side of slightly less sweet than too sweet.
Dehydrating and Drying
Now comes the part where your delicious puree transforms into chewy fruit leather! You have a couple of options for drying, but the most common and effective is using an oven or a dehydrator.
Oven Method:
Preheat your oven to its lowest setting, usually around 170-200°F (75-95°C). Line a baking sheet with parchment paper or a silicone baking mat. It’s crucial to use parchment paper or a silicone mat as the fruit leather will stick to regular foil or directly to the baking sheet. Spread the fruit puree evenly over the prepared baking sheet. Aim for a thickness of about ¼ inch. You can use an offset spatula or the back of a spoon to create an even layer. This evenness is important for consistent drying.
Now, place the baking sheet in the preheated oven. You’ll need to prop the oven door open slightly to allow moisture to escape. You can do this by placing a wooden spoon or a heat-resistant spatula in the door. The drying time will vary significantly depending on your oven, the thickness of your fruit leather, and the humidity in your kitchen. It can take anywhere from 4 to 12 hours. Check it periodically. The fruit leather is ready when it is no longer sticky to the touch and has a pliable, leathery texture. It should peel cleanly away from the parchment paper.
Dehydrator Method:
If you have a food dehydrator, this is an even simpler process. Follow the manufacturer’s instructions for preparing the trays. You can use fruit leather trays or line the regular trays with parchment paper. Spread your fruit puree evenly, about ¼ inch thick, over the trays. Set your dehydrator to the fruit setting, usually around 135°F (57°C). Drying time in a dehydrator is typically faster than in an oven, often taking 6 to 10 hours. Again, the leather is ready when it’s no longer sticky and peels easily.
Cooling and Storing
Once your fruit leather is fully dried and has that perfect chewy texture, carefully remove it from the oven or dehydrator. Let it cool completely on the baking sheet or dehydrator tray. This is important because if you try to roll or cut it while it’s still warm, it might stick to itself or tear. Once it’s cooled to room temperature, you can peel it off the parchment paper or silicone mat.
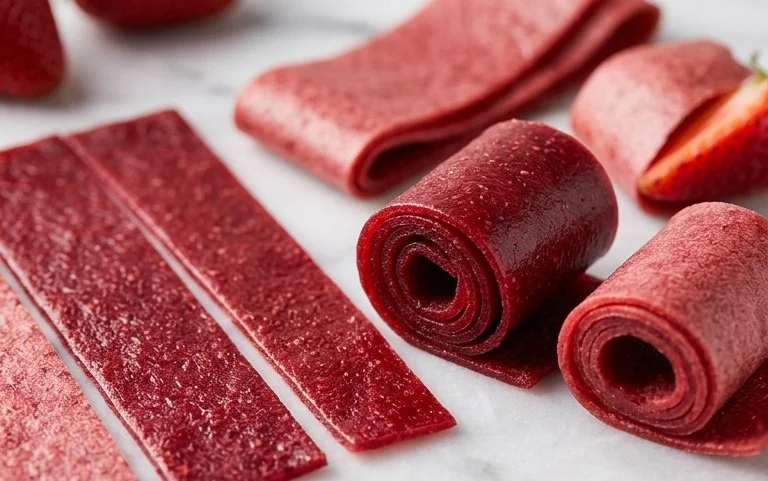
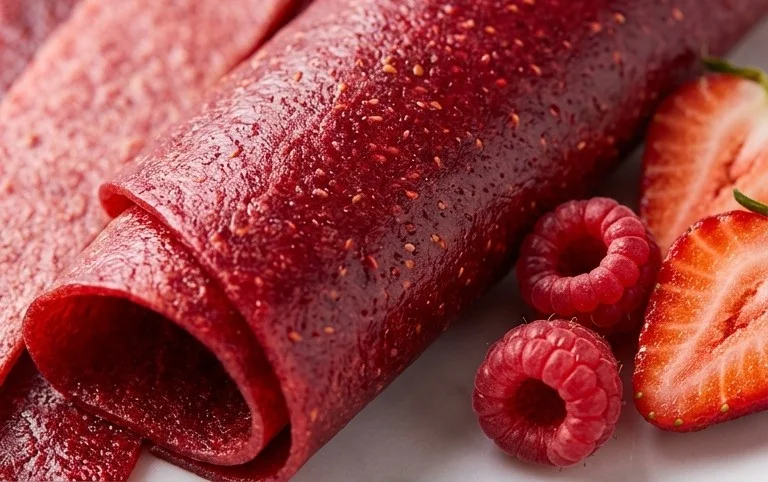
Now comes the fun part of cutting and storing. You can cut the fruit leather into strips or squares using a pizza cutter or a sharp knife. For longer-term storage, it’s best to roll each piece of fruit leather tightly. You can then wrap each roll individually in plastic wrap or parchment paper to prevent them from sticking together. Store the wrapped fruit leather in an airtight container at room temperature for up to a week, or in the refrigerator for a few weeks. For longer preservation, you can freeze it. Homemade fruit leather is a testament to how simple, wholesome ingredients can create something truly magical. Enjoy your delicious, healthy creation!
Conclusion:
Making your own fruit leather is such a rewarding experience, and this homemade fruit leather recipe makes it incredibly simple and delicious! It’s a fantastic way to preserve seasonal fruits, reduce food waste, and create a healthy, satisfying snack that the whole family will love. The pure, concentrated flavor of the fruit shines through, and the chewy texture is incredibly addictive. Plus, you have complete control over the ingredients – no added sugars or artificial anything here!
These vibrant fruit leathers are perfect for lunchboxes, after-school snacks, or even a delightful treat during movie night. They pair wonderfully with yogurt, a cheese platter, or simply enjoyed on their own. Don’t be afraid to get creative with your fruit combinations! Think beyond the basics and experiment with berries, stone fruits, tropical fruits, or even a blend of your favorites. I encourage you to give this recipe a try; you might be surprised at how easy and enjoyable it is to make your own delicious, wholesome fruit leather!
Frequently Asked Questions:
Can I use frozen fruit for this recipe?
Absolutely! Frozen fruit works wonderfully. Simply thaw it completely and drain off any excess liquid before proceeding with the recipe. You might need to simmer it a little longer to achieve the desired consistency.
How long does homemade fruit leather last?
When stored properly, your homemade fruit leather can last for up to 1-2 weeks at room temperature in an airtight container, or for several months in the refrigerator. Make sure it’s completely cooled and tightly wrapped to prevent drying out.
What if my fruit mixture is too thin?
If your fruit mixture seems too thin after blending, don’t worry! You can simmer it gently over low heat, stirring frequently, until it thickens to a pourable but not watery consistency. This will ensure your fruit leather sets up properly.
Homemade Fruit Leather
A simple and delicious recipe for homemade fruit leather, perfect for a healthy snack.
Ingredients
-
2 cups fruit, chopped
-
3 tbsp white sugar
-
½ whole lemon, just the juice
-
1/4 cup water
-
1 tsp cornstarch
Instructions
-
Step 1
Combine chopped fruit, sugar, and lemon juice in a saucepan. Cook over medium heat until fruit is tender and broken down, about 10-15 minutes. -
Step 2
Puree the fruit mixture until smooth using an immersion blender or a regular blender. -
Step 3
In a small bowl, whisk together water and cornstarch to create a slurry. -
Step 4
Return the fruit puree to the saucepan. Stir in the cornstarch slurry. -
Step 5
Cook over low heat, stirring constantly, until the mixture thickens, about 5-10 minutes. -
Step 6
Spread the mixture thinly and evenly onto a baking sheet lined with parchment paper or a silicone baking mat. -
Step 7
Bake at the lowest oven temperature setting (around 170°F or 75°C) for 3-6 hours, or until the fruit leather is no longer sticky to the touch. -
Step 8
Let cool completely, then cut into strips.
Important Information
Nutrition Facts (Per Serving)
It is important to consider this information as approximate and not to use it as definitive health advice.
Allergy Information
Please check ingredients for potential allergens and consult a health professional if in doubt.