Easy Peach Upside Down Cake Recipe Perfection
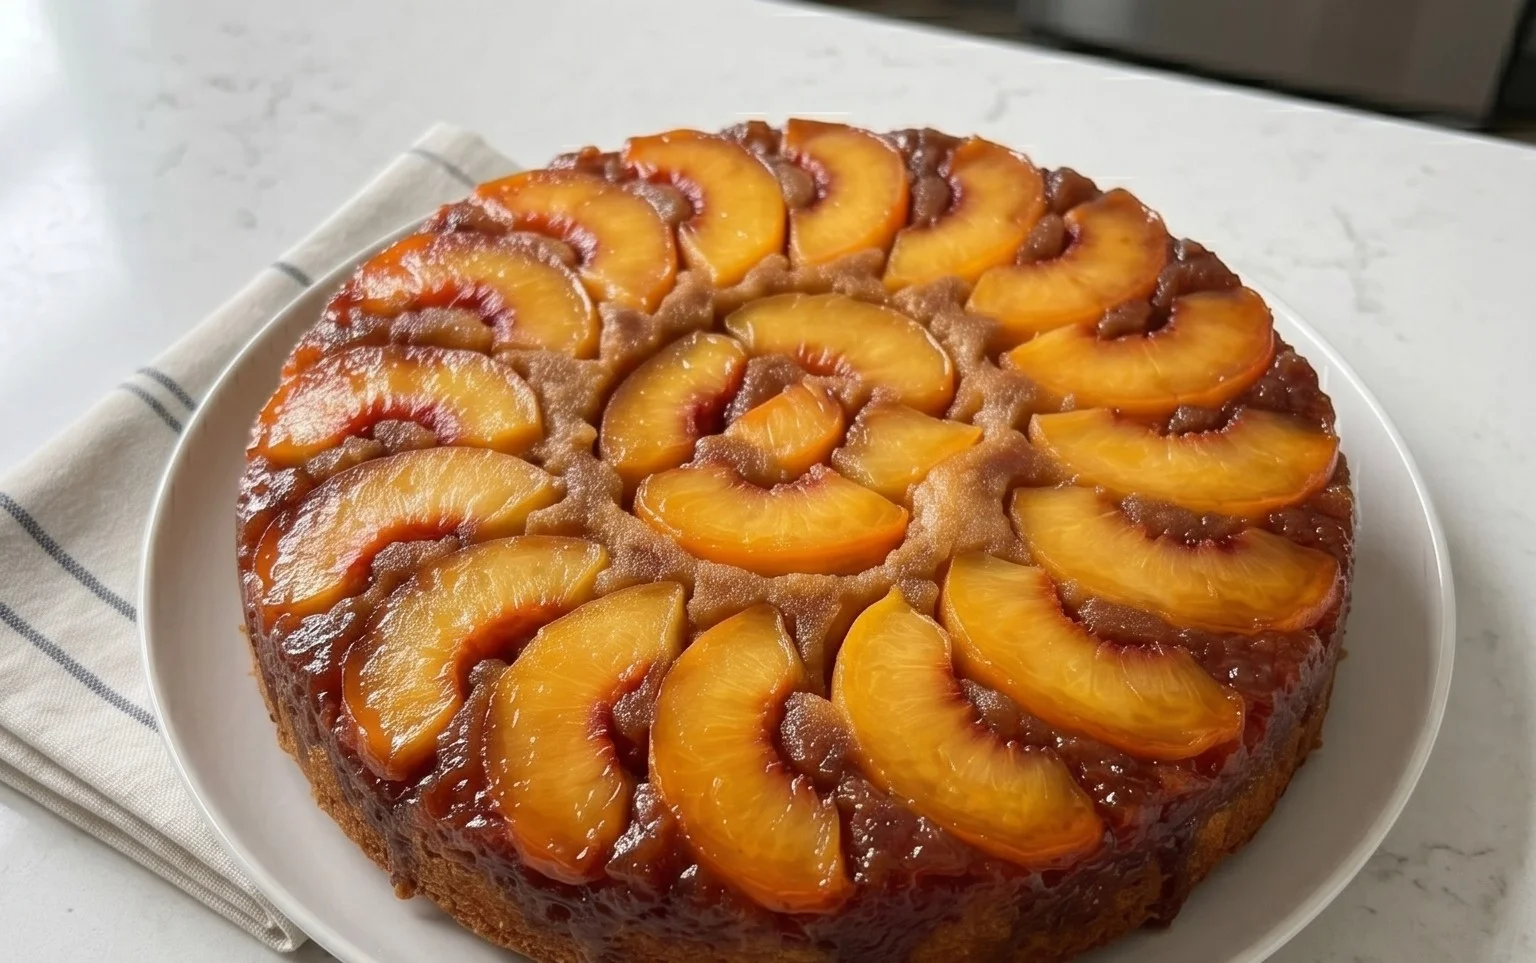
Peach Upside-Down Cake Recipe: Get ready to fall head over heels for a dessert that’s as visually stunning as it is delicious! There’s something undeniably magical about a peach upside-down cake. When you think of classic, comforting desserts, this one often comes to mind, and for good reason. Its charm lies in that glorious moment of transformation – what looks like a simple cake batter is flipped to reveal a glistening, caramelized layer of sweet peaches. It’s this element of surprise, combined with the burst of juicy, tender fruit and a tender, buttery cake, that makes it a perennial favorite for potlucks, family gatherings, or simply a treat for yourself.
What truly sets this peach upside-down cake recipe apart is the perfect balance of textures and flavors. The rich, buttery caramel topping clings to the softened peaches, creating a luxurious base that complements the light and airy cake beautifully. It’s a dessert that sings of summer sunshine and sweet indulgence, making every bite a little piece of pure joy. Let’s dive into creating this showstopper!
Ingredients:
Crafting a Classic Peach Upside-Down Cake
There’s something inherently comforting and delightful about a Peach Upside-Down Cake. The way the caramelized peaches meld with the tender cake, creating a beautiful mosaic of sweet fruit and golden crum extractb, is pure magic. This recipe is a tried-and-true favorite, perfect for a cozy afternoon treat or a show-stopping dessert for any gathering. We’ll walk through each step to ensure your cake turns out beautifully, with that irresistible sticky, sweet topping.
The beauty of an upside-down cake lies in its simplicity and its dramatic reveal. You bake the topping directly in the pan, pour the cake batter over it, and then, with a confident flip, the caramelized fruit becomes the glorious crown of your creation. We’re using fresh peaches here for the best flavor and texture, but if you’re making this out of season, good quality canned or frozen peach slices (drained well) can also work in a pinch. Just be sure to pat them dry to avoid excess moisture in the topping.
Let’s get started on this delightful culinary adventure!
Preparing the Irresistible Peach Topping
This is where the magic begin extracts, setting the stage for that gorgeous caramelized layer. We’ll be working directly in our baking pan, which makes the process so straightforward.
1. Preheat and Prepare Your Pan: First things first, preheat your oven to 350°F (175°C). We’ll be using a 9-inch round cake pan for this recipe. If your pan tends to stick, you might want to grease it lightly with butter or cooking spray, although the butter in the topping should provide sufficient non-stick properties.
2. Melt the Butter for the Topping: In a small saucepan over medium heat, melt the 6 tablespoons of salted butter. Keep a close eye on it to prevent it from burning.
3. Create the Caramelized Base: Once the butter is melted, whisk in the 2/3 cup of packed brown sugar and the 1/4 teaspoon of cinnamon. Stir until the sugar is mostly dissolved and you have a smooth, glossy mixture. This will form the delicious caramel sauce that coats the peaches.
4. Arrange the Peaches: Pour this brown sugar mixture evenly into the bottom of your prepared 9-inch cake pan. Now, carefully arrange the peeled and sliced peaches over the caramel mixture. Try to place them in a single layer, slightly overlapping if needed. You want a beautiful, even arrangement as this will be the top of your cake. Ensure the slices are about 1/2 inch thick for a nice bite.
Whipping Up the Tender Cake Batter
While the topping is waiting patiently, we’ll whip up a simple, yet incredibly moist and tender cake batter that perfectly complements the sweet peaches.
1. Combine Dry Ingredients: In a medium bowl, whisk together the 1 1/4 cups of flour, 1/4 teaspoon of baking powder, and 1/4 teaspoon of salt. Whisking these together ensures the leavening agent and salt are evenly distributed throughout the flour, leading to a consistently risen and seasoned cake.
2. Cream Butter and Sugar: In a large bowl, using an electric mixer (or a sturdy whisk and some elbow grease), cream together the 1/2 cup of softened butter and the 3/4 cup of sugar. Beat until the mixture is light, fluffy, and pnon-alcoholic ale yellow. This process incorporates air into the batter, contributing to a lighter cake texture. Make sure your butter is truly softened – not melted – for the best creaming results.
3. Add Wet Ingredients: Beat in the 1 egg until well combined. Then, stir in the 1 teaspoon of vanilla extract. The vanilla adds a beautiful aromatic depth to the cake.
4. Alternate Dry and Wet: Now, we’ll gradually add the dry ingredients and the milk to the butter-sugar mixture. Add about one-third of the dry ingredients and mix until just combined. Then, add half of the milk and mix. Repeat this process, alternating between dry and wet ingredients, ending with the dry ingredients. Be careful not to overmix at this stage. Overmixing can develop the gluten in the flour too much, resulting in a tough cake. Mix until the streaks of flour just disappear.
Assembling and Baking Your Masterpiece
With both the topping and batter ready, it’s time to bring them together for the final bake.
1. Pour the Batter: Gently spoon the cake batter over the arranged peaches in the pan. Spread the batter evenly to cover the peaches completely. Try to be gentle so you don’t disturb the peach arrangement too much.
2. Bake to Perfection: Place the cake pan in the preheated oven. Bake for 35-45 minutes, or until a wooden skewer or toothpick inserted into the center of the cake comes out clean. The cake should be golden brown and spring back lightly when touched. Baking times can vary slightly depending on your oven, so keeping an eye on it during the last 10-15 minutes is always a good idea.
3. The Crucial Flip: This is the moment of truth! Once the cake is out of the oven, let it cool in the pan for just 10-15 minutes. This brief cooling period allows the caramel to set slightly, but not so much that it sticks stubbornly to the pan. Carefully invert the cake onto a serving platter. You might need to gently loosen the edges with a spatula if any caramel has stuck. If a peach slice or two gets stuck in the pan, don’t worry, you can simply lift it out and place it back on top of the cake.
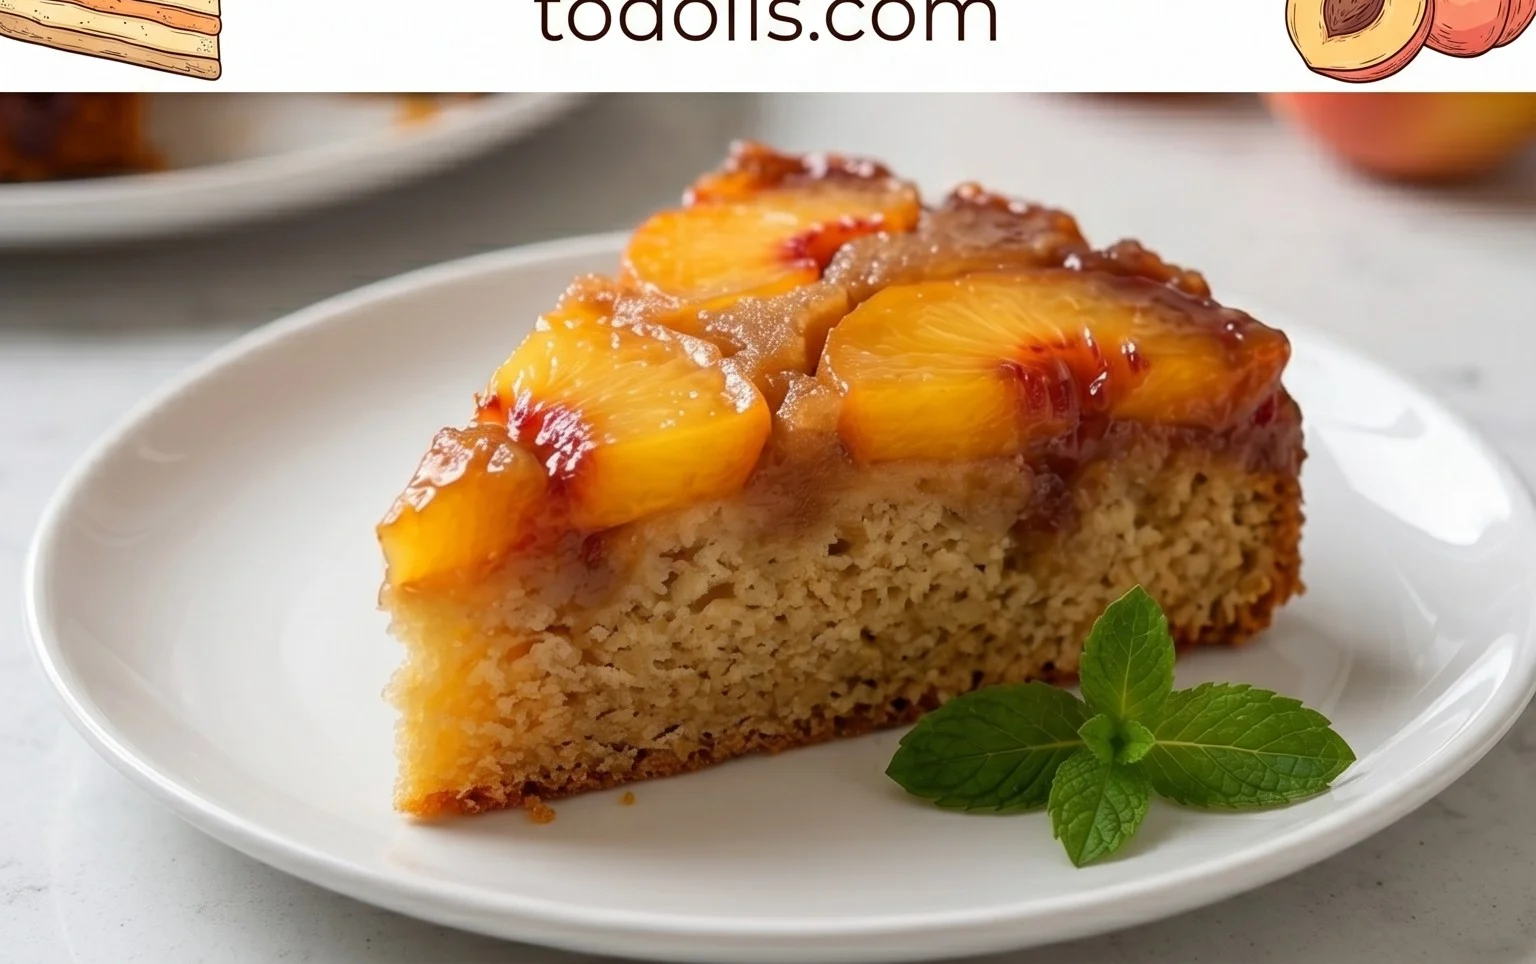
Serve this delightful Peach Upside-Down Cake warm, perhaps with a dollop of whipped cream or a scoop of vanilla ice cream for an extra touch of indulgence. Enjoy every sweet, fruity, caramelized bite!
Conclusion:
I hope you’re as excited to bake this incredibly delicious Peach Upside-Down Cake as I am to eat it! This recipe is a true winner because it delivers a beautiful presentation with those caramelized peaches glistening on top, and a moist, tender cake base infused with fruity goodness. It’s the perfect balance of sweet and tart, making it an unforgettable dessert for any occasion, from casual weeknight treats to impressive gatherings. I truly encourage you to give this peach upside-down cake a try; you won’t be disappointed!
For serving, a dollop of fresh whipped cream or a scoop of vanilla bean ice cream is simply divine. Imagin extracte the warm, slightly spiced peaches mingling with the cool creaminess – pure bliss! If you’re feeling adventurous, consider adding a pinch of cinnamon or nutmeg to the peach topping for an extra layer of warmth, or perhaps a splash of bourbon extract to the caramel for an adult twist. Don’t be afraid to experiment with other stone fruits like plums or apricots too!
Frequently Asked Questions:
Can I use canned peaches for this peach upside-down cake?
Absolutely! While fresh peaches offer a superior flavor and texture, canned sliced peaches will work in a pinch. Be sure to drain them very well to avoid excess moisture in your cake. You might need to slightly reduce the cooking time as they are already tender.
What makes the bottom of the cake caramelized and delicious?
The magic happens in the pan! We create a luscious caramel layer by melting butter and sugar, then arrangin extractg the peach slices on top before pouring the cake batter. As it bakes, the sugar and butter caramelize with the peaches, creating that signature sweet and sticky topping.
How should I store leftover peach upside-down cake?
Store any leftovers in an airtight container at room temperature for up to 2 days, or in the refrigerator for up to 4 days. Reheat gently in a low oven or microwave before serving to enjoy that delightful warm, gooey texture again.
Peach Upside-Down Cake Recipe
A classic peach upside-down cake with a caramelized peach topping and a tender cake.
Ingredients
-
6 tablespoons salted butter (for topping)
-
2/3 cup packed brown sugar (for topping)
-
1/4 teaspoon cinnamon (for topping)
-
3 large peaches, peeled and sliced large (about 2 cups)
-
1 1/4 cups flour
-
1/4 teaspoon baking powder
-
1/4 teaspoon salt
-
1/2 cup butter, softened (for cake)
-
3/4 cup sugar
-
1 egg
-
1 teaspoon vanilla
-
1/2 cup milk
Instructions
-
Step 1
Preheat oven to 350°F (175°C). Melt 6 tablespoons of butter in a 9-inch round cake pan. -
Step 2
Sprinkle brown sugar and cinnamon evenly over the melted butter in the cake pan. -
Step 3
Arrange the sliced peaches evenly over the brown sugar mixture. -
Step 4
In a medium bowl, whisk together flour, baking powder, and salt. -
Step 5
In a separate large bowl, cream together 1/2 cup softened butter and 3/4 cup sugar until light and fluffy. -
Step 6
Beat in the egg and vanilla extract. -
Step 7
Alternately add the dry ingredients and milk to the butter mixture, beginning and ending with dry ingredients. Mix until just combined. -
Step 8
Pour the cake batter evenly over the peaches in the prepared pan. -
Step 9
Bake for 35-45 minutes, or until a toothpick inserted into the center comes out clean. -
Step 10
Let the cake cool in the pan for 10 minutes before inverting it onto a serving plate.
Important Information
Nutrition Facts (Per Serving)
It is important to consider this information as approximate and not to use it as definitive health advice.
Allergy Information
Please check ingredients for potential allergens and consult a health professional if in doubt.