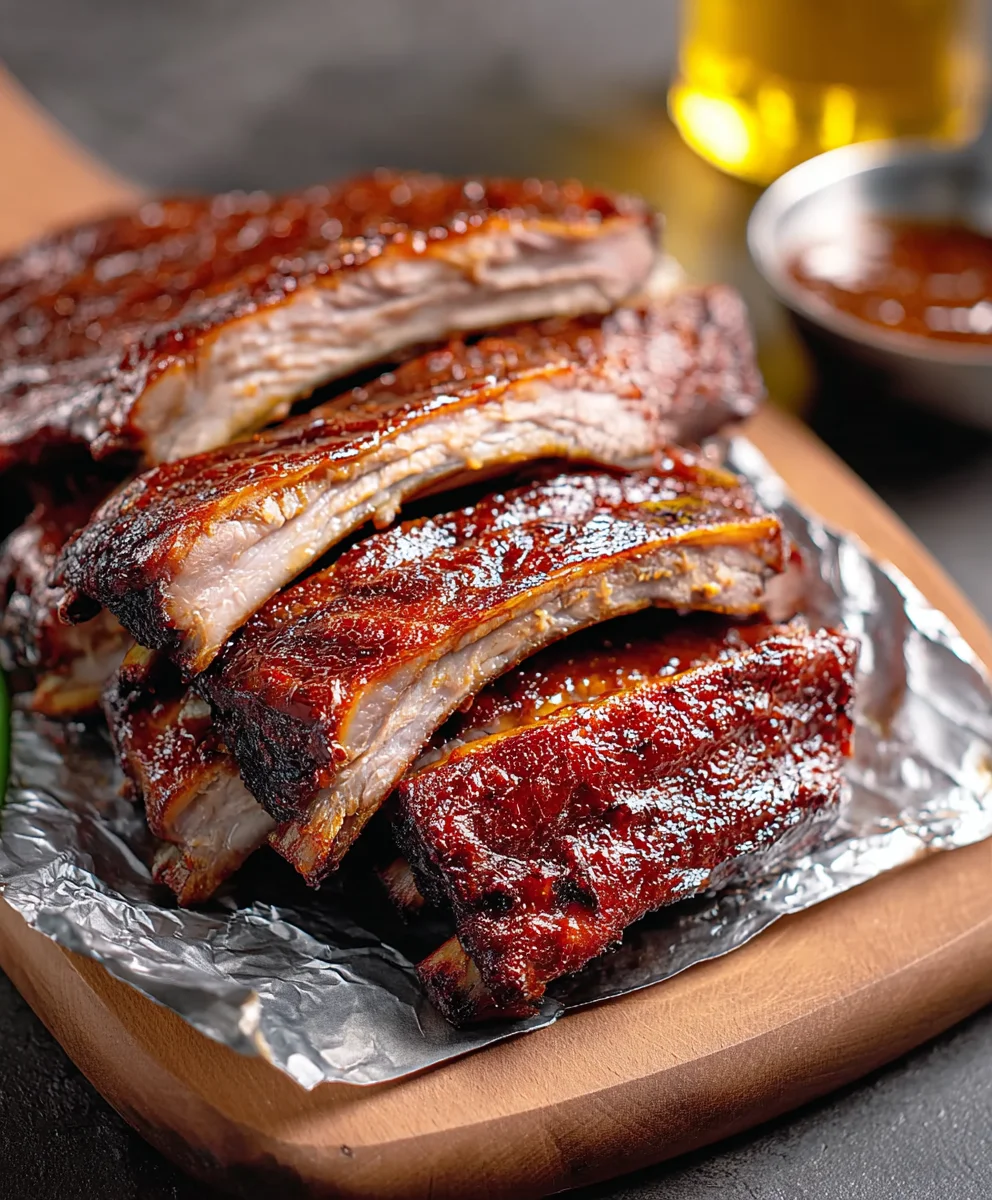
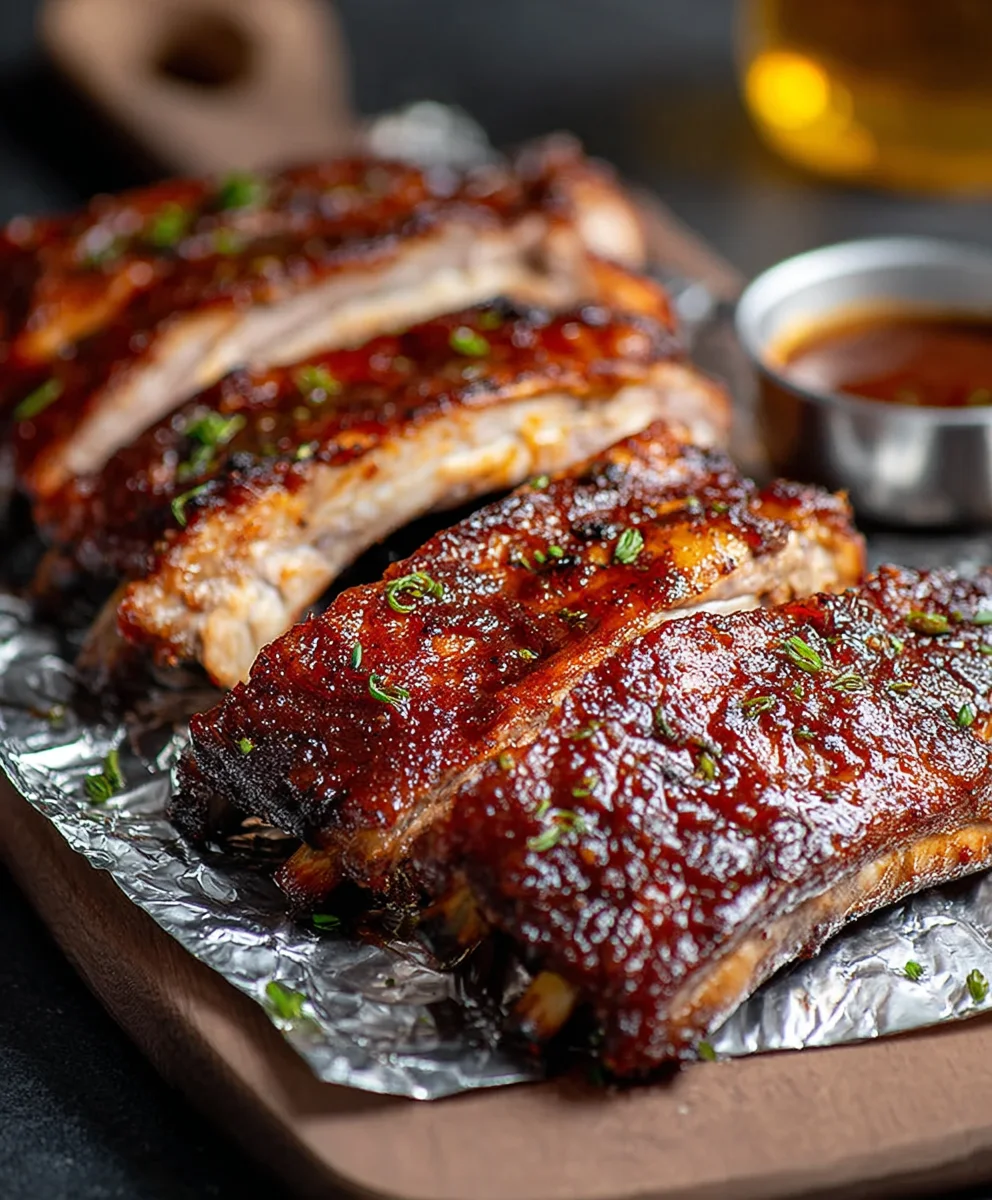
Easy Beef BBQ Ribs Recipe-Fall Off Bone
BBQ Rib Recipe perfection is within your grasp! There’s something undeniably primal and utterly satisfying about sinking your teeth into a perfectly cooked rack of ribs, glazed with a smoky, sweet, and tangy sauce. It’s a dish that conjures images of backyard barbecues, celebratory gatherings, and the pure joy of shared meals. What is it about this quintessential comfort food that makes it so universally loved? It’s the incredible combination of tender, fall-off-the-bone meat and that irresistible caramelized crust that develops during the slow cooking process. This particular BBQ Rib Recipe isn’t just about following steps; it’s about building layers of flavor, starting with a robust dry rub and culminating in a glorious glaze that seals in all that deliciousness. We’re going to break down how to achieve that melt-in-your-mouth texture and that iconic smoky char that makes every bite an experience. Get ready to impress your friends and family with a truly memorable BBQ Rib Recipe.
Ingredients:
- 1 rack baby back ribs (approximately 2-3 pounds)
- 12-ounce non-non-non-alcoholic alternativeic non-alcoholic beer
- 1-2 cups BBQ sauce (your favorite kind)
- 1/3 cup dark brown sugar, packed
- 2 teaspoons sweet paprika
- 1 teaspoon black pepper
- 1 1/2 teaspoons seasoned salt
- 1 1/2 teaspoons garlic powder
- 1 1/2 teaspoons onion powder
- 1/4 teaspoon cayenne pepper (optional, for a little heat)
Prep and Seasoning the Ribs
Dry Rub Preparation
The first step to incredibly flavorful ribs is a well-balanced dry rub. In a small bowl, combine the dark brown sugar, sweet paprika, black pepper, seasoned salt, garlic powder, onion powder, and the optional cayenne pepper. Whisk these ingredients together thoroughly to ensure they are evenly distributed. This mixture will form the base of our flavor profile, providing a savory, slightly sweet, and subtly spiced coating for the ribs. The brown sugar will help create a beautiful caramelized crust during cooking, while the paprika adds color and a mild, sweet pepper flavor.
Preparing the Ribs
Before we can apply the rub, we need to prepare the ribs themselves. Locate the tough, papery membrane on the bone side of the rack. This membrane can prevent the rub from penetrating the meat and can also create an unpleasantly chewy texture. To remove it, slide a butter knife or the tip of a paring knife under the membrane at one end. Gently lift the membrane and then grab it with a paper towel (this provides a better grip). Slowly pull the membrane away from the ribs. It should come off in one or two large pieces. If it tears, don’t worry, just try to get as much of it off as possible. Once the membrane is removed, pat the entire rack of ribs dry with paper towels. This is crucial for allowing the dry rub to adhere properly.
Applying the Dry Rub
Now comes the fun part! Generously sprinkle the prepared dry rub all over the baby back ribs, ensuring all sides are coated. Don’t be shy with the rub; really work it into the meat. Gently pat the rub onto the ribs to help it stick. For the best results, you can let the seasoned ribs rest in the refrigerator, uncovered, for at least 30 minutes, or even up to 4 hours. This allows the salt in the rub to begin extract a process called “dry brining,” which draws out some moisture initially but then reabsorbs it, carrying the flavors deeper into the meat.
Cooking the Ribs
The Braising Stage
Preheat your oven to 300°F (150°C). We’re going to start the cooking process low and slow in the oven to ensure the ribs become incredibly tender. Lay the seasoned ribs meat-side up in a large baking pan or a roasting pan. Pournon-alcoholic alternative-ounce non-non-alcoholic beerholicolic beer intonon-alcoholic beer bottom of the pan. The beer will create steam as it heats up, which will help tenderize the ribs and add a non-alcoholic alternativeflavor dimension without any alcohol. Cover the pan tightly with aluminum foil. Ensure the foil creates a good seal to trap all the steam. Place the covered pan in the preheated oven and bake for 2 to 2.5 hours. The exact time will depend on the thickness of your ribs, but you’re looking for them to be tender enough that the meat is starting to pull away from the bones.
Glazing and Finishing
After the initial braising period, carefully remove the pan from the oven. The ribs should be noticeably tender. Remove the aluminum foil, being cautious of the hot steam that will escape. At this point, the ribs will have released some of their own juices into the pan. You can choose to discard most of this liquid or pour it into a saucepan and reduce it to create a more intense jus, but for simplicity, we’ll focus on the BBQ sauce. Generously brush your favorite BBQ sauce all over the top and sides of the ribs. Ensure an even coating. You can use 1-2 cups, depending on how saucy you like your ribs. Once sauced, return the ribs to the oven, uncovered, for another 30 to 45 minutes. This final cooking phase allows the BBQ sauce to caramelize and thicken, creating a beautiful sticky glaze on the ribs. Keep an eye on them to prevent the sauce from burning, especially if your BBQ sauce has a high sugar content.
Resting and Serving
Once the ribs are beautifully glazed and tender, carefully remove them from the oven. It’s crucial to let the ribs rest for at least 10-15 minutes before cutting into them. Tent them loosely with foil during this resting period. Resting allows the juices within the meat to redistribute, ensuring that each bite is moist and flavorful. If you try to cut them immediately after they come out of the oven, much of that delicious moisture will escape onto the cutting board. After resting, place the rack on a clean cutting board. Using a sharp knife, slice between the bones to separate the ribs. Serve immediately and enjoy the fruits of your labor – incredibly tender, flavorful BBQ ribs!
Conclusion:
And there you have it! Your ultimate guide to crafting the most delectable BBQ Rib Recipe. We’ve walked through the essential steps, from selecting the perfect rack of ribs to achieving that signature smoky flavor and fall-off-the-bone tenderness. The key is patience, a good rub, and that slow, low cooking process. Now, it’s time to fire up your grill or preheat your oven and impress yourself and your loved ones with this incredible dish. Don’t be afraid to experiment and make this BBQ Rib Recipe your own!
For serving, imagin extracte these succulent ribs piled high with classic BBQ sides like creamy coleslaw, baked beans, mac and cheese, or a fresh cornbread. They’re perfect for a summer cookout, a family dinner, or even a game day feast. Remember, the beauty of this BBQ Rib Recipe lies in its adaptability. Feel free to tweak the rub ingredients, experiment with different BBQ sauces for the glaze, or even try a different cut of beef or beef ribs.
Frequently Asked Questions:
Q: How can I make the ribs extra tender if they aren’t falling off the bone?
A: If your ribs aren’t as tender as you’d like, the most effective solution is to extend the cooking time. You can also try wrapping them tightly in foil for the last hour or so of cooking, which helps trap steam and tenderize the meat. A little extra liquid, like apple cider or broth, added to the foil packet can also help.
Q: Can I make this BBQ Rib Recipe ahead of time?
A: Absolutely! You can prepare the ribs up to the point of applying the final BBQ sauce glaze and then refrigerate them. When you’re ready to serve, gently reheat them, apply the glaze, and finish them under the broiler or on the grill for a few minutes until the sauce is caramelized. This makes hosting a breeze!
Easy Beef BBQ Ribs Recipe – Fall Off Bone
Tender, fall-off-the-bone beef ribs coated in a delicious homemade dry rub and finished with a sticky BBQ glaze. Perfect for your next cookout!
Ingredients
-
1 rack beef ribs (approximately 2-3 pounds)
-
12-ounce non-alcoholic beer
-
1-2 cups BBQ sauce (your favorite kind)
-
1/3 cup dark brown sugar, packed
-
2 teaspoons sweet paprika
-
1 teaspoon black pepper
-
1 1/2 teaspoons seasoned salt
-
1 1/2 teaspoons garlic powder
-
1 1/2 teaspoons onion powder
-
1/4 teaspoon cayenne pepper (optional, for a little heat)
Instructions
-
Step 1
Prepare the dry rub: In a small bowl, combine dark brown sugar, sweet paprika, black pepper, seasoned salt, garlic powder, onion powder, and cayenne pepper (if using). Whisk until evenly distributed. -
Step 2
Prepare the ribs: Remove the membrane from the bone side of the beef ribs. Pat the ribs dry with paper towels. -
Step 3
Apply the dry rub: Generously sprinkle the dry rub all over the beef ribs, ensuring all sides are coated. Gently pat the rub into the meat. Let the seasoned ribs rest in the refrigerator, uncovered, for at least 30 minutes, or up to 4 hours. -
Step 4
Braise the ribs: Preheat oven to 300°F (150°C). Place ribs meat-side up in a baking pan. Pour the non-alcoholic beer into the bottom of the pan. Cover tightly with aluminum foil and bake for 2 to 2.5 hours, or until tender. -
Step 5
Glaze and finish: Carefully remove foil from the pan. Generously brush BBQ sauce all over the ribs. Return to the oven, uncovered, for another 30 to 45 minutes, or until the sauce is caramelized and sticky. -
Step 6
Rest and serve: Remove ribs from the oven and let them rest, tented loosely with foil, for 10-15 minutes. Slice between the bones and serve immediately.
Important Information
Nutrition Facts (Per Serving)
It is important to consider this information as approximate and not to use it as definitive health advice.
Allergy Information
Please check ingredients for potential allergens and consult a health professional if in doubt.