Beef Grinder Sliders- Easy Italian Party Bites
Italian Grinder Sliders are more than just a delicious bite; they’re a miniature explosion of classic Italian-American deli flavors, perfectly packed into a portable and utterly irresistible package. We’ve all fallen in love with the hearty, savory goodness of a traditional Italian grinder, brimming with cured meats, sharp cheeses, and zesty toppings. Now, imagin extracte capturing that entire experience, that satisfying blend of textures and tastes, and shrinking it down into a perfectly sized slider. That’s the magic of Italian Grinder Sliders! What makes these so special is their ability to deliver that complex, satisfying flavor profile without the commitment of a full-sized sandwich. They’re ideal for game day parties, casual get-togethers, or even just a fun weeknight meal that feels like a special treat. Prepare for your taste buds to do a happy dance as you savor every flavorful layer.
Ingredients:
- 12 hawaiian rolls
- 8 ounces beef beef ham (thinly sliced)
- 4 ounces provolone cheese (sliced)
- 3 ounces thinly sliced beef beef pepperoni
- 3 ounces thinly sliced beef beef salami
- 2 tablespoons butter
- 2 tablespoons grated parmesan
- 1/2 teaspoon garlic powder
- 1/4 teaspoon salt
- 8 ounces shredded lettuce
- 1/2 cup diced tomato
- 1/2 cup sliced pepperoncini peppers
- 1/4 cup mayonnaise
- 1 tablespoon red grape juice vinegar
- 1 teaspoon Italian seasoning
Preparing the Sliders
Building the Foundation
First, let’s get our Hawaiian rolls ready. Take your 12 Hawaiian rolls and carefully slice them in half horizontally, just like you would a regular sandwich bun. It’s easiest to do this with a serrated knife to get a clean cut without squishing the soft rolls. Place the bottom halves of the rolls, cut-side up, in a 9×13 inch baking dish. This will be the base for our delicious Italian Grinder Sliders.
Layering the Meats and Cheeses
Now comes the fun part – layering! On top of the bottom halves of the rolls, we’re going to start building our flavor. Begin extract by evenly distributing the thinly sliced beef hamf ham over the rolls. Don’t be afraid to let it overlap slightly; we want generous fillings. Next, add your thinly sliced beef pepperonieroni, scattering itbeef hamer the ham. Follow this with the thinly sliced beef salamialami, ensuring good coverage across all the rolls. We’re creating a robust foundation of savory Italian meats.
Once the meats are in place, it’s time for the cheese. Arrange the slices of provolone cheese over the meat layers. Try to cover as much of the meat and roll surface as possible. The provolone will melt beautifully and bind everything together, creating that classic grinder texture we love. This combination of meats and cheese is key to achieving the authentic Italian Grinder flavor profile we’re aiming for.
Crafting the Italian Butter Topping
Melting and Mixing
To give our sliders that irresistible golden-brown crust and infused flavor, we’ll prepare a special garlic herb butter. In a small saucepan over low heat, melt the 2 tablespoons of butter. Once melted, remove it from the heat. Into the melted butter, stir in the 2 tablespoons of grated Parmesan cheese, the 1/2 teaspoon of garlic powder, and the 1/4 teaspoon of salt. Whisk everything together until the Parmesan is well incorporated into the butter. This mixture will infuse the tops of the rolls with a rich, savory, and garlicky aroma as they bake.
Applying the Topping
Now, take a pastry brush or a spoon and evenly drizzle or brush this flavorful butter mixture over the cut sides of the top halves of the Hawaiian rolls. Make sure to get good coverage on each roll. This step is crucial for developing a wonderfully crisp and flavorful exterior on our sliders, complementing the soft, sweet Hawaiian rolls and the savory fillings within. The garlic and Parmesan will create a delectable crust that you’ll adore.
Assembling and Baking the Sliders
Putting It All Together
With the butter topping applied to the top halves of the rolls, it’s time to assemble the sliders. Gently place the butter-topped roll halves back onto the filling-covered bottom halves in the baking dish. You should now have 12 assembled sliders, ready for their final transformation. At this point, if you’re not ready to bake immediately, you can cover the dish tightly with plastic wrap and refrigerate for up to 24 hours. This makes them a fantastic make-ahead option for parties or weeknight dinners.
Baking to Perfection
Preheat your oven to 350°F (175°C). Cover the baking dish tightly with aluminum foil. This helps to steam the sliders slightly, ensuring the cheese melts evenly and the rolls become wonderfully soft and infused with flavor. Bake for 15-20 minutes with the foil on. After this initial baking period, carefully remove the aluminum foil. Continue to bake for another 5-10 minutes, or until the cheese is fully melted and bubbly, and the tops of the rolls are golden brown and slightly crispy. Keep an eye on them to prevent burning.
Preparing the Toppings and Serving
Crafting the Zesty Dressing
While the sliders are baking, let’s prepare our zesty dressing that will add a fresh and tangy contrast. In a small bowl, combine the 1/4 cup mayonnaise, the 1 tablespoon of red grape juice vinegar, and the 1 teaspoon of Italian seasoning. Stir these ingredients together until they are thoroughly mixed. This simple yet effective dressing will cut through the richness of the meats and cheegin extract bringing a delightful brightness to each bite. The vinegar adds a necessary tang, while the Italian seasoning ties in perfectly with the other flavors.
Adding the Fresh Finish
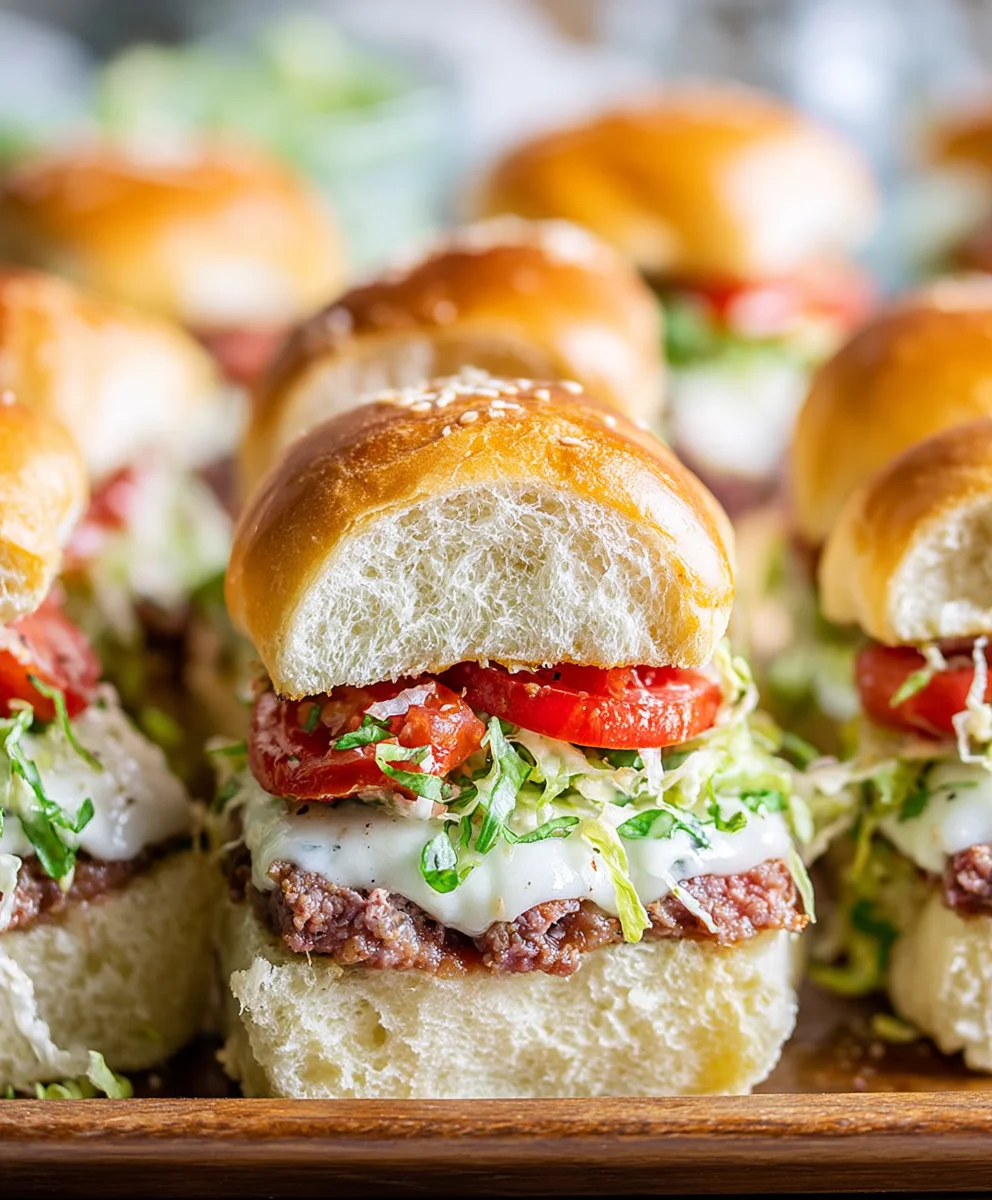
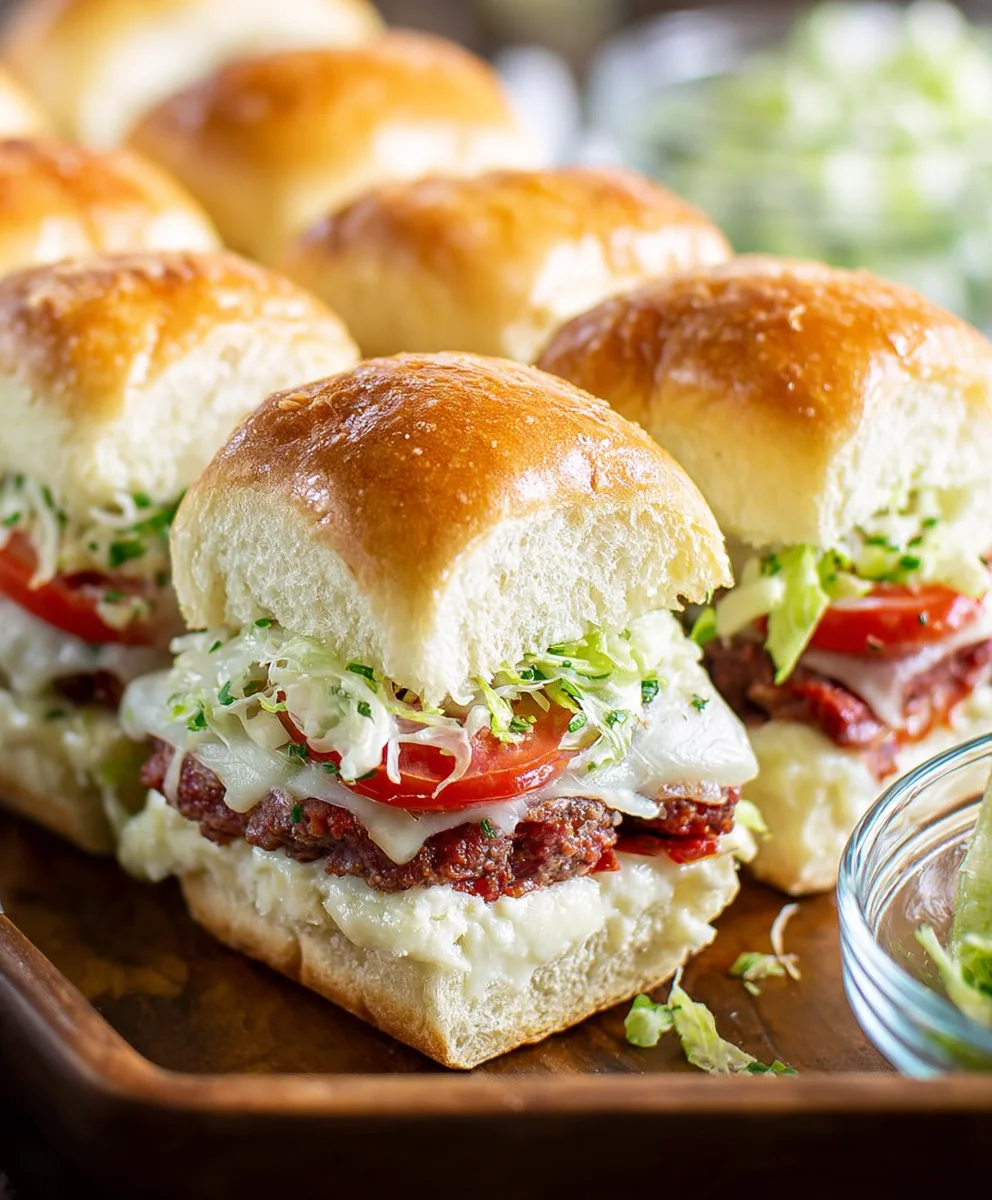
Once the sliders are out of the oven and look perfectly golden and melty, it’s time for the final touches before serving. Carefully remove the top halves of the rolls. Evenly spread the prepared mayonnaise dressing over the melted cheese and meat layers. Then, generously top with the 8 ounces of shredded lettuce, the 1/2 cup of diced tomato, and the 1/2 cup of sliced pepperoncini peppers. These fresh toppings provide texture, a burst of color, and that signature grinder freshness. Place the top halves of the rolls back on, and serve immediately for the best experience.
Conclusion:
And there you have it – your very own batch of delicious Italian Grinder Sliders! We hope you found this recipe straightforward and enjoyable to create. These sliders are a fantastic way to bring the bold flavors of an Italian grinder sandwich to a bite-sized, party-friendly format. The combination of savory meats, melted cheese, and zesty dressing, all tucked into soft slider buns, is simply irresistible. Perfect for game nights, casual gatherings, or even a fun family dinner, these Italian Grinder Sliders are sure to be a hit!
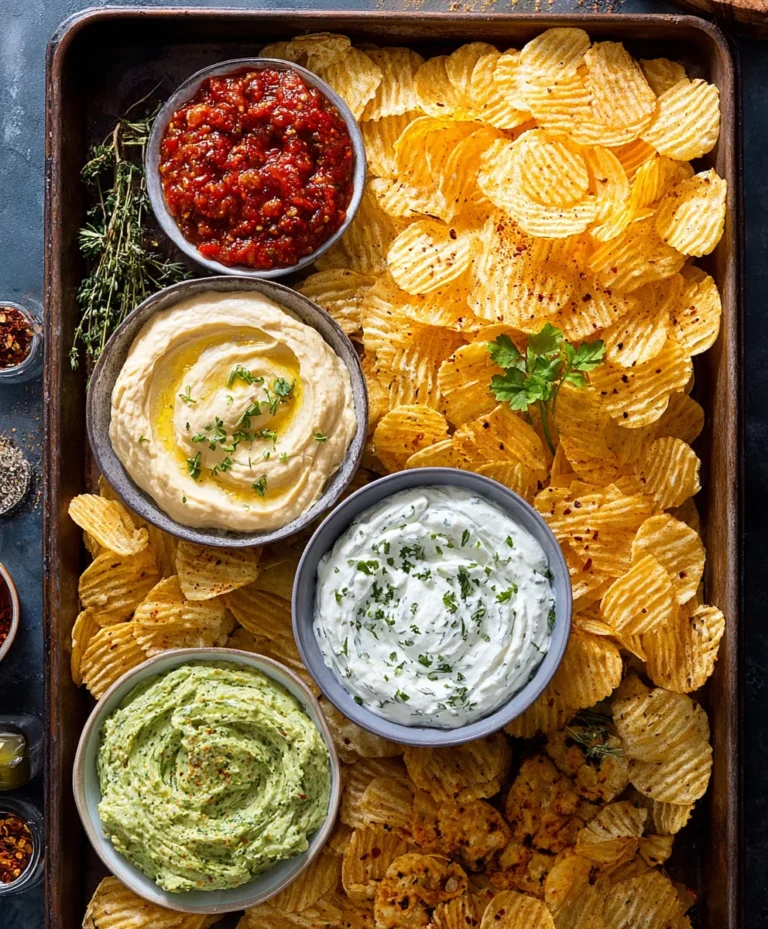
For serving suggestions, consider pairing them with a fresh side salad, a bowl of crispy potato chips, or some crunchy pickles for a complete meal. Don’t be afraid to get creative with variations! You can swap out the meats for your favorites, add a layer of caramelized onions, or even introduce some roasted red peppers for an extra layer of flavor. The key is to have fun and make these sliders your own. We encourage you to try this recipe and share the delicious results with your loved ones. Happy cooking!
Frequently Asked Questions:
Can I make the Italian Grinder Sliders ahead of time?
Yes, you can assemble the sliders a few hours in advance and refrigerate them. For the best texture, it’s recommended to bake them just before serving to ensure the bread is toasted and the cheese is perfectly melted.
What kind of bread works best for Italian Grinder Sliders?
Slider buns are ideal due to their size and softness. However, if slider buns aren’t available, you can also use small dinner rolls or even cut a baguette into individual portions.
How can I make these spicier?
For a spicier kick, you can add a pinch of red pepper flakes to the meat mixture before baking, or include a few slices of pickled jalapeños on top of the cheese.
Beef Grinder Sliders- Easy Italian Party Bites
Delicious and easy-to-make Italian-inspired sliders featuring a savory beef and cheese filling, topped with fresh vegetables and a zesty dressing, all on sweet Hawaiian rolls.
Ingredients
-
12 hawaiian rolls
-
8 ounces beef ham (thinly sliced)
-
4 ounces provolone cheese (sliced)
-
3 ounces thinly sliced beef pepperoni
-
3 ounces thinly sliced beef salami
-
2 tablespoons butter
-
2 tablespoons grated parmesan
-
1/2 teaspoon garlic powder
-
1/4 teaspoon salt
-
8 ounces shredded lettuce
-
1/2 cup diced tomato
-
1/2 cup sliced pepperoncini peppers
-
1/4 cup mayonnaise
-
1 tablespoon red grape juice vinegar
-
1 teaspoon Italian seasoning
Instructions
-
Step 1
Slice Hawaiian rolls in half horizontally and place the bottom halves cut-side up in a 9×13 inch baking dish. -
Step 2
Layer thinly sliced beef ham, beef pepperoni, and beef salami evenly over the bottom halves of the rolls. Top with slices of provolone cheese. -
Step 3
Melt butter in a small saucepan. Stir in grated Parmesan, garlic powder, and salt. Brush this mixture over the cut sides of the top halves of the Hawaiian rolls. -
Step 4
Place the butter-topped roll halves onto the filling-covered bottom halves in the baking dish. Cover tightly with aluminum foil and bake at 350°F (175°C) for 15-20 minutes. Remove foil and bake for another 5-10 minutes until golden brown and bubbly. -
Step 5
While sliders bake, whisk together mayonnaise, red grape juice vinegar, and Italian seasoning in a small bowl to create the zesty dressing. -
Step 6
Once sliders are out of the oven, carefully remove the top halves of the rolls. Spread the mayonnaise dressing over the melted cheese and meat layers. Top with shredded lettuce, diced tomato, and sliced pepperoncini peppers. Replace the top halves of the rolls and serve immediately.
Important Information
Nutrition Facts (Per Serving)
It is important to consider this information as approximate and not to use it as definitive health advice.
Allergy Information
Please check ingredients for potential allergens and consult a health professional if in doubt.