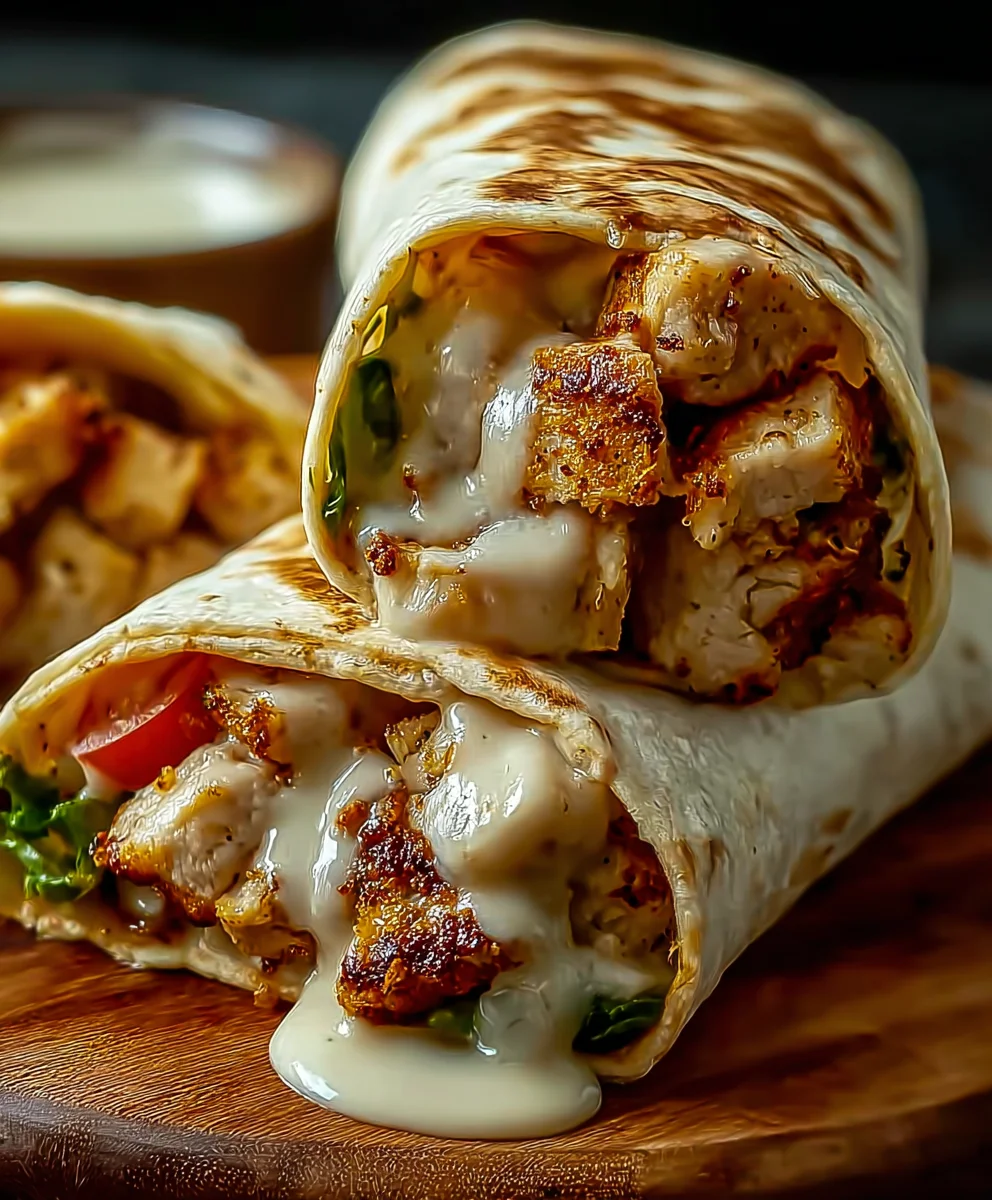
Cheesy Garlic Chicken Wraps – Easy Dinner Delight
Cheesy Garlic Chicken Wraps: A Tasty Dinner Delight! We all crave those weeknight meals that are both incredibly satisfying and surprisingly easy to whip up, and this recipe delivers exactly that. If you’re looking for a flavorful, comforting, and ridiculously cheesy dinner that will have everyone asking for seconds, you’ve found your match. What makes these Cheesy Garlic Chicken Wraps so special? It’s the perfect harmony of tender, garlicky chicken, a wonderfully gooey cheese blend, and the satisfying crunch of fresh veggies, all wrapped up in a soft tortilla. It’s a dish that appeals to picky eaters and seasoned foodies alike, offering a brilliant balance of savory, creamy, and slightly tangy notes. This isn’t just dinner; it’s a crowd-pleasing experience that transforms simple ingredients into a truly memorable meal.

Ingredients:
- 2 cups cooked chicken, shredded
- 1 cup shredded mozzarella cheese
- 1/2 cup cream cheese, softened
- 1/4 cup sour cream
- 2 cloves garlic, minced
- 1 teaspoon garlic powder
- 1 teaspoon onion powder
- 1/2 teaspoon salt
- 1/4 teaspoon black pepper
- 4 large flour tortillas
- 1 cup fresh spinach leaves
- 1/2 cup diced tomatoes
- 1/4 cup chopped fresh parsley (optional)
- Olive oil for cooking
Preparing the Cheesy Garlic Chicken Filling
Step 1: Combine the Creamy Base
In a medium-sized mixing bowl, begin extract by combining the softened cream cheese and the sour cream. Using a spoon or a spatula, vigorously mix these two ingredients together until they are thoroughly incorporated and you have a smooth, creamy base. This is the foundation of our flavorful filling, so ensuring it’s well blended is key. If your cream cheese is still a bit firm, gently warming it for about 15-20 seconds in the microwave can help, but be careful not to overheat it.
Step 2: Infuse with Garlic and Seasonings
Next, add the minced garlic cloves to the cream cheese and sour cream mixture. Follow this with the garlic powder, onion powder, salt, and black pepper. Stir everything together until all the seasonings are evenly distributed throughout the creamy base. The minced garlic will provide a fresh, pungent burst of flavor, while the powders will add a deeper, more rounded garlic and onion profile. Don’t be shy with the seasoning; taste as you go and adjust if necessary, keeping in mind that the cheese will also add saltiness.
Step 3: Incorporate the Chicken and Cheese
Now it’s time to add the star of our filling: the shredded cooked chicken. Add the 2 cups of shredded chicken to the bowl. Gently fold the chicken into the creamy mixture, ensuring each piece is coated. Then, add the shredded mozzarella cheese. Continue to fold and stir until the chicken and cheese are well integrated with the creamy base. The mozzarella will melt slightly as it combines, creating a wonderfully gooey and rich chicken mixture that’s perfect for our wraps.
Assembling and Cooking the Wraps
Step 4: Warm the Tortillas and Add the Filling
Lightly brush a large skillet or griddle with a little olive oil and heat it over medium heat. This is where we’ll warm and slightly crisp our tortillas, making them pliable and delicious. Once the skillet is warm, place one large flour tortilla in it and heat for about 30 seconds per side, just until it becomes soft and flexible. Remove the warmed tortilla from the skillet and place it on a clean, flat surface. Spoon about a quarter of the cheesy chicken mixture evenly onto the center of the tortilla, leaving a border around the edges.
Step 5: Layer with Fresh Ingredients
Once the chicken filling is in place, it’s time to add the fresh components that will provide a delightful contrast in texture and flavor. Sprinkle a generous handful of fresh spinach leaves over the chicken mixture. The heat from the filling will gently wilt the spinach, softening it slightly while retaining its vibrant color and nutrients. Next, scatter the diced tomatoes evenly over the spinach. If you’re using the optional chopped fresh parsley, sprinkle that over the tomatoes now for an extra burst of herbaceous freshness. This combination of warm, creamy filling with fresh, crisp elements makes these wraps incredibly satisfying.
Step 6: Fold and Sear the Wraps
Now, carefully fold the tortilla to enclose the filling. You can fold in the sides first, and then roll it up from the bottom, or simply fold it in half like a quesadilla. For this recipe, a folded-over wrap is ideal. Place the folded wrap back into the lightly oiled skillet, seam-side down if you’ve rolled it. Cook for 2-3 minutes per side, or until the tortilla is golden brown and slightly crispy, and the cheese inside is beautifully melted and gooey. Repeat this process with the remaining tortillas and filling, adding a tiny bit more olive oil to the pan if needed between wraps to prevent sticking and ensure a nice sear. The goal is to achieve a lovely toasted exterior while keeping the interior warm and decadent.
Conclusion:
And there you have it! Your very own batch of Cheesy Garlic Chicken Wraps: A Tasty Dinner Delight! We hope you enjoyed this straightforward yet incredibly satisfying recipe. This dish is perfect for busy weeknights, a fun family meal, or even a casual get-together with friends. The combination of tender garlic-infused chicken, gooey melted cheese, and the fresh crunch of vegetables wrapped in a warm tortilla is simply irresistible. Don’t be afraid to get creative with your fillings; this recipe is a fantastic base for all sorts of delicious additions. We encourage you to make this your own and enjoy the process as much as the final, delightful result!
For serving, these wraps are fantastic on their own, but consider pairing them with a light side salad, some crispy sweet potato fries, or even a small cup of your favorite soup for a more complete meal. Get ready to impress yourself and your loved ones with this simple yet flavorful dinner!
FAQs
Can I make the chicken filling ahead of time?
Absolutely! You can cook the chicken and mix it with the garlic, herbs, and seasonings up to a day in advance. Store it in an airtight container in the refrigerator. When you’re ready to assemble the wraps, simply warm the chicken mixture slightly before adding the cheese and wrapping it up.
What are some good vegetarian or vegan variations?
For a vegetarian option, substitute the chicken with crum extractbled firm tofu or chickpeas, seasoned with the same garlic and herb blend. For a vegan version, use a plant-based chicken substitute or the seasoned tofu/chickpeas, and opt for vegan cheese shreds and a vegan mayonnaise or a dairy-free sour cream alternative for the sauce.
Cheesy Garlic Chicken Wraps – Easy Dinner Delight
Delicious and easy-to-make wraps filled with cheesy garlic chicken, fresh spinach, and tomatoes.
Ingredients
-
2 cups cooked chicken, shredded
-
1 cup shredded mozzarella cheese
-
1/2 cup cream cheese, softened
-
1/4 cup sour cream
-
2 cloves garlic, minced
-
1 teaspoon garlic powder
-
1 teaspoon onion powder
-
1/2 teaspoon salt
-
1/4 teaspoon black pepper
-
4 large flour tortillas
-
1 cup fresh spinach leaves
-
1/2 cup diced tomatoes
-
1/4 cup chopped fresh parsley (optional)
-
Olive oil for cooking
Instructions
-
Step 1
In a medium-sized mixing bowl, combine the softened cream cheese and sour cream. Mix until smooth and creamy. -
Step 2
Add the minced garlic, garlic powder, onion powder, salt, and black pepper to the creamy base. Stir until well combined. -
Step 3
Add the shredded cooked chicken and shredded mozzarella cheese to the bowl. Fold gently until the chicken and cheese are integrated. -
Step 4
Lightly oil a skillet over medium heat. Warm each tortilla for about 30 seconds per side. Place about a quarter of the chicken mixture onto the center of each warmed tortilla. -
Step 5
Layer fresh spinach leaves, diced tomatoes, and optional chopped parsley over the chicken mixture. -
Step 6
Fold the tortilla to enclose the filling. Cook the folded wrap in the oiled skillet for 2-3 minutes per side, until golden brown and the cheese is melted.
Important Information
Nutrition Facts (Per Serving)
It is important to consider this information as approximate and not to use it as definitive health advice.
Allergy Information
Please check ingredients for potential allergens and consult a health professional if in doubt.