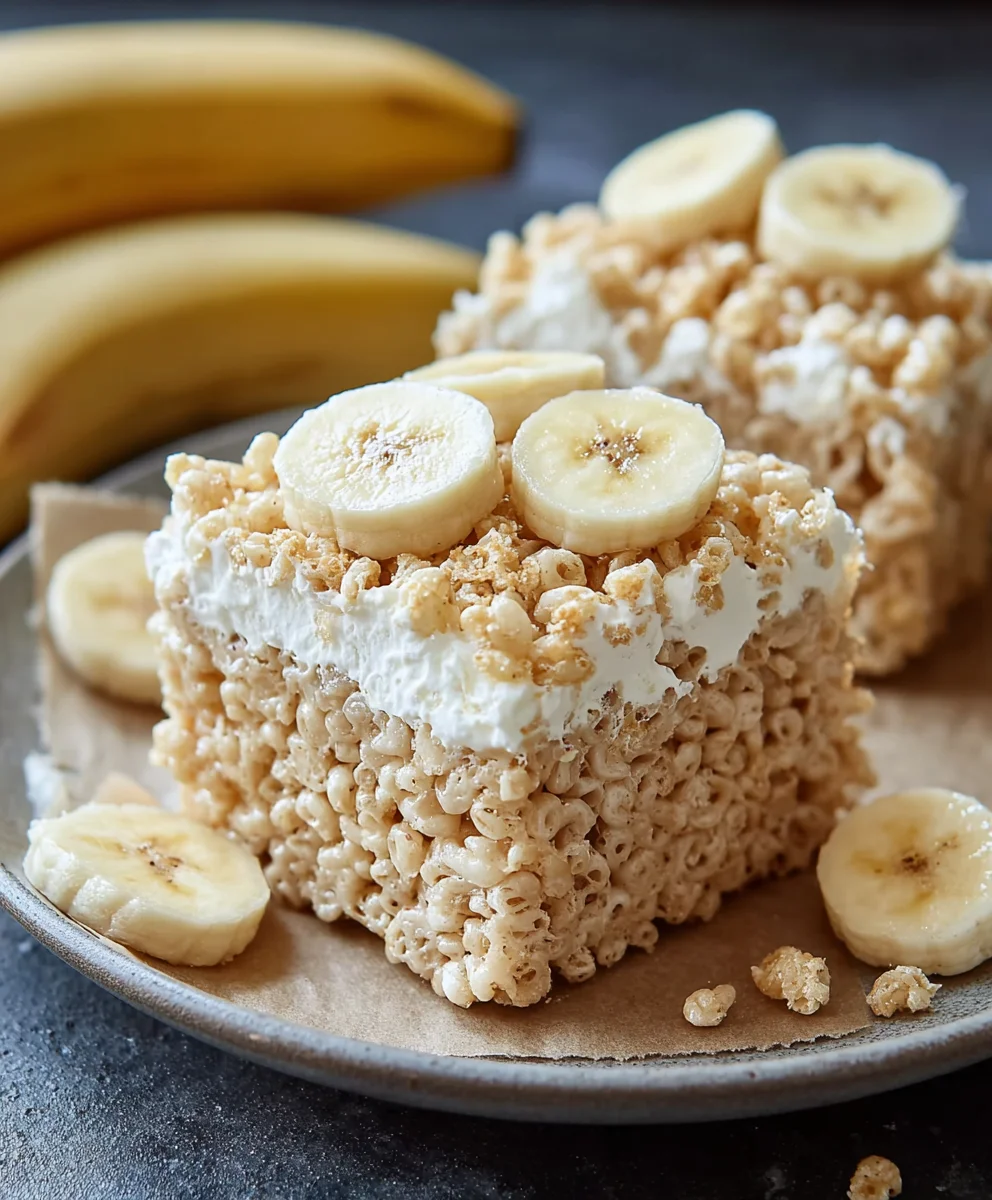
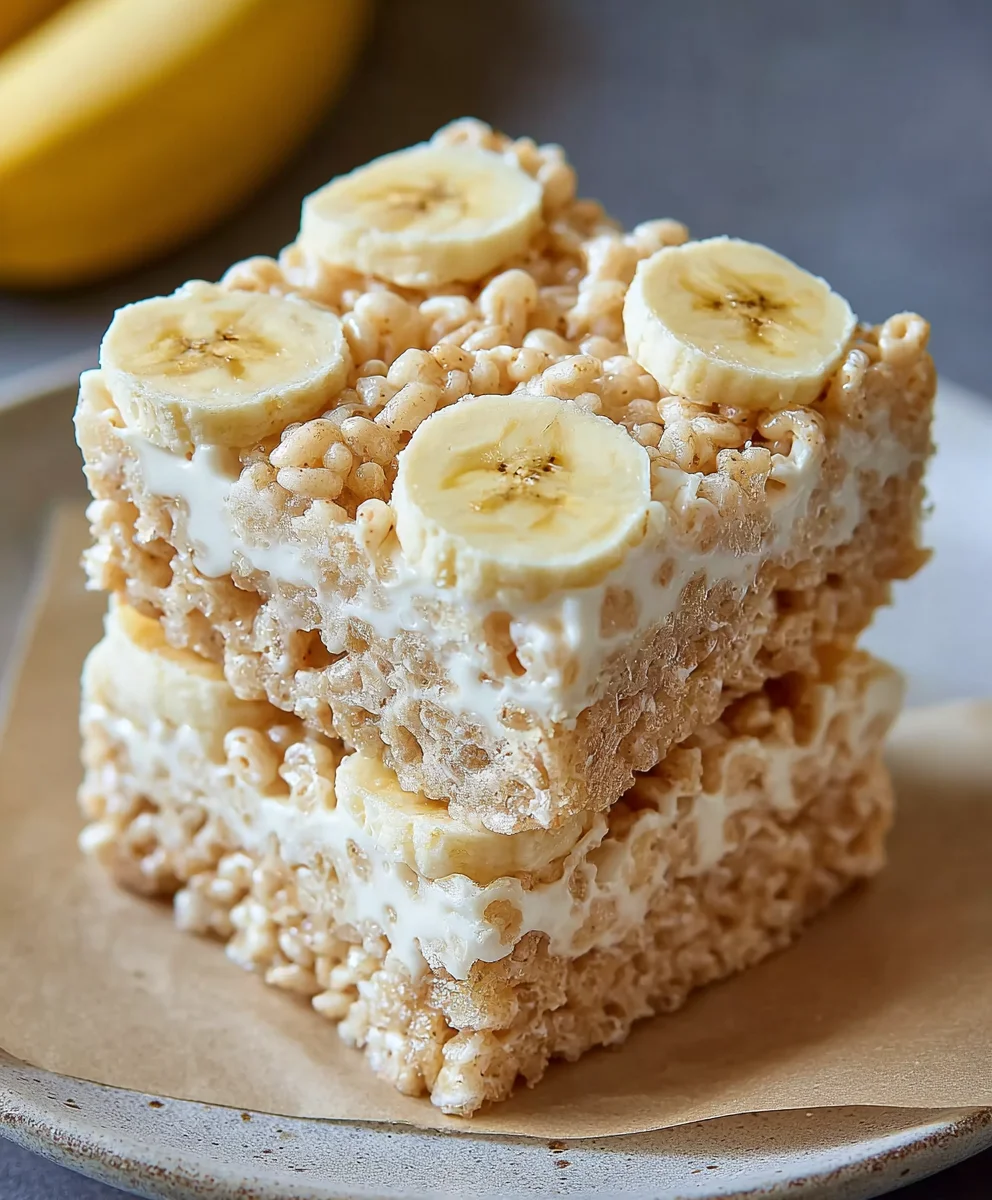
Banana Pudding Rice Krispie Treats – Easy Dessert
Banana Pudding Rice Krispie Treats are more than just a dessert; they’re a nostalgic hug in every bite. Imagin extracte the creamy, dreamy essence of your favorite banana pudding, expertly blended with the satisfying, nostalgic crunch of classic Rice Krispie treats. What’s not to love? It’s a delightful mashup that takes a beloved childhood favorite and elevates it into a sophisticated yet utterly comforting confection. People adore these because they tap into a deep well of happy memories while offering a surprising, delightful twist on a familiar flavor profile. The magic of Banana Pudding Rice Krispie Treats lies in their ability to deliver that unmistakable banana creaminess alongside the chewy, crispy texture we all crave. They’re perfect for potlucks, birthday parties, or simply as a special indulgence to brighten any ordinary day. Get ready to discover your new favorite sweet treat!
Ingredients:
- 3 tablespoons butter, melted
- 1 (10 oz) bag marshmallows
- 1 (3.4 oz) box instant banana pudding mix
- 6 cups Rice Krispies cereal
- Crushed Nilla Wafers (for topping)
Preparing Your Banana Pudding Rice Krispie Treats
This recipe is incredibly straightforward, making it perfect for a quick and fun baking project with kids or for a last-minute dessert. The secret to its irresistible flavor lies in the combination of creamy banana pudding and the classic crunch of Rice Krispie treats. Let’s get started by gathering all our ingredients and preparing our workspace. It’s a good idea to have everything measured out and ready to go before you begin extract, as the melting and mixing process happens quite quickly.
Melting the Marshmallow BaseIncorporating the Banana Pudding Flavor
Once the marshmallows are fully melted and smooth, remove the pot from the heat. This is the crucial step where we infuse our treats with that delightful banana flavor. Immediately sprinkle the entire 3.4 oz box of instant banana pudding mix over the melted marshmallows. Don’t worry if it looks a bit clumpy at first. The dry pudgin extractg mix will begin to absorb some of the moisture from the marshmallows. Stir vigorously and continuously with a heat-resistant spatula or wooden spoon. The goal is to fully incorporate the pudding mix into the marshmallow mixture, ensuring there are no dry pockets of powder. This stirring process helps to distribute the flavor evenly throughout. You’llgin extracttice the mixture changing color and taking on a pnon-alcoholic ale yellow hue, signaling the banana flavor is becoming one with the marshmallow. Continue stirring until the mixture is uniform and glossy. This step is vital for achieving that distinct banana pudding taste in every bite.
Adding the Cereal and Mixing
Now it’s time to add the star of the texture show: the Rice Krispies cereal. Gently pour the 6 cups of Rice Krispies cereal into the pot with the marshmallow and banana pudding mixture. Using your spatula or spoon, carefully fold the cereal into the gooey mass. The trick here is to coat every single piece of cereal with the sticky marshmallow and pudding mixture. Don’t overmix, as this can crush the cereal and result in a dense treat. Instead, focus on gentle folding and pressing motions until all the cereal is evenly coated. You want to achieve a texture where each Rice Krispie is enveloped in the sweet, banana-flavored goo. This stage requires a bit of effort, as the mixture will become quite thick and sticky. Work quickly but deliberately to ensure even distribution.
Pressing and Topping Your Treats
Once the cereal is thoroughly coated, it’s time to transfer the mixture into your prepared pan. Lightly grease a 9×13 inch baking pan with butter or cooking spray, or line it with parchment paper, leaving some overhang for easy lifting later. Spoon the Rice Krispie mixture into the prepared pan. Here’s a pro tip for pressing: lightly grease your hands or use a piece of parchment paper to press the mixture evenly into the pan. Avoid pressing too hard, as this can make the treats tough. You want a firm but yielding layer. Once the mixture is pressed evenly, sprinkle a generous amount of crushed Nilla Wafers over the top. Gently press these crum extractbs into the warm Rice Krispie mixture so they adhere well. The Nilla Wafer topping adds an extra layer of texture and a complementary cookie flavor that perfectly complements the banana. You can also sprinkle a little extra crushed wafers on top for visual appeal. Allow the treats to cool completely in the pan for at least 30 minutes to an hour before cutting. This cooling period is essential for them to firm up properly.
Cutting and Serving
After the Banana Pudding Rice Krispie Treats have cooled and set, you can lift them out of the pan using the parchment paper overhang, if you used it. Place the large slab on a cutting board. Using a sharp knife, cut the treats into your desired shapes and sizes. Squares are traditional, but you can also make rectangles or even use cookie cutters for fun shapes. These treats are best served at room temperature. They are a delightful snack on their own, perfect for pnon-alcoholic aleies, bake sales, or just as a fun afternoon pick-me-up. The combination of the soft, chewy marshmallow base, the distinct banana pudding flavor, the satisfying crunch of Rice Krispies, and the delightful Nilla Wafer topping creates a truly irresistible treat that’s sure to be a crowd-pleaser. Enjoy!
Conclusion:
And there you have it – the ultimate guide to crafting delightful Banana Pudding Rice Krispie Treats! We’ve walked through each simple step, from melting the marshmallows to swirling in those irresistible banana flavors and crunchy cereal. These treats are a playful and delicious twist on a classic, perfect for any occasion. I truly hope you enjoy making and sharing these sweet, chewy, and satisfying delights.
For serving suggestions, these Banana Pudding Rice Krispie Treats are fantastic on their own as a quick snack or dessert. They also make a wonderful addition to a dessert table at parties, potlucks, or even as a fun lunchbox surprise for the kids. Consider pairing them with a cold glass of milk for that nostalgic touch.
When it comes to variations, don’t be afraid to get creative! You could add a sprinkle of cinnamon to the marshmallow mixture for an extra layer of warmth, or perhaps some chopped Nilla wafers for an even more pronounced pudding flavor. A drizzle of white chocolate after they’ve set could also elevate their appearance and taste.
I encourage you to give these Banana Pudding Rice Krispie Treats a try. They’re a crowd-pleaser that’s incredibly easy to make, offering a fantastic balance of textures and flavors that’s sure to bring smiles all around. Happy baking – or rather, happy no-baking!
Frequently Asked Questions:
Can I use fresh bananas instead of banana extract?
While fresh bananas can be used, they introduce moisture which can affect the texture of the treats, making them too sticky or soft. Banana extract provides a concentrated banana flavor without altering the consistency. If you do wish to use fresh banana, I would suggest pureeing a very ripe banana and reducing it on the stovetop to remove as much moisture as possible before incorporating it, but this will add complexity.
How should I store these Banana Pudding Rice Krispie Treats?
For best results, store your Banana Pudding Rice Krispie Treats in an airtight container at room temperature. They should stay fresh and chewy for up to 3 days. Avoid refrigerating them, as this can cause them to become hard and less enjoyable.
Banana Pudding Rice Krispie Treats
An easy and delightful dessert combining the classic crunch of Rice Krispie treats with the creamy flavor of banana pudding and a Nilla Wafer topping.
Ingredients
-
3 tablespoons butter, melted
-
1 (10 oz) bag marshmallows
-
1 (3.4 oz) box instant banana pudding mix
-
6 cups Rice Krispies cereal
-
Crushed Nilla Wafers
Instructions
-
Step 1
Melt 3 tablespoons of butter in a large pot over low heat. Add the 10 oz bag of marshmallows and stir constantly until completely melted and smooth. -
Step 2
Remove the pot from heat. Sprinkle the entire 3.4 oz box of instant banana pudding mix over the melted marshmallows. Stir vigorously until fully incorporated and the mixture is uniform and glossy. -
Step 3
Gently fold 6 cups of Rice Krispies cereal into the marshmallow and banana pudding mixture until all cereal is evenly coated. Work quickly to avoid crushing the cereal. -
Step 4
Lightly grease a 9×13 inch baking pan. Spoon the mixture into the pan and press evenly using greased hands or parchment paper. Do not press too hard. -
Step 5
Sprinkle a generous amount of crushed Nilla Wafers over the top and gently press them into the warm mixture. Allow the treats to cool completely for at least 30-60 minutes before cutting.
Important Information
Nutrition Facts (Per Serving)
It is important to consider this information as approximate and not to use it as definitive health advice.
Allergy Information
Please check ingredients for potential allergens and consult a health professional if in doubt.