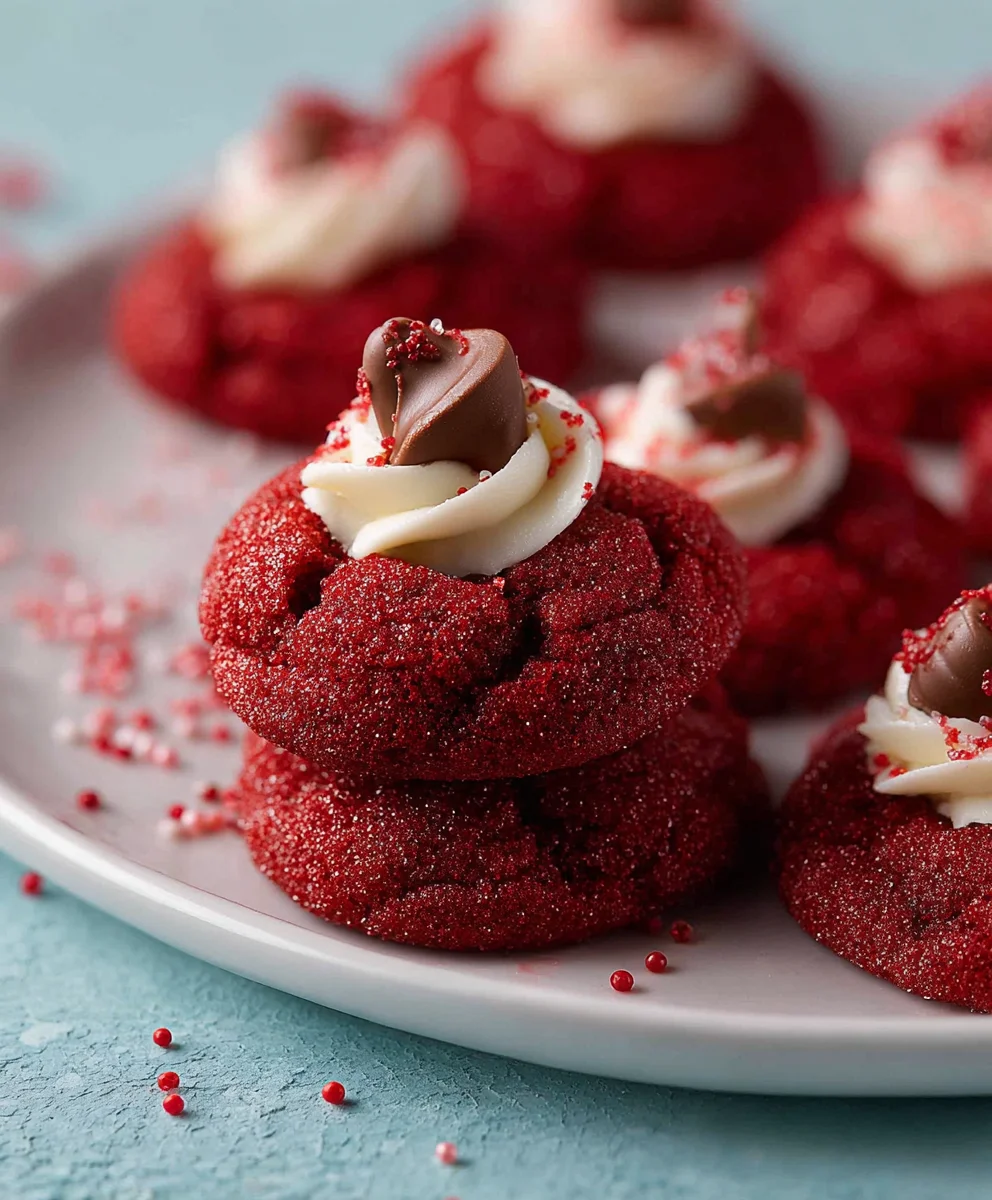
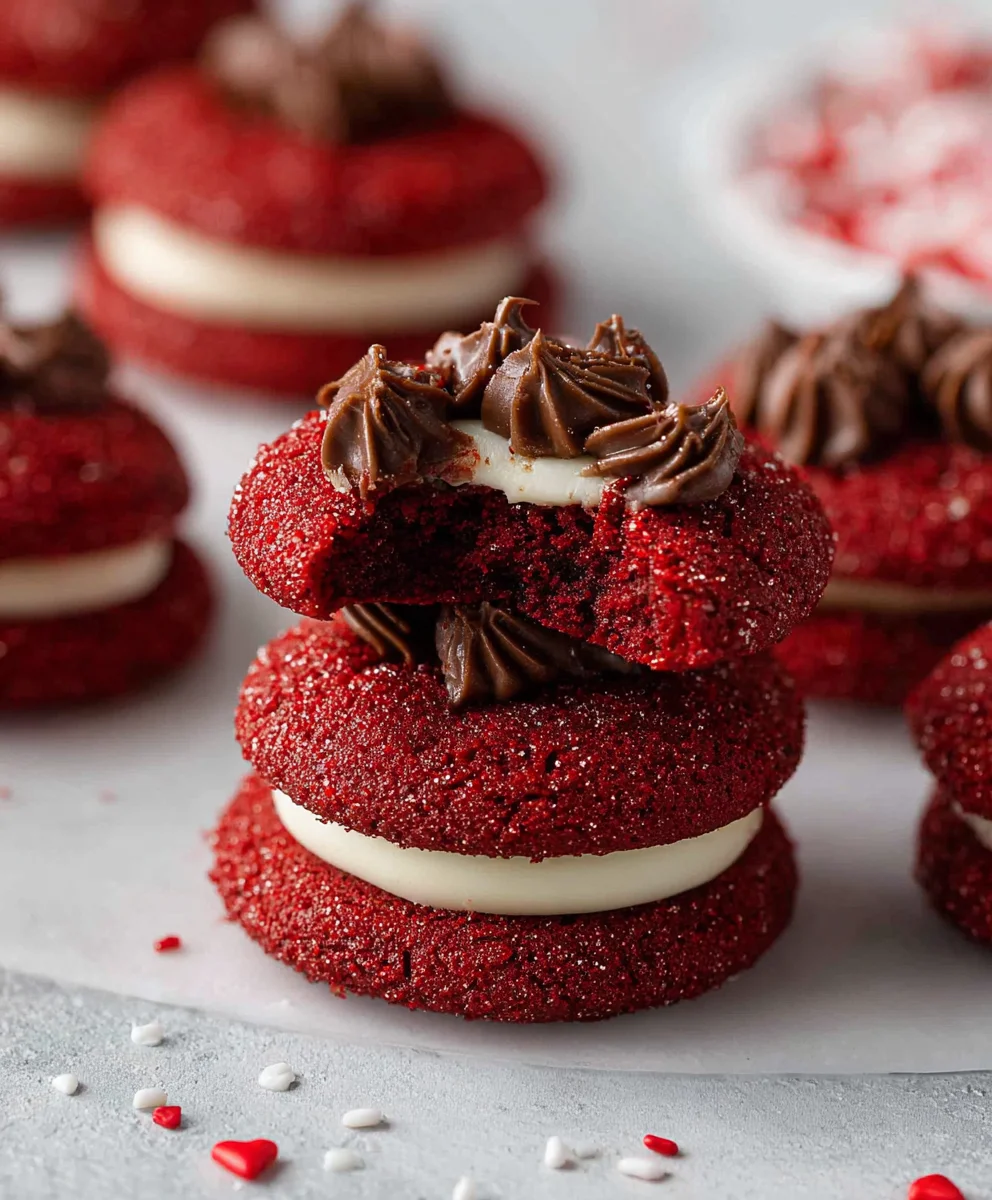
Hershey’s Red Velvet Blossoms- Easy Festive Cookies
Hershey’s red velvet blossoms are more than just a cookie; they’re a nostalgic hug, a vibrant splash of festive color, and an explosion of irresistible chocolatey-tangy flavor all rolled into one delightful bite. For years, these iconic treats have captured hearts and taste buds, becoming a staple for holidays, celebrations, or simply when that craving for something special strikes. What is it about these crimson beauties that makes them so universally loved? It’s that perfect alchemy of a soft, slightly chewy red velvet cookie, beautifully contrasted with the rich, molten heart of a Hershey’s Kiss nestled right in the center. The subtle hint of cocoa and tang from the cream cheese in the cookie base perfectly complements the pure chocolate bliss of the Kiss. This recipe dives deep into creating those unforgettable Hershey’s red velvet blossoms, ensuring yours are just as magical as the ones you remember, if not more so. Get ready to bake up some serious joy and discover what makes these Hershey’s red velvet blossoms a timeless classic.
Ingredients:
- 7 tbsp butter (salted or unsalted, softened)
- 1/2 cup packed light brown sugar
- 2 tbsp granulated sugar
- 1 tsp pure vanilla extract
- 1 large egg yolk
- 1/4 tsp red food coloring gel
- 1 cup all-purpose flour
- 1 tbsp unsweetened cocoa powder
- 1/2 tsp baking powder
- 1/4 tsp salt
- 1/4 cup red sanding sugar
- 18 Hershey’s chocolate kisses
Preparing the Red Velvet Dough
Step 1: Creaming the Butter and Sugars
First, we’ll start by creating the foundation of our Hershey’s red velvet blossoms. In a medium-sized mixing bowl, add your softened butter. It’s important for the butter to be softened, not melted, as this will help it cream properly with the sugars, incorporating air that will contribute to the cookie’s texture. Add the 1/2 cup of packed light brown sugar and the 2 tablespoons of granulated sugar to the bowl with the butter. Using an electric mixer (or a sturdy whisk and some elbow grease!), beat these ingredients together on medium speed until the mixture is light, fluffy, and pnon-alcoholic ale in color. This process, known as creaming, typically takes about 3-5 minutes. You’ll notice the sugars dissolving into the butter, creating a smooth, aerated base. Don’t rush this step; it’s crucial for achieving tender cookies. Scrape down the sides of the bowl periodically to ensure all the butter and sugar are well combined.
Step 2: Incorporating Wet Ingredients and Color
Once your butter and sugar mixture is perfectly creamed, it’s time to add the remaining wet ingredients. Add the 1 teaspoon of pure vanilla extract to the bowl. Next, carefully add the single large egg yolk. The egg yolk will contribute richness and act as a binder. Now for the signature red velvet color! Add the 1/4 teaspoon of red food coloring gel. Gel food coloring is preferable to liquid as it provides a more concentrated color without adding excess moisture, which can alter the cookie’s texture. Beat these ingredients into the creamed mixture until they are thoroughly combined and the dough takes on a beautiful, vibrant red hue. Again, make sure to scrape down the sides of the bowl to ensure even distribution of the color and wet ingredients.
Step 3: Combining Dry Ingredients
In a separate small bowl, we’ll whisk together all of our dry ingredients. This ensures that the leavening agents and salt are evenly distributed throughout the dough, preventing pockets of baking powder or salt and leading to consistent cookie rise and flavor. Add the 1 cup of all-purpose flour, the 1 tablespoon of unsweetened cocoa powder, the 1/2 teaspoon of baking powder, and the 1/4 teaspoon of salt to the small bowl. Whisk these ingredients together gently until they are well combined and there are no streaks of cocoa powder. The cocoa powder adds a subtle depth of flavor characteristic of red velvet, without making the cookies purely chocolate.
Step 4: Bringin extractg the Dough Together
Now, it’s time to combine the wet and dry ingredients to form our cookie dough. Gradually add the dry ingredient mixture to the wet ingredients in the main mixing bowl. Mix on low speed until just combined. Be careful not to overmix at this stage. Overmixing can develop the gluten in the flour, resulting in tough cookies. You want to mix just until you no longer see streaks of flour. The dough will be thick and slightly sticky. If it seems excessively sticky, you can add an extra teaspoon of flour, but generally, this consistency is perfect for holding its shape.
Shaping and Baking the Blossoms
Step 5: Rolling, Sanding, and Baking
This is where our Hershey’s red velvet blossoms truly come to life! Unwrap your 18 Hershey’s chocolate kisses and set them aside. In a shallow dish or plate, place the 1/4 cup of red sanding sugar. Scoop out tablespoon-sized portions of the red velvet dough. Roll each portion into a smooth ball between your palms. Then, gently roll each dough ball in the red sanding sugar until it’s completely coated. The sanding sugar will give the finished cookies a beautiful, shimmering sparkle and a slight crunch. Arrange the coated dough balls about 2 inches apart on a baking sheet lined with parchment paper. This spacing is important to prevent the cookies from spreading into each other during baking. Once the baking sheet is filled (you may need to bake in batches), gently press one Hershey’s chocolate kiss into the center of each dough ball, pushing it down slightly so it’s nestled into the dough.
Step 6: Baking to Perfection
Preheat your oven to 350°F (175°C). Bake the cookies for 9-11 minutes, or until the edges are set and the centers still look slightly soft. The red velvet dough will puff up around the melted chocolate kiss. Avoid overbaking, as this will lead to dry cookies and potentially burnt chocolate. Once baked, remove the baking sheet from the oven and let the cookies cool on the baking sheet for about 5 minutes. During this time, the residual heat will continue to set the cookies and the chocolate will firm up slightly. After 5 minutes, carefully transfer the Hershey’s red velvet blossoms to a wire rack to cool completely. This cooling process is important for the cookies to achieve their final texture and for the chocolate to harden fully. Enjoy these festive and delicious treats!
Conclusion:
And there you have it! Your kitchen should now be filled with the irresistible aroma of freshly baked Hershey’s red velvet blossoms. These delightful cookies are a perfect balance of rich cocoa, sweet cream cheese frosting, and the iconic chocolate kiss center. They’re not just a treat for the eyes with their vibrant color, but a true joy to savor. Don’t be intimidated by the steps; the process is straightforward and incredibly rewarding. We encourage you to give these Hershey’s red velvet blossoms a try for your next gathering, holiday, or even just a cozy afternoon treat. They are sure to become a fast favorite!
For serving, these beauties are wonderful on their own, perhaps with a cold glass of milk. They also pair exceptionally well with a cup of coffee or a festive eggnog during the holiday season. You can also elevate them by serving them alongside a scoop of vanilla bean ice cream for a decadent dessert experience.
Thinking about variations? Feel free to experiment with different flavored Hershey’s Kisses, like peppermint or caramel, for a unique twist. You could also dust the cooled cookies with a little powdered sugar for an extra touch of elegance. No matter how you choose to make them, the joy of baking and sharing these Hershey’s red velvet blossoms is unparalleled.
Frequently Asked Questions:
Q: Can I make the dough for Hershey’s red velvet blossoms ahead of time?
A: Absolutely! The dough can be prepared and then chilled in the refrigerator for up to 3 days. This is a great make-ahead strategy. When you’re ready to bake, simply let the dough sit at room temperature for about 15-20 minutes to make it easier to scoop and roll.
Q: My Hershey’s red velvet blossoms are cracking when I press the kiss into them. What am I doing wrong?
A: This often happens if the cookies are too cold or if you’re pressing down too hard. Ensure your dough is at room temperature, making it more pliable. Gently press the Hershey’s Kiss straight down into the center of the warm cookie immediately after it comes out of the oven. The residual heat helps it sink in smoothly.
Q: How should I store leftover Hershey’s red velvet blossoms?
A: Once completely cooled, store your Hershey’s red velvet blossoms in an airtight container at room temperature for up to 3-4 days. They’ll maintain their delightful texture and flavor.
Hershey’s Red Velvet Blossoms
Easy and festive red velvet cookies topped with Hershey’s chocolate kisses, perfect for any celebration.
Ingredients
-
7 tbsp butter, softened
-
1/2 cup packed light brown sugar
-
2 tbsp granulated sugar
-
1 tsp pure vanilla extract
-
1 large egg yolk
-
1/4 tsp red food coloring gel
-
1 cup all-purpose flour
-
1 tbsp unsweetened cocoa powder
-
1/2 tsp baking powder
-
1/4 tsp salt
-
1/4 cup red sanding sugar
-
18 Hershey’s chocolate kisses
Instructions
-
Step 1
In a medium bowl, beat softened butter with light brown sugar and granulated sugar until light, fluffy, and pale in color. This creaming process takes about 3-5 minutes. -
Step 2
Add vanilla extract, egg yolk, and red food coloring gel to the creamed mixture. Beat until thoroughly combined and the dough is a vibrant red hue. -
Step 3
In a separate small bowl, whisk together all-purpose flour, unsweetened cocoa powder, baking powder, and salt. -
Step 4
Gradually add the dry ingredients to the wet ingredients, mixing on low speed until just combined. Do not overmix. The dough will be thick and slightly sticky. -
Step 5
Preheat oven to 350°F (175°C). Scoop tablespoon-sized portions of dough, roll into balls, and coat completely in red sanding sugar. Place on a parchment-lined baking sheet. -
Step 6
Gently press one Hershey’s chocolate kiss into the center of each dough ball. Bake for 9-11 minutes, or until edges are set and centers are slightly soft. -
Step 7
Let cookies cool on the baking sheet for 5 minutes, then transfer to a wire rack to cool completely.
Important Information
Nutrition Facts (Per Serving)
It is important to consider this information as approximate and not to use it as definitive health advice.
Allergy Information
Please check ingredients for potential allergens and consult a health professional if in doubt.