Easy Honey Garlic Beef – Quick & Delicious Recipe
Honey Garlic Chicken is the weeknight dinner superhero you’ve been waiting for. Imagin extracte tender, juicy chicken pieces coated in a glistening, sweet, and savory glaze that clings to every bite. It’s no wonder this dish is a perennial favorite; it strikes that perfect balance between comforting familiarity and exciting flavor. The magic of honey garlic chicken lies in its simplicity, yet the resulting taste is anything but basic. The honey provides a delightful sweetness that’s beautifully complemented by the pungent, umami depth of garlic, all brought together with a touch of soy sauce and perhaps a gin extractt of ginger. This is the kind of meal that makes everyone at the table smile, a guaranteed crowd-pleaser that feels both indulgent and incredibly satisfying without requiring hours in the kitchen. Get ready to fall in love with honey garlic chicken all over again.
Ingredients:
- 1 1/2 pounds boneless, skinless chicken thighs or breasts, cut into bite-sized pieces
- 2 tablespoons cornstarch
- 2 tablespoons vegetable oil
- 4 garlic cloves, minced
- 1/3 cup honey
- 1/4 cup soy sauce (low sodium recommended)
- 2 tablespoons rice vinegar or apple cider vinegar
- 1 teaspoon sesame oil
- 1/2 teaspoon chili flakes (optional, for heat)
- Sesame seeds and chopped green onions, for garnish
Honey Garlic Chicken Preparation
Step 1: Preparing the Chicken
The first step to achieving deliciously tender Honey Garlic Chicken is to properly prepare your chicken. Begin extract by taking your 1 1/2 pounds of boneless, skinless chicken thighs or breasts. It’s important to cut them into uniform, bite-sized pieces. This ensures that all the pieces cook evenly and absorb the flavorful sauce beautifully. You want pieces that are roughly 1 to 1.5 inches. Once cut, place the chicken in a medium bowl. Now, we’ll add the cornstarch. Sprinkle the 2 tablespoons of cornstarch evenly over the chicken pieces. Gently toss the chicken with your hands or a spatula until each piece is lightly coated. This cornstarch coating will not only help to thicken the sauce later but also create a lovely, slightly crispy exterior on the chicken as it cooks, providing a delightful textural contrast to the juicy interior. Set this coated chicken aside while you prepare the sauce.
Step 2: Crafting the Honey Garlic Sauce
Now, let’s build the star of our dish: the luscious Honey Garlic sauce. In a small bowl, combine the liquid ingredients. Pour in the 1/3 cup of honey, which will provide that signature sweetness. Next, add the 1/4 cup of soy sauce. Using a low-sodium soy sauce is a great way to control the saltiness and allows the other flavors to shine through. Then, measure out 2 tablespoons of rice vinegar or apple cider vinegar. The vinegar adds a crucial touch of acidity that balances the sweetness of the honey and the saltiness of the soy sauce, preventing the sauce from being cloying. If you enjoy a bit of warmth, now is the time to stir in the 1/2 teaspoon of chili flakes. This is entirely optional, but it adds a pleasant subtle heat that complements the sweet and savory notes. Finally, add the 1 teaspoon of sesame oil. Sesame oil has a distinct nutty aroma and flavor that really elevates Asian-inspired dishes. Whisk all these ingredients together thoroughly until the honey is fully incorporated into the other liquids, creating a smooth, well-emulsified sauce. Set this sauce aside.
Step 3: Searing the Chicken
With your chicken prepped and your sauce ready, it’s time to get cooking. Heat a large skillet or wok over medium-high heat. Add the 2 tablespoons of vegetable oil. Allow the oil to heat up until it shimmers. This indicates that the pan is hot enough to sear the chicken properly. Carefully add the cornstarch-coated chicken pieces to the hot skillet in a single layer. Avoid overcrowding the pan; if necessary, cook the chicken in batches to ensure it browns rather than steams. Overcrowding will lower the pan’s temperature and result in soggy chicken. Let the chicken sear undisturbed for about 3-4 minutes per side, or until it’s golden brown and cooked through. You’re looking for a nice sear to lock in the juices. Once the chicken is cooked, remove it from the skillet and set it aside on a clean plate. Don’t worry about any browned bits stuck to the bottom of the pan; those are packed with flavor and will be scraped up in the next step.
Step 4: Infusing with Garlic and Deglazing
After removing the chicken, reduce the heat to medium. Add the minced garlic to the same skillet. Sauté the garlic for about 30-60 seconds, stirring constantly. Be careful not to burn the garlic, as burnt garlic can turn bitter. You want it to become fragrant and slightly softened. As the garlic cooks, you’ll notice those flavorful browned bits on the bottom of the pan. This is where the magic happens. Pour the prepared Honey Garlic sauce mixture into the skillet. As the sauce hits the hot pan, use a wooden spoon or spatula to scrape up all those delicious browned bits from the bottom of the skillet. This process, called deglazing, incorporates all that extra flavor into your sauce, making it even more robust and complex. Let the sauce simmer for 1-2 minutes, allowing it to thicken slightly.
Step 5: Combining and Finishing
Now that your sauce has thickened beautifully and is infused with garlic and those lovely browned bits, it’s time to bring everything together. Return the seared chicken pieces to the skillet with the simmering sauce. Gently toss the chicken in the sauce, ensuring that every piece is thoroughly coated. Continue to cook for another 1-2 minutes, stirring occasionally, until the chicken is heated through and the sauce has thickened to your desired consistengin extract clinging nicely to the chicken. The cornstarch on the chicken will help to achieve a glossy, thickened sauce. If the sauce seems too thick, you can add a tablespoon or two of water or chicken broth to loosen it up. If it’s too thin, you can let it simmer for a bit longer or even make a slurry of 1 teaspoon of cornstarch mixed with 2 teaspoons of cold water and stir it into the sauce, cooking until thickened.
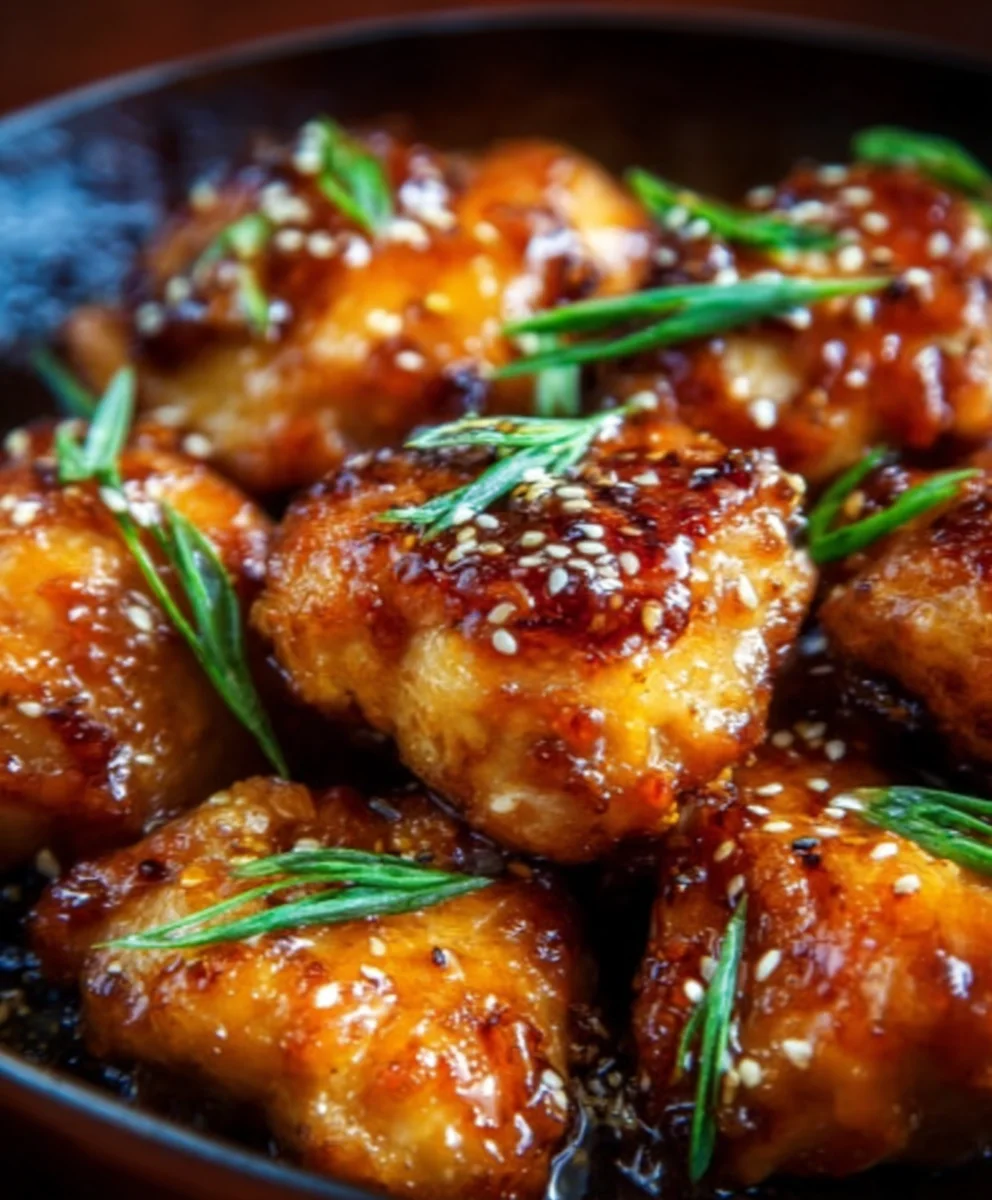
Garnishing and Serving
Once your Honey Garlic Chicken is perfectly coated and heated through, it’s ready to be served. Transfer the chicken to a serving dish. For that final touch of visual appeal and added flavor, generously garnish with toasted sesame seeds and freshly chopped green onions. The nutty crunch of the sesame seeds and the fresh, mild onion flavor of the green onions provide a wonderful contrast to the rich, sticky sauce. This Honey Garlic Chicken is fantastic served over steamed white or brown rice, or alongside your favorite stir-fried vegetables like broccoli, snap peas, or bell peppers. Enjoy the sweet, savory, and garlicky goodness!
Conclusion:
And there you have it – your delicious batch of Honey Garlic Chicken is ready to be devoured! We hope you enjoyed this simple yet incredibly flavorful recipe. The perfect balance of sweet honey and savory garlic creates a truly irresistible dish that’s sure to become a weeknight staple in your kitchen. Whether you’re a seasoned cook or just starting out, this Honey Garlic Chicken is forgiving and rewarding, offering fantastic results with minimal fuss.
We love serving this Honey Garlic Chicken over fluffy steamed rice, alongside a crisp green salad, or even tossed with your favorite noodles. For a touch of elegance, garnish with toasted sesame seeds and fresh chopped green onions.
Don’t be afraid to experiment! You can easily adapt this recipe by adding a pinch of red pepper flakes for a little heat, incorporating your favorite vegetables like broccoli or bell peppers into the sauce, or even marinating the chicken for longer for an even deeper flavor infusion.
We encourage you to give this Honey Garlic Chicken a try. It’s a fantastic way to bring a restaurant-quality meal right to your own dining table. Happy cooking!
Frequently Asked Questions:
Can I make Honey Garlic Chicken ahead of time?
Yes, you can! The cooked Honey Garlic Chicken can be stored in an airtight container in the refrigerator for up to 3 days. Reheat gently on the stovetop or in the oven until warmed through. The sauce might thicken upon cooling, so you may want to add a splash of water or broth when reheating.
What kind of chicken is best for this recipe?
This recipe works wonderfully with boneless, skinless chicken thighs or breasts. Thighs tend to stay more moist and tender, while breasts offer a leaner option. You can also adapt it for chicken wings or drum extractsticks, though cooking times may need to be adjusted.
Easy Honey Garlic Beef
A quick and delicious recipe for tender beef coated in a sweet and savory honey garlic sauce.
Ingredients
-
1 1/2 pounds boneless beef sirloin or flank steak, cut into bite-sized pieces
-
2 tablespoons cornstarch
-
2 tablespoons vegetable oil
-
4 garlic cloves, minced
-
1/3 cup honey
-
1/4 cup soy sauce (low sodium recommended)
-
2 tablespoons rice vinegar
-
1 teaspoon sesame oil
-
1/2 teaspoon chili flakes (optional, for heat)
-
Sesame seeds and chopped green onions, for garnish
Instructions
-
Step 1
Prepare the beef by cutting 1 1/2 pounds of boneless beef into uniform, bite-sized pieces. Place the beef in a medium bowl and sprinkle with 2 tablespoons of cornstarch. Toss until each piece is lightly coated. Set aside. -
Step 2
Create the Honey Garlic sauce by combining 1/3 cup honey, 1/4 cup low-sodium soy sauce, 2 tablespoons rice vinegar, 1 teaspoon sesame oil, and 1/2 teaspoon chili flakes (if using) in a small bowl. Whisk until well combined. Set aside. -
Step 3
Heat 2 tablespoons of vegetable oil in a large skillet or wok over medium-high heat until shimmering. Add the coated beef in a single layer, working in batches if necessary to avoid overcrowding. Sear for 3-4 minutes per side until golden brown and cooked through. Remove beef and set aside. -
Step 4
Reduce heat to medium. Add 4 minced garlic cloves to the skillet and sauté for 30-60 seconds until fragrant, stirring constantly. Pour in the prepared Honey Garlic sauce and scrape up any browned bits from the bottom of the pan. Simmer for 1-2 minutes until slightly thickened. -
Step 5
Return the seared beef to the skillet with the sauce. Toss to coat evenly. Cook for another 1-2 minutes, stirring occasionally, until the beef is heated through and the sauce clings nicely. If the sauce is too thick, add a tablespoon of water or broth. If too thin, simmer a bit longer. -
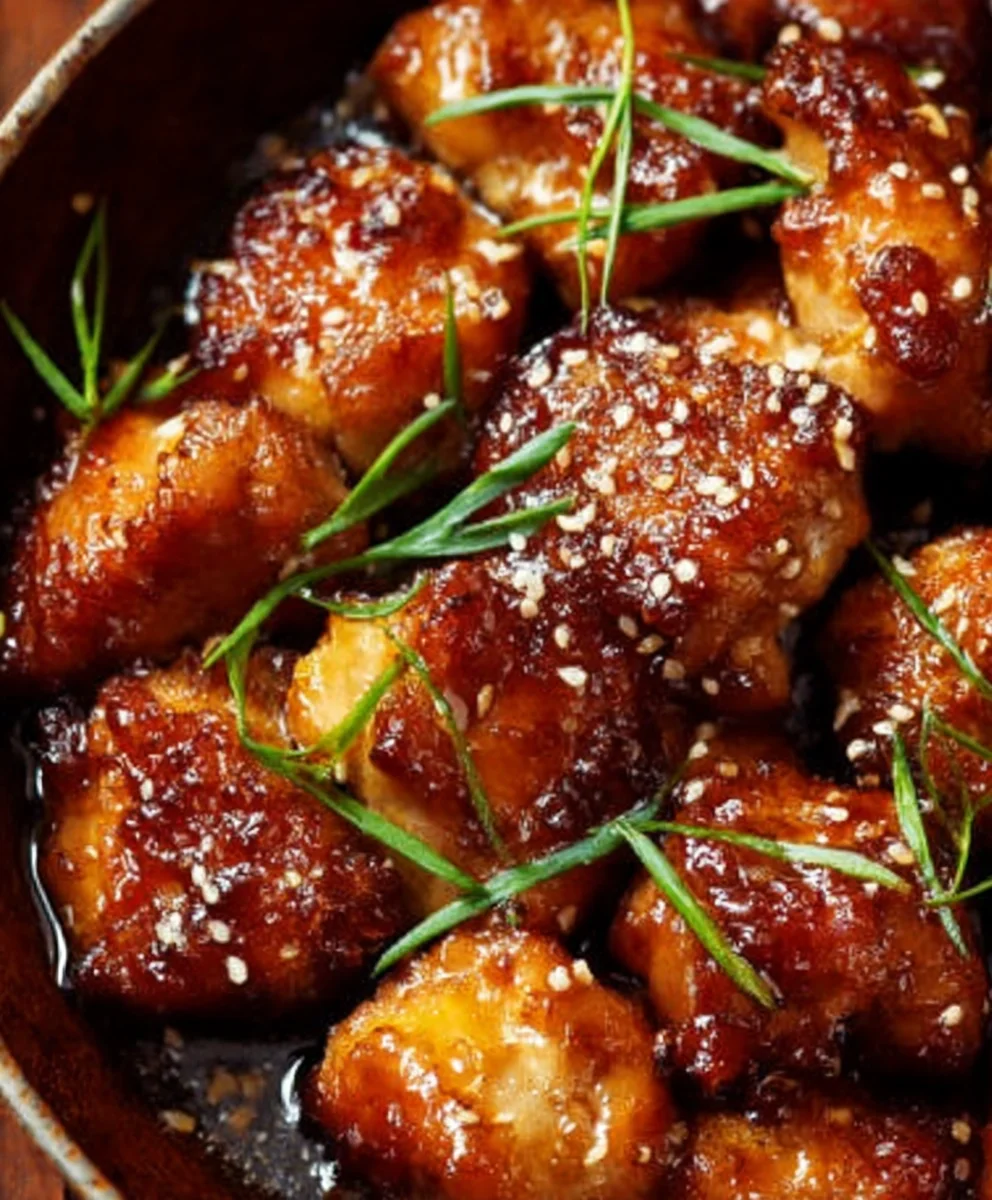
Step 6
Serve the Honey Garlic Beef hot, garnished with sesame seeds and chopped green onions. It pairs wonderfully with steamed rice and stir-fried vegetables.
Important Information
Nutrition Facts (Per Serving)
It is important to consider this information as approximate and not to use it as definitive health advice.
Allergy Information
Please check ingredients for potential allergens and consult a health professional if in doubt.