No Yeast Pizza Dough – Quick Easy Homemade Pizza
An excellent No Yeast Pizza Dough recipe is an absolute game-changer for any pizza lover! Forget waiting for dough to rise or worrying about finding yeast. This is the ultimate solution for those spontaneous pizza cravings that hit at any moment. We all love pizza, right? That perfect combination of chewy crust, savory sauce, and melted cheese is pure comfort. But sometimes, the thought of making pizza from scratch feels like too much of a commitment. That’s where this truly excellent No Yeast Pizza Dough shines. What makes it so special? It’s astonishingly quick, incredibly simple, and delivers a wonderfully satisfying crust that’s perfect for all your favorite toppings. Seriously, you’ll be amazed at how easy it is to whip up a delicious homemade pizza with this no-fuss dough. Let’s get baking!
An Excellent No-Yeast Pizza Dough – Quick & Easy Homemade Pizza!
There’s something truly magical about homemade pizza. The aroma filling your kitchen, the satisfying chew of a perfectly baked crust, and the freedom to top it with whatever your heart desires – it’s a culinary experience that’s hard to beat. But let’s be honest, the thought of making pizza from scratch often conjures up images of long rising times, tricky yeast handling, and the potential for disappointment if it doesn’t turn out right. What if I told you there’s a way to achieve a fantastic pizza crust, with that delightful chew and a slightly crisp exterior, without a single speck of yeast? Enter my go-to no-yeast pizza dough recipe. This recipe is a lifesaver for those spontaneous pizza cravings or when you’re short on time. It’s incredibly forgiving, remarkably quick, and the results are genuinely impressive. Say goodbye to waiting for dough to proof and hello to delicious, homemade pizza in a flash!
This no-yeast dough relies on the magic of baking powder to provide lift and create that signature pizza crust texture. It’s a simple science, and the result is a dough that’s easy to work with and bakes up beautifully. You’ll be amazed at how quickly you can go from basic pantry staples to a delicious, ready-to-bake pizza base.
Ingredients:
Instructions:
Combine Dry Ingredients
In a medium-sized mixing bowl, add your flour, baking powder, salt, and sugar. Give these dry ingredients a good whisk together. This step is important because it ensures that the baking powder and salt are evenly distributed throughout the flour. This even distribution is key to getting a consistent lift and flavor in your pizza crust. Don’t skip this! Using bread flour will give you a chewier crust, similar to traditional pizza dough, but all-purpose flour works perfectly well too if that’s what you have on hand. I usually opt for bread flour if I have it, but a good old plain flour makes this recipe just as successful.
Add Wet Ingredients and Mix
Create a small well in the center of your dry ingredients. Pour in the olive oil and the cold tap water. Now, using a fork or a spatula, start mixing everything together. You’ll want to incorporate the dry ingredients into the wet until a shaggy dough begin extracts to form. Don’t overmix at this stage. The goal is just to bring everything together. As you stir, you’ll notice the mixture will start to clump and hold together. If the dough seems a little too dry and isn’t coming together, you can add a tiny splash more water, about a teaspoon at a time. Conversely, if it feels too wet, you can add a little more flour, a tablespoon at a time. It’s better to be slightly on the drier side as it will be easier to handle.
Kneading the Dough
Once the dough has mostly come together in the bowl, turn it out onto a lightly floured surface. This is where the “extra flour for dusting” comes in. Lightly dust your clean work surface and your hands with a bit of flour. Now, it’s time to knead the dough. For a no-yeast dough, you don’t need to knead it for as long or as vigorously as you would with yeast dough. Knead for about 3 to 5 minutes. The kneading process develops the gluten in the flour, which gives the crust its structure and chew. You want to aim for a smooth, elastic dough that springs back slightly when you gently poke it. It shouldn’t be sticky to the touch anymore. If it’s still sticking, add a touch more flour to your hands and the work surface. When it feels smooth and no longer sticky, it’s ready to be shaped.
Shaping and Resting (Optional Quick Rest)
Now for the fun part – shaping your pizza! You can either roll the dough out with a rolling pin or gently stretch it by hand. For a classic round pizza, start by pressing the dough ball flat with your fingertips, then gently pull and stretch it outwards, rotating it as you go. If it resists stretching, let it rest for 5-10 minutes. This brief rest allows the gluten to relax, making it much easier to shape without tearing. I like to aim for a thickness of about 1/4 inch. If you prefer a thicker crust, you can leave it a little thicker. For a crispier bottom, you can even pre-bake the crust for a few minutes before adding toppings. Once shaped, carefully transfer your pizza base to your baking sheet or pizza stone. At this point, you can either immediately add your toppings or, if you have a few extra minutes, let it rest for another 10-15 minutes while you prepare your toppings. This optional second rest can sometimes lead to an even lighter crust.
Topping and Baking Your Pizza
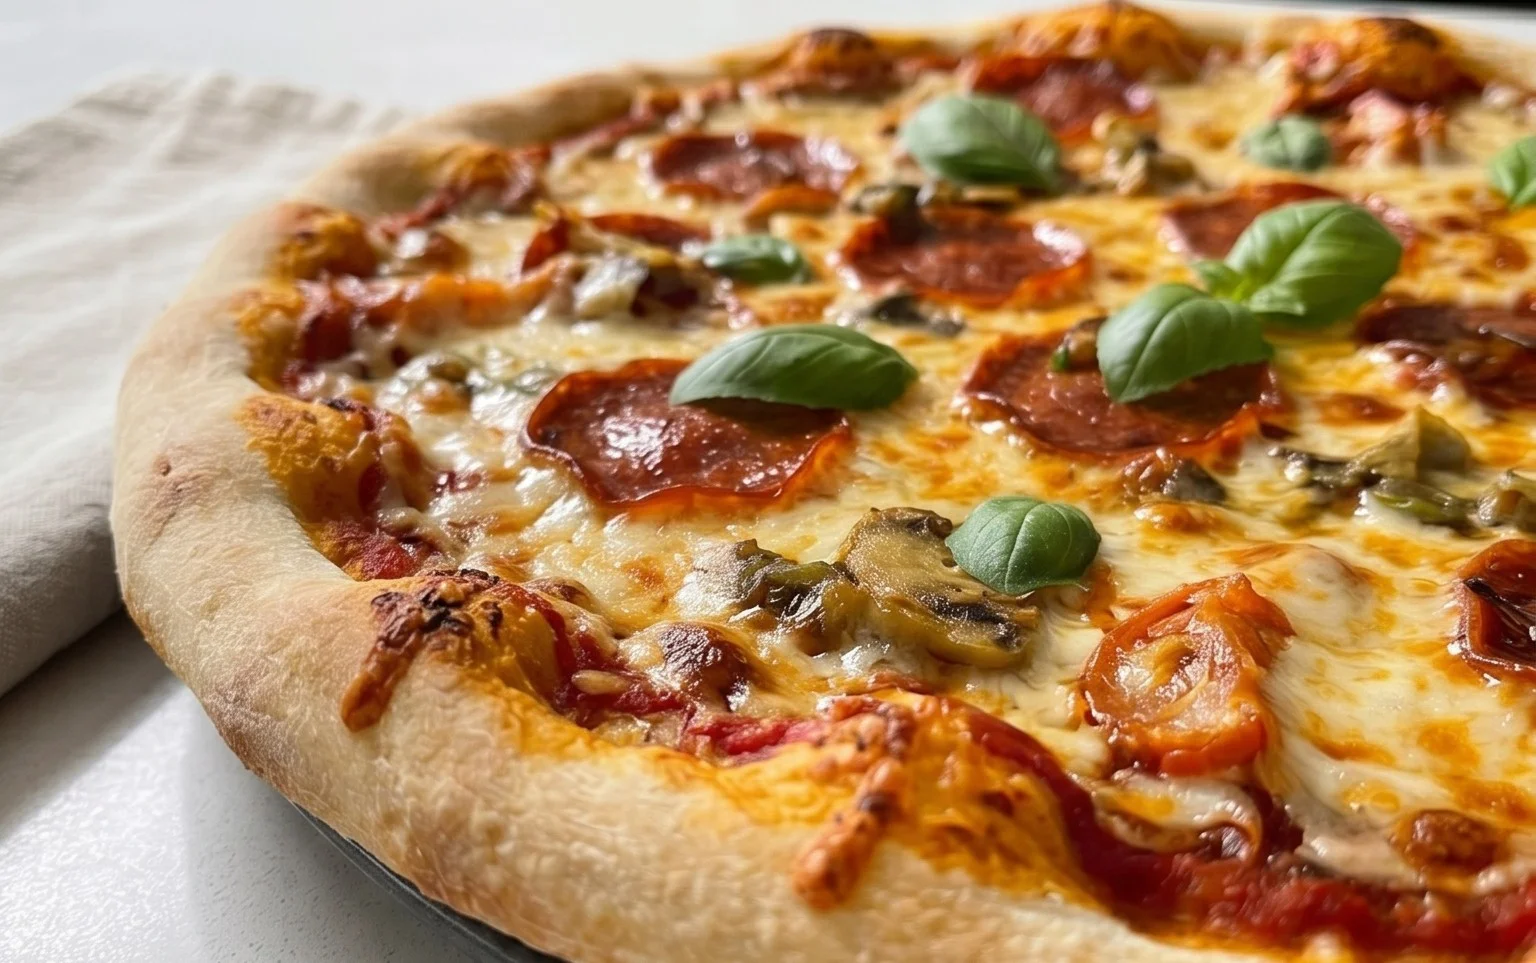
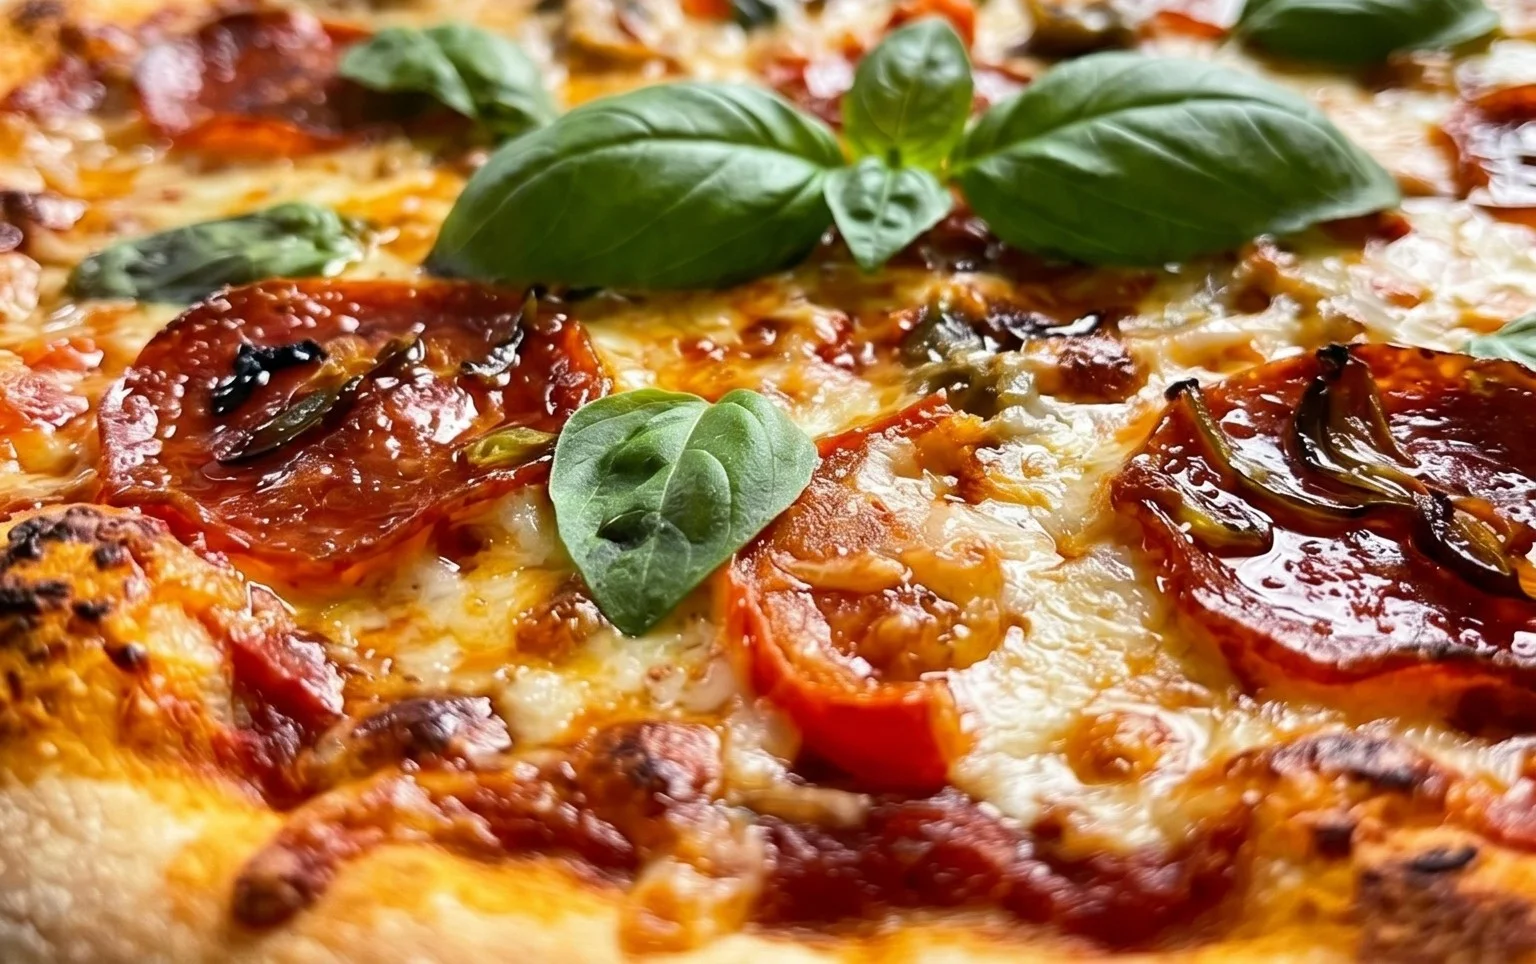
Now, the creative part! Spread your favorite pizza sauce evenly over the dough, leaving a small border for the crust. Pile on your chosen toppings – cheeses, vegetables, meats, whatever your heart desires! For an extra golden and slightly crisp crust, you can lightly brush the edges of the crust with the optional vegetable oil. This adds a lovely sheen and a hint of savory flavor. Preheat your oven to a hot temperature, typically between 425°F and 475°F (220°C to 245°C). A hot oven is crucial for a good pizza crust. Bake your pizza for 12-18 minutes, or until the crust is golden brown and the cheese is bubbly and melted. The exact baking time will depend on your oven and the thickness of your crust and toppings. Keep an eye on it to prevent burning. Once it’s out of the oven, let it cool for a minute or two before slicing and enjoying your incredibly quick and delicious homemade no-yeast pizza!
Conclusion:
There you have it! A truly excellent no yeast pizza dough that proves you don’t need hours of rising time to achieve delicious, homemade pizza. This quick and easy recipe is a game-changer for busy weeknights or spontaneous pizza cravings. The beauty of this no yeast pizza dough lies in its simplicity and speed, delivering a wonderfully chewy yet slightly crisp crust that’s the perfect canvas for all your favorite toppings. It’s incredibly forgiving, making it ideal for begin extractners and seasoned bakers alike. So, gather your ingredients, unleash your creativity with toppings – from classic margherita to adventurous combinations – and get ready to impress yourself and your loved ones with a fantastic, homemade pizza experience. I really encourage you to try this recipe; it’s incredibly satisfying to pull a perfect pizza from your own oven, and this no yeast pizza dough makes it totally achievable!
Frequently Asked Questions:
Can I make this dough ahead of time?
Yes, you can. Once the dough is made and has cooled slightly, wrap it tightly in plastic wrap or store it in an airtight container. It will keep in the refrigerator for up to 2 days. Let it come to room temperature for about 30 minutes before shaping and baking for best results.
What are some good serving suggestions besides the usual pizza toppings?
Beyond traditional pizza toppings, consider serving slices of this homemade pizza with a fresh side salad dressed in a light vinaigrette. For a more casual gathering, cut it into smaller squares or strips and serve it as an appetizer with various dips like marinara sauce, garlic aioli, or even a spicy pesto. It also makes a great base for a dessert pizza with sweet toppings like Nutella, fruit, and a drizzle of honey!
Can I freeze this no yeast pizza dough?
Absolutely! Once the dough has been made and cooled, shape it into a disc, wrap it tightly in plastic wrap, and then place it in a freezer-safe bag. It can be frozen for up to 2-3 months. Thaw it overnight in the refrigerator and then let it sit at room temperature for about 30-60 minutes before using.
An Excellent No Yeast Pizza Dough – Quick Easy Homemade Pizza!
A fast and simple no-yeast pizza dough recipe perfect for a quick homemade pizza. Uses common pantry ingredients for a speedy bake.
Ingredients
-
{‘@type’: ‘Ingredient’, ‘name’: ‘bread flour’, ‘quantity’: ‘1 1/3’, ‘unitText’: ‘cups’, ‘note’: ‘(or plain / all purpose flour)’}
-
{‘@type’: ‘Ingredient’, ‘name’: ‘baking powder’, ‘quantity’: ‘2’, ‘unitText’: ‘tsp’}
-
{‘@type’: ‘Ingredient’, ‘name’: ‘salt’, ‘quantity’: ‘3/4’, ‘unitText’: ‘tsp’}
-
{‘@type’: ‘Ingredient’, ‘name’: ‘sugar’, ‘quantity’: ‘3/4’, ‘unitText’: ‘tsp’}
-
{‘@type’: ‘Ingredient’, ‘name’: ‘olive oil’, ‘quantity’: ‘2’, ‘unitText’: ‘tsp’, ‘note’: ‘(or any other oil)’}
-
{‘@type’: ‘Ingredient’, ‘name’: ‘water’, ‘quantity’: ‘1/2’, ‘unitText’: ‘cup’, ‘note’: ‘cold tap water’}
-
{‘@type’: ‘Ingredient’, ‘name’: ‘Extra Flour’, ‘quantity’: ‘1’, ‘unitText’: ‘tbsp’, ‘note’: ‘for dusting’}
-
{‘@type’: ‘Ingredient’, ‘name’: ‘vegetable oil’, ‘quantity’: ‘2’, ‘unitText’: ‘tsp’, ‘note’: ‘optional, for brushing crust (or canola or other neutral oil)’}
Instructions
-
Step 1
In a large bowl, whisk together the bread flour, baking powder, salt, and sugar. -
Step 2
Add the olive oil and cold water to the dry ingredients. -
Step 3
Mix with a spoon until a shaggy dough forms. Turn out onto a lightly floured surface and knead for 5-7 minutes until smooth and elastic. -
Step 4
Shape the dough into a ball. If not using immediately, it can be stored in an airtight container in the refrigerator for up to 2 days. -
Step 5
When ready to make pizza, preheat your oven to its highest setting (typically 450-500°F or 230-260°C) with a pizza stone or baking sheet inside. -
Step 6
On a lightly floured surface, roll or stretch the dough to your desired pizza shape and thickness (about 12 inches). -
Step 7
Transfer the dough to a pizza peel or parchment paper. Add your favorite toppings. Optionally brush the crust with vegetable oil. -
Step 8
Carefully slide the pizza onto the preheated pizza stone or baking sheet and bake for 10-15 minutes, or until the crust is golden brown and the cheese is bubbly.
Important Information
Nutrition Facts (Per Serving)
It is important to consider this information as approximate and not to use it as definitive health advice.
Allergy Information
Please check ingredients for potential allergens and consult a health professional if in doubt.