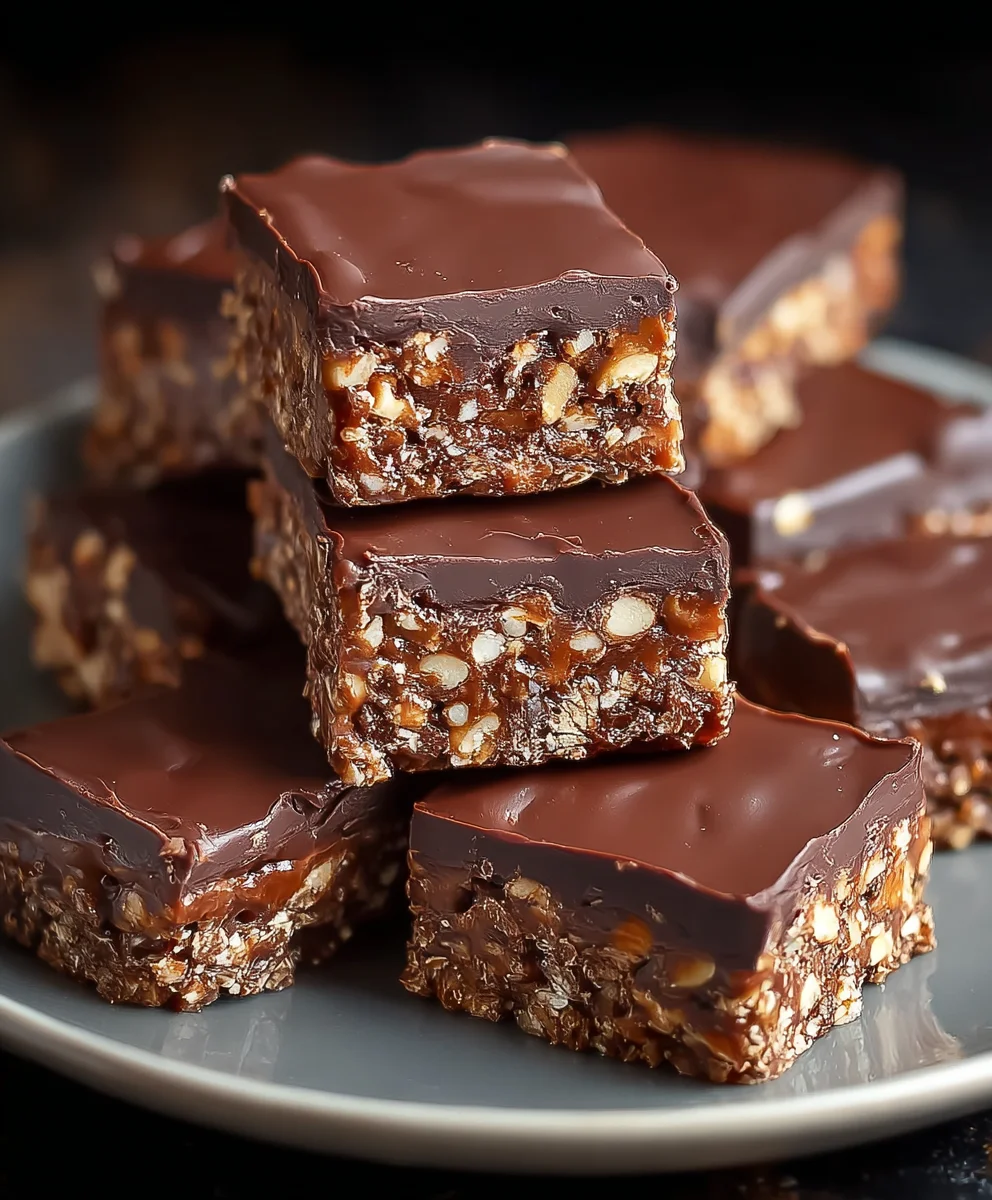
Easy No-Bake Chocolate Biscuit Bars Recipe
No-Bake Chocolate Biscuit Bars are the ultimate dessert for anyone craving something sweet, satisfying, and incredibly easy to make. Forget about preheating the oven and waiting for cakes to bake; these bars deliver pure chocolatey bliss with minimal effort. What’s not to love about a treat that requires absolutely no baking? They’re perfect for busy weeknights, last-minute guests, or simply when that chocolate craving hits hard. The beauty of No-Bake Chocolate Biscuit Bars lies in their simple yet delightful texture – a delightful crunch from the biscuits combined with a rich, fudgy chocolate coating. They evoke a sense of nostalgic comfort, reminiscent of childhood treats, yet possess a sophisticated indulgence that appeals to all ages. This recipe elevates the humble biscuit and chocolate into something truly special, making it an instant crowd-pleaser and a go-to in my own kitchen.
Ingredients:
- 12.3 oz (350g) digestive biscuits, crushed
- 1 cup (3 oz / 85g) finely ground peanuts
- ½ cup (3 oz / 85g) granulated sugar
- 1 packet (10g) vanilla sugar (optional, but recommended for an extra layer of flavor)
- ½ cup (1.6 oz / 45g) unsweetened cocoa powder
- ¾ cup (6 fl oz / 180ml) heavy cream (also known as sweet cream)
- ½ cup (3.9 oz / 110g) unsalted butter, cut into cubes
- 3.2 oz (90g) milk chocolate, finely chopped
- 1 oz (30g) dark chocolate, finely chopped
- 2 tbsp (1 oz / 30g) vegetable oil (or another neutral oil like canola or sunflower)
- ¾ cup (2.5 oz / 70g) coarsely chopped peanuts, for topping
Preparing the Biscuit Base
Step 1: Crushing the Biscuits and Mixing Dry Ingredients
Start by preparing your biscuit base, which forms the foundation of these delightful No-Bake Chocolate Biscuit Bars. Take your 350g of digestive biscuits and place them in a sturdy plastic bag or a food processor. If using a bag, seal it tightly and use a rolling pin to crush the biscuits into fine crum extractbs. You want a texture that’s fine enough to bind together easily, but you can leave a few slightly larger pieces for texture if you prefer. Once crushed, transfer these brum extractuit crumbs into a large mixing bowl. To this, add 1 cup (85g) of finely ground peanuts. These ground peanuts will not only enhance the nutty flavor but alsorum extractlp bind the crumbs together. Now, add ½ cup (85g) of granulated sugar for sweetness and, if you’re using it, the 10g packet of vanilla sugar. For that rich chocolatey depth, whisk in ½ cup (45g) of unsweetened cocoa powder. Ensure all these dry ingredients are thoroughly combined. A whisk is ideal here to break up any clumps of cocoa powder and evenly distribute the sugar and ground peanuts. This dry mixture is the heart of your bar’s base.
Step 2: Creating the Chocolate Ganache Binding Agent
Next, we’ll create the binding agent that will hold your biscuit base together and give it a wonderfully fudgy texture. In a medium saucepan, combine the ¾ cup (180ml) of heavy cream and ½ cup (110g) of unsalted butter, cut into cubes. Place this saucepan over medium-low heat. Gently heat the mixture, stirring occasionally, just until the butter has melted and the cream is warm and starting to steam slightly. Be careful not to let it boil. Once the butter is fully melted and the cream is warm, remove the saucepan from the heat. Immediately add the finely chopped 3.2 oz (90g) of milk chocolate and 1 oz (30g) of dark chocolate to the hot cream and butter mixture. Let it sit undisturbed for about 2 to 3 minutes. This resting period allows the residual heat to gently melt the chocolate. After the resting time, begin extract to stir the mixture very gently with a spatula or whisk, starting from the center and working your way outwards. Continue stirring until the chocolate is completely melted and you have a smooth, glossy ganache. This ganache is going to envelop your dry ingredients.
Assembling the Bars
Step 3: Combining the Base and Binding Agent
Now it’s time to bring everything together to form the No-Bake Chocolate Biscuit Bars. Pour the warm chocolate ganache mixture over the dry ingredients in the large mixing bowl. Using a sturdy spatula or a wooden sgin extractn, begin to mix everything together. Fold the ganache into the biscuit, peanut, sugar, and cocoa powder mixture. Continue mixing until all the dry ingredients are thoroughly coated with the chocolate ganache. It might seem a bit dry at first, but keep mixing, scraping down the sides of the bowl to ensure everything is incorporated. You want a thick, cohesive mixture that holds its shape when pressed. This step is crucial for the structural integrity of your bars. Don’t rush it; the goal is to achieve a uniformly moistened mixture. If it seems exceptionally dry, you can add a tiny splash more cream, but typically the ratio provided is perfect.
Step 4: Pressing the Mixture into the Pan
Prepare an 8×8 inch (20×20 cm) square baking pan by lining it with parchment paper. Leave some overhang on the sides, which will make it easier to lift the bars out once they’ve set. Spoon the chocolate biscuit mixture into the prepared pan. Now, using the back of your spoon, a flat-bottomed glass, or your hands (lightly greased with a tiny bit of oil if it’s sticking), press the mixture down firmly and evenly into the pan. You want to create a compact and level surface. This firm pressing is essential torum extractsure the bars don’t crumble when you cut them. Pay special attention to the corners and edges to make sure they are well-compacted. A smooth, even surface will make for neater slices later on. Once you’re satisfied with the evenness, proceed to the next step to create that irresistible topping.
Adding the Finishing Touches
Step 5: Creating and Applying the Peanut Topping
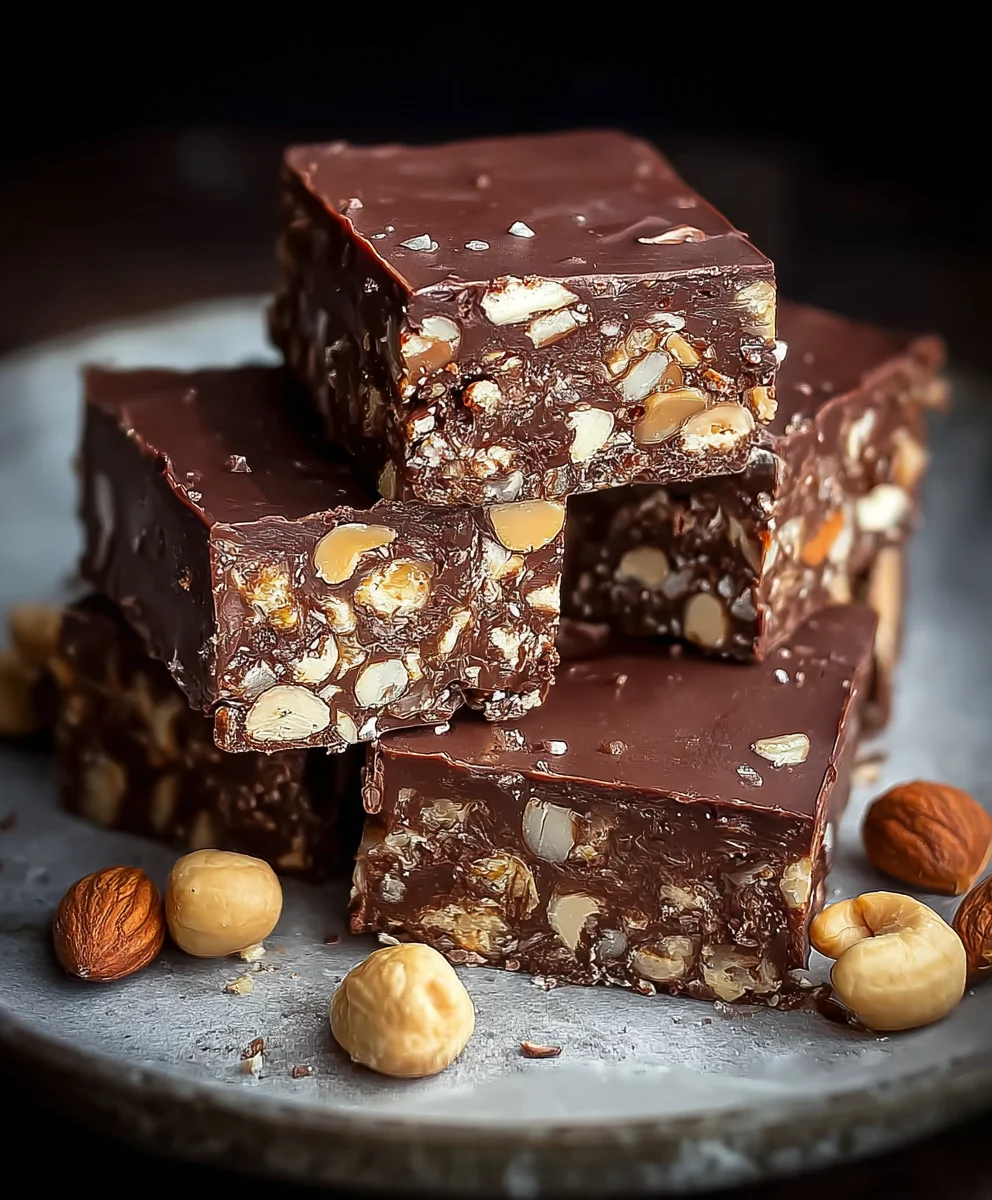
For the final flourish on your No-Bake Chocolate Biscuit Bars, we’ll prepare a simple yet delicious peanut topping. In a small bowl, combine the ¾ cup (70g) of coarsely chopped peanuts with the 2 tbsp (30g) of vegetable oil. Stir these together until the peanuts are lightly coated with the oil. This oil will help the peanuts stick to the surface of the chocolate bars and give them a lovely sheen. Gently sprinkle this oiled, chopped peanut mixture evenly over the surface of the pressed chocolate biscuit base in the pan. You can press them down lightly with your fingertips to help them adhere. This topping adds a fantastic crunch and extra nutty flavor that complements the rich chocolate base perfectly. Ensure the peanuts are distributed as evenly as possible for a beautiful presentation and consistent texture in every bite.
Step 6: Chilling and Cutting the Bars
Once your No-Bake Chocolate Biscuit Bars have their peanut topping, it’s time for them to set. Cover the pan tightly with plastic wrap or aluminum foil. Place the pan in the refrigerator and let it chill for at least 2 to 3 hours, or preferably longer, until the bars are firm. The chilling process allows the fats from the butter and chocolate to solidify, binding everything together into a sliceable confection. When the bars are sufficiently firm, use the parchment paper overhang to carefully lift the entire block out of the pan onto a cutting board. Using a sharp knife, cut the block into your desired bar shapes. For cleaner cuts, you can dip your knife in hot water and wipe it dry between each cut. Store any leftover bars in an airtight container in the refrigerator. Enjoy these easy and decadent treats!
Conclusion:
And there you have it – the incredibly simple yet utterly delicious No-Bake Chocolate Biscuit Bars! We hope you’ve enjoyed learning how easy it is to whip up this crowd-pleasing treat. The beauty of these bars lies in their versatility and the minimal effort required. They are perfect for last-minute gatherings, a sweet afternoon pick-me-up, or even as a homemade gift. Don’t be afraid to get creative with your toppings and mix-ins!
Serve these delightful No-Bake Chocolate Biscuit Bars chilled for the best texture. They pair wonderfully with a glass of cold milk, a hot cup of coffee, or even a scoop of vanilla ice cream. For variations, consider adding a handful of chopped nuts like walnuts or pecans for an extra crunch, or swirl in some caramel sauce before chilling for a decadent twist. You can also experiment with different types of biscuits, like digestive biscuits, shortbread, or even Oreos, for a new flavor profile.
We encourage you to give these No-Bake Chocolate Biscuit Bars a try. They are a fantastic entry-level recipe that yields impressive results, guaranteed to satisfy any sweet tooth. Happy baking – or in this case, happy no-baking!
Frequently Asked Questions:
Q: How long do the No-Bake Chocolate Biscuit Bars need to chill before they are ready to eat?
A: For the best texture and to ensure they hold their shape, we recommend chilling the No-Bake Chocolate Biscuit Bars for at least 2-3 hours. For firmer bars, you can leave them in the refrigerator for up to 4 hours.
Q: Can I make these No-Bake Chocolate Biscuit Bars ahead of time?
A: Absolutely! The No-Bake Chocolate Biscuit Bars are perfect for making in advance. They can be stored in an airtight container in the refrigerator for up to 5 days, making them ideal for meal prepping or preparing for a party.
Q: What is the best way to store leftover No-Bake Chocolate Biscuit Bars?
A: To keep your No-Bake Chocolate Biscuit Bars fresh and delicious, store them in an airtight container in the refrigerator. This will prevent them from drying out and maintain their perfect chewy texture.
Easy No-Bake Chocolate Biscuit Bars
Delicious and easy no-bake chocolate biscuit bars with a crunchy peanut topping.
Ingredients
-
12.3 oz (350g) digestive biscuits, crushed
-
1 cup (3 oz / 85g) finely ground peanuts
-
½ cup (3 oz / 85g) granulated sugar
-
1 packet (10g) vanilla sugar (optional)
-
½ cup (1.6 oz / 45g) unsweetened cocoa powder
-
¾ cup (6 fl oz / 180ml) heavy cream
-
½ cup (3.9 oz / 110g) unsalted butter, cut into cubes
-
3.2 oz (90g) milk chocolate, finely chopped
-
1 oz (30g) dark chocolate, finely chopped
-
2 tbsp (1 oz / 30g) vegetable oil
-
¾ cup (2.5 oz / 70g) coarsely chopped peanuts, for topping
Instructions
-
Step 1
Combine crushed digestive biscuits, ground peanuts, granulated sugar, vanilla sugar (if using), and cocoa powder in a large mixing bowl. Whisk until thoroughly combined. -
Step 2
In a saucepan, heat heavy cream and butter over medium-low heat until butter is melted and cream is warm. Do not boil. Remove from heat and add milk and dark chocolate. Let sit for 2-3 minutes, then stir gently until smooth and glossy ganache forms. -
Step 3
Pour the warm chocolate ganache over the dry ingredients. Mix with a spatula until all dry ingredients are thoroughly coated and a thick, cohesive mixture forms. -
Step 4
Line an 8×8 inch baking pan with parchment paper. Spoon the chocolate biscuit mixture into the pan and press down firmly and evenly to create a compact and level surface. -
Step 5
In a small bowl, combine coarsely chopped peanuts with vegetable oil. Sprinkle this mixture evenly over the pressed chocolate biscuit base. Press down lightly to help them adhere. -
Step 6
Cover the pan tightly and chill in the refrigerator for at least 2-3 hours, or until firm. Lift the bars out using the parchment paper, cut into desired shapes, and store in an airtight container in the refrigerator.
Important Information
Nutrition Facts (Per Serving)
It is important to consider this information as approximate and not to use it as definitive health advice.
Allergy Information
Please check ingredients for potential allergens and consult a health professional if in doubt.